Gone are the days when a filmstrip was used just to showcase videos. With innovative ideas, these days the filmstrip effect is used in various business presentations too. Wondering how to use it for your PowerPoint presentation? Wait! Let me tell you some of its usage.
Portray your organization and unit profile among your clients and competitors. Make an awesome picture collage and brief about your team. Give an insight of your company’s milestones. Use filmstrip as timeline diagram to display targets of business and sales. Not only this, but you can also give details about your new product and its launching strategies. Apart from this, in schools and colleges teachers can use filmstrip effect PPT to present annual events’ details. Students or team members can demonstrate their projects, experiences, etc. incorporating filmstrip effects in their PowerPoint presentation.
Cool! Isn’t it? How about creating a filmstrip on your own than wasting your time in browsing some cool effects on internet! Below, we are going to teach you steps to create the filmstrip effect in just a few minutes.
What You’ll Learn to Create in this PowerPoint Tutorial:

Steps to Create the Filmstrip Effect in PowerPoint:
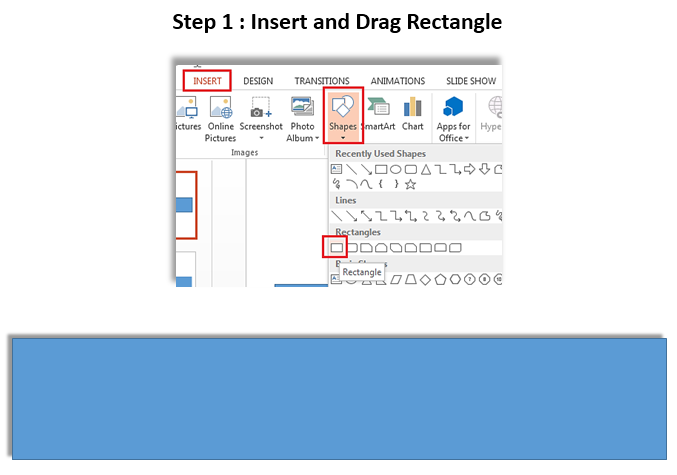
Step 1- Insert Rectangle: The first step is to place rectangle. For this, go to the Insert tab > Shapes > Rectangle and drag to draw. (See the screenshot for help.)
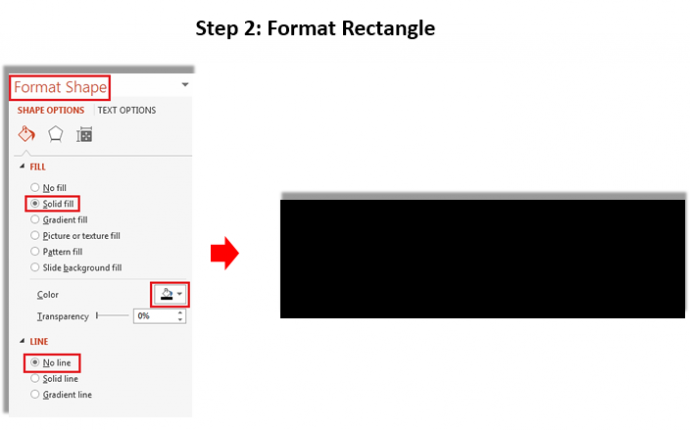
Step 2- Format the Rectangular shape: Right click on the shape, go to Format Shape > Fill > Color- Black > Line > No line.
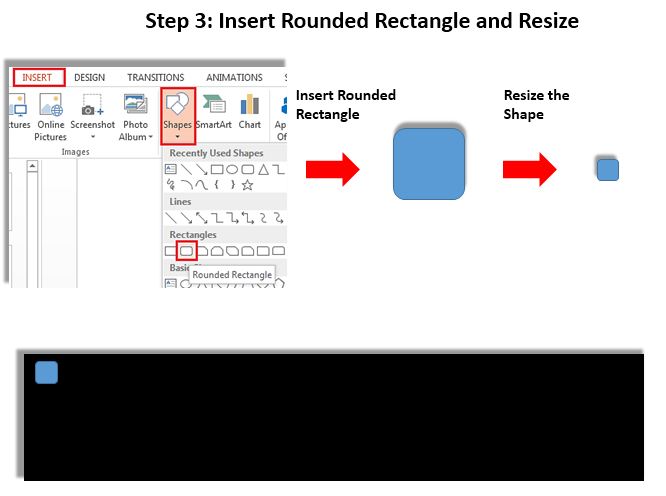
Step 3- Insert Rounded Rectangle: Again, go back to the Insert tab > Shapes > Rounded Rectangle. Drag inside and keep it smaller in size. Keep it on the black rectangle.
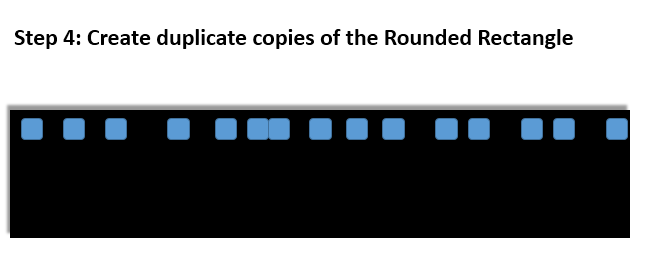
Step 4- Create copies: Select the rounded rectangle > press Shift + Ctrl and drag. Do this to create number of copies.
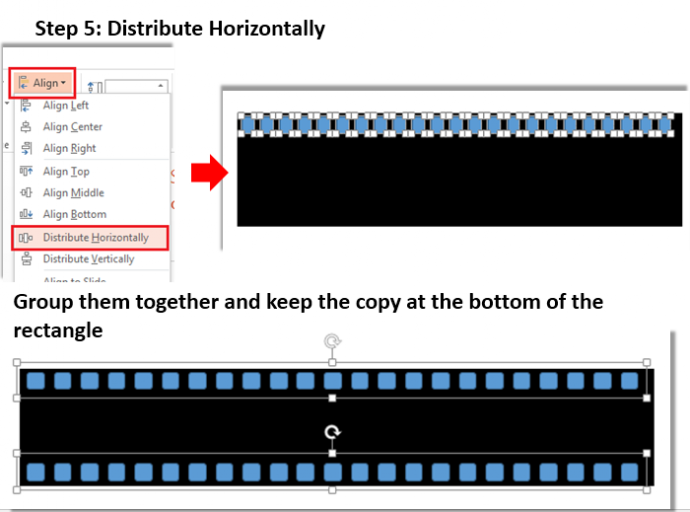
Step 5- Distribute Horizontally: Select each shape by pressing Shift key. Next, go to the Format tab> Align > Distribute Horizontally.
Press CTRL+G keys and group all the rounded rectangles. Further, press SHIFT + CTRL keys and drag rounded rectangles downward. Keep it at the bottom of the rectangle.
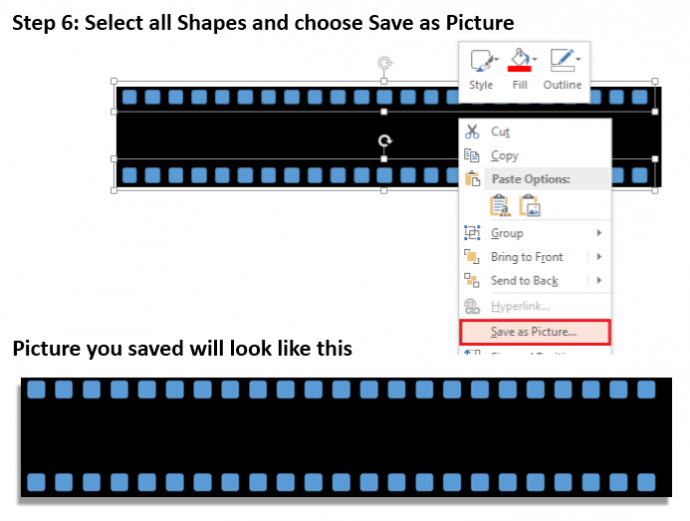
Step 6- Save as Picture: Now, select the rectangle and both the groups of Rounded Rectangles, right click and select Save as Picture on your desktop.
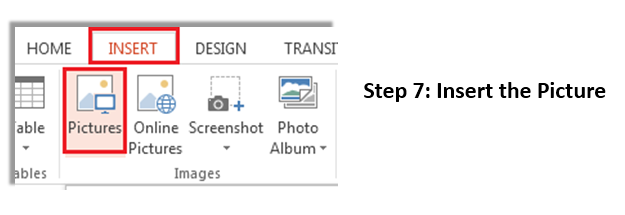
Step 7- Insert the Picture: On the new slide, go to the Insert tab > Picture and select the same picture from your desktop.
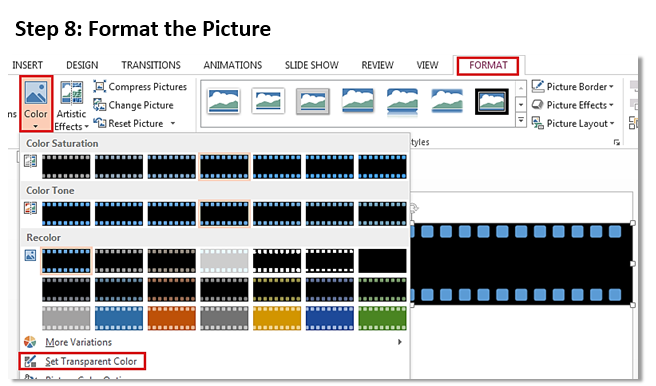
Step 8- Format the Picture: Select the picture added, go to the Format tab > Color > Set Transparent Color and click on the Rounded Rectangle.
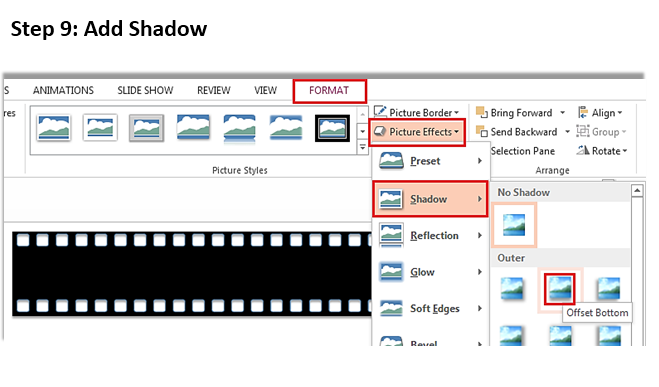
Step 9- Add Shadow: Select the formatted shape, go to the Format tab > Picture Effects > Shadow > Offset Bottom.
Step 10- Add Pictures: Go to the Insert tab> Pictures and select pictures that you want to showcase on your filmstrip.
Note: Resize these pictures to fit in the rectangular shape. You can also change the angle of filmstrip in your PPT presentation using the rotating handle on top.

Spice up your next PowerPoint presentation implementing this filmstrip effect and let your audience applaud for your efforts.
Stay tuned to read more articles and keep sharing your feedback with us.



 Customer Reviews


