Google Slides is a freely accessible presentation tool that is used by millions of people all around the world.
It comes up with some advanced technologies that help to create an engaging presentation in an effortless manner. You can easily work on Google Slides and draft your presentation without the botheration of installing any third-party applications.
If you are already using Google Slides, then you must be aware of its basic techniques. So, in this blog, I’m presenting some advanced tips and tricks that can help you create a good presentation.
Let’s go through these powerful tips and master the art of creating impactful presentations in less time!
1. Make Universal Changes with Master Slides
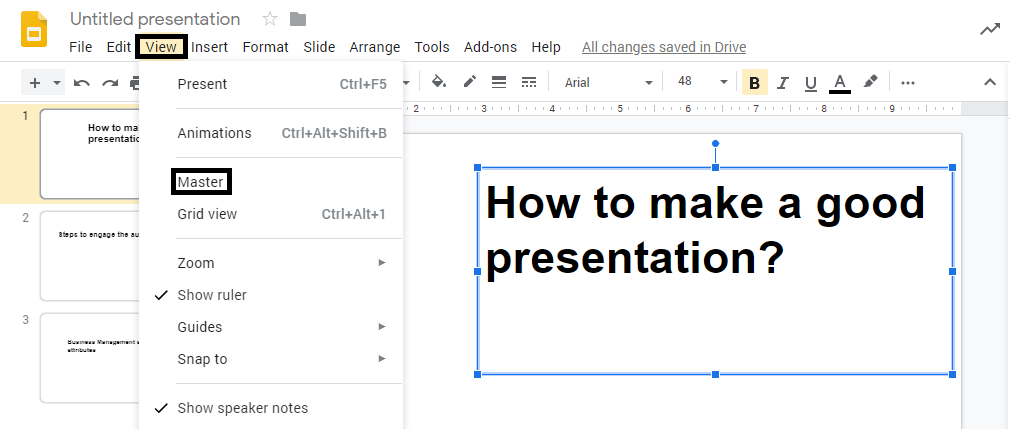
It happens often when we want to apply changes in all the slides but without going back to the individual slides. In this scenario, Master Slides could really be helpful and to seek help, you just have to follow one easy step:
- Click on View → Master option
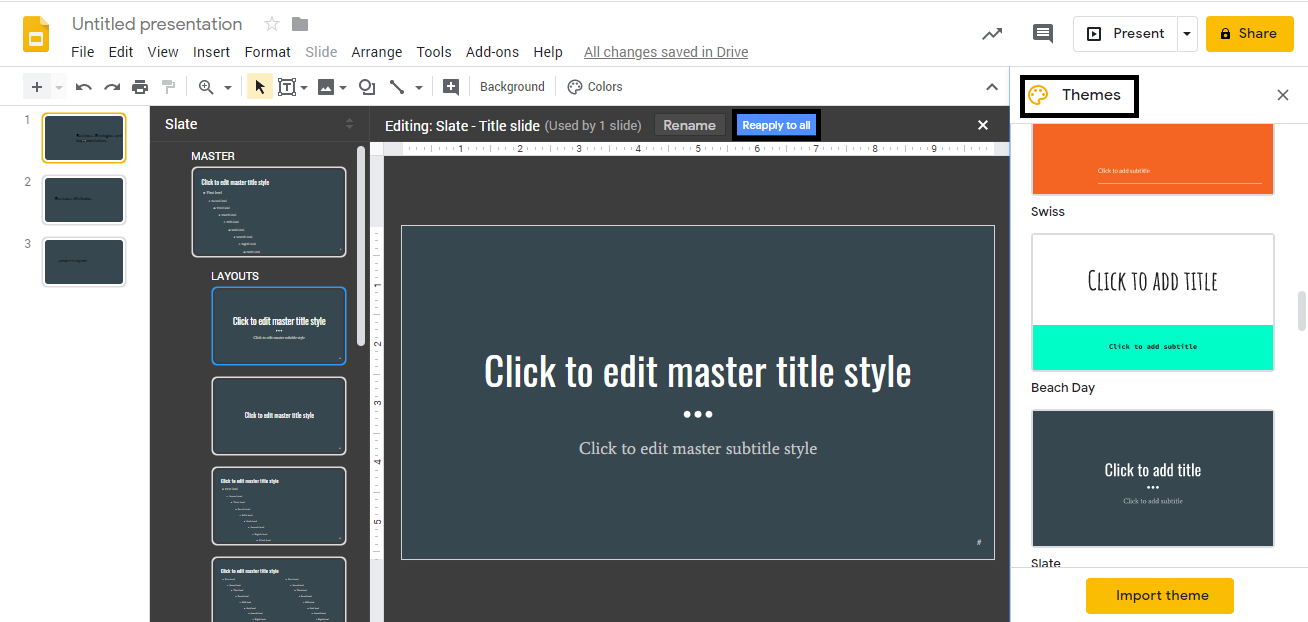
This is how you can customize all the slides simultaneously and that too in a few minutes. From changing the themes in the background to adding an image, you can do anything using the Master Slides option to make your presentation even more attractive.
2. Mask Images to Create Unique Designs
You can make your images stand out by giving it a unique shape. That is called masking and we bet, 99 out of 100 presenters do not know this can be done in Google Slides in split seconds!
To mask an image, we have to go through some important steps:
# Insert an image
- Open your presentation in Google Slides
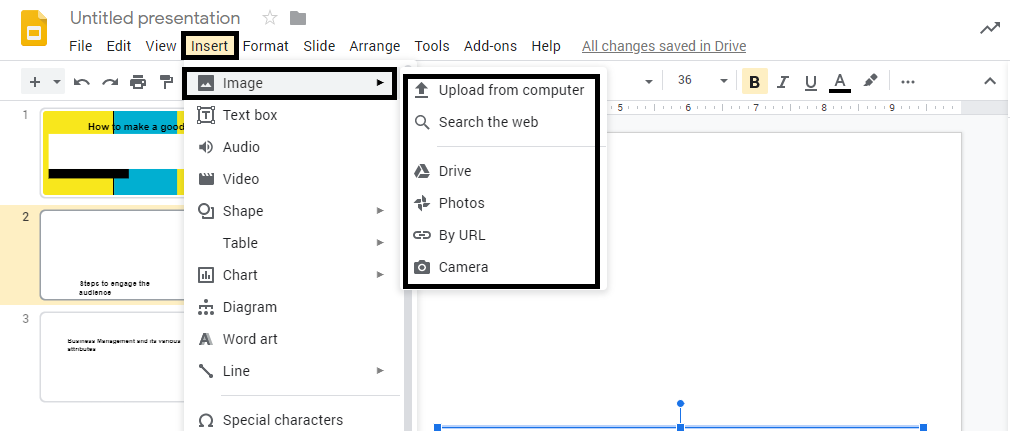
- Click on Insert→Image option
- A lot of alternatives will appear just next to the image drop-down button and hence, you can choose the picture accordingly
# Mask an image
After inserting an image -:
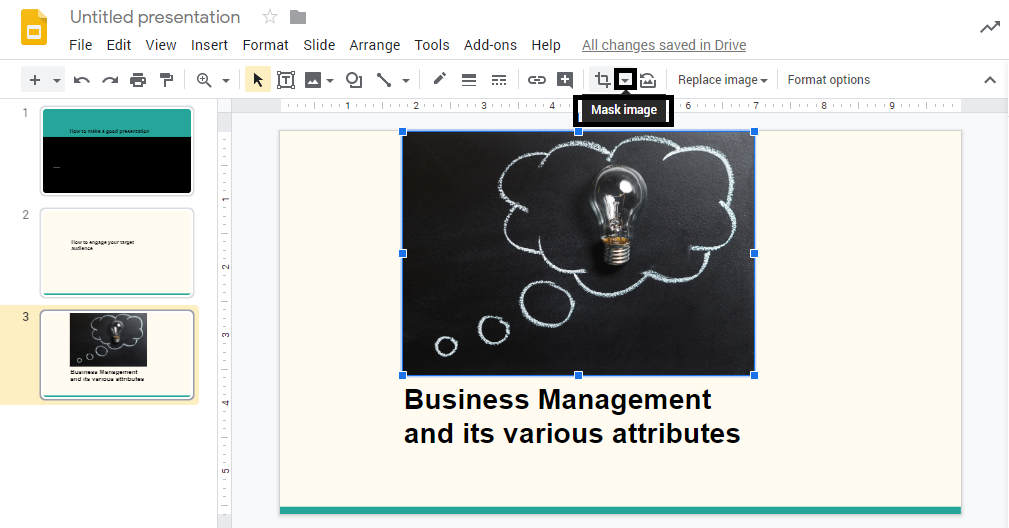
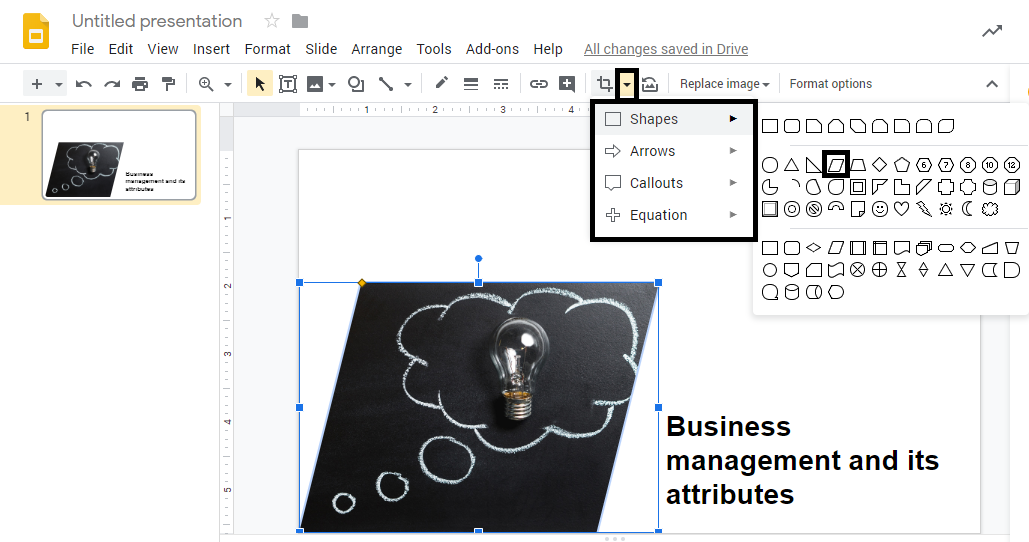
Click on Drop-Down arrow that is placed just next to the Crop button
# Mask Image Options -:
Once you follow the previous step, then a lot of options will appear on your screen as shown below. You can simply choose any of the options you want to implement on your image. For example, we have given a diamond shape to the picture to bring dynamism in the slide.
3. Tweak Your Chart for Better Understanding
To add a chart in your presentation, simply go through a few steps:
- Open your presentation and insert a new slide
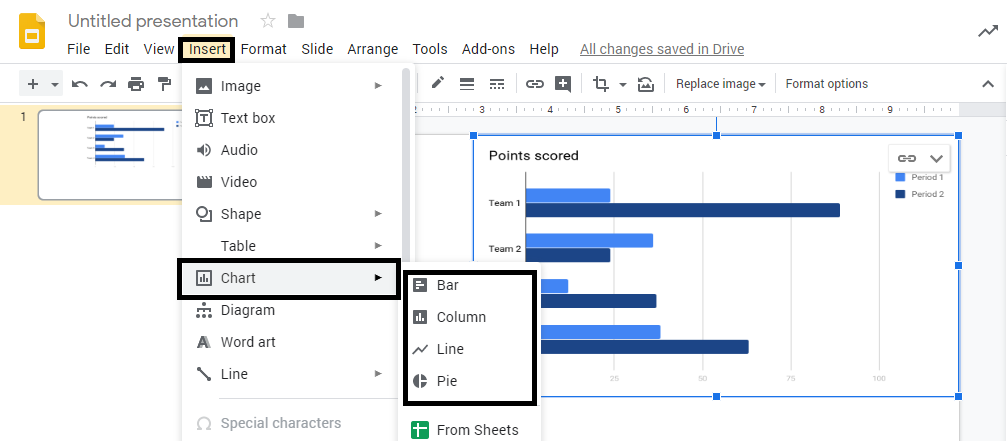
- Click on the Insert option→Chart button and select the chart you want- bar, column, line, or pie chart.
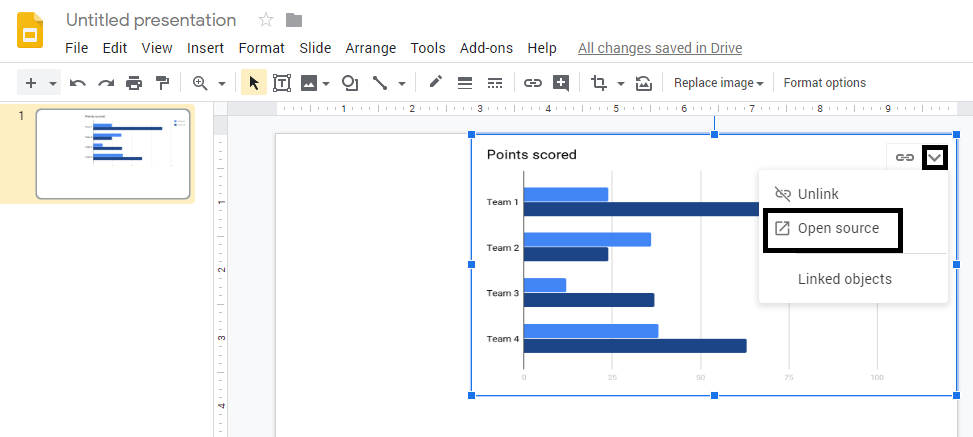
Modify the information in your chart by simply clicking on the top right Drop-Down arrow that will open up a list of options like unlink, and open source.
Click on the Open Source button
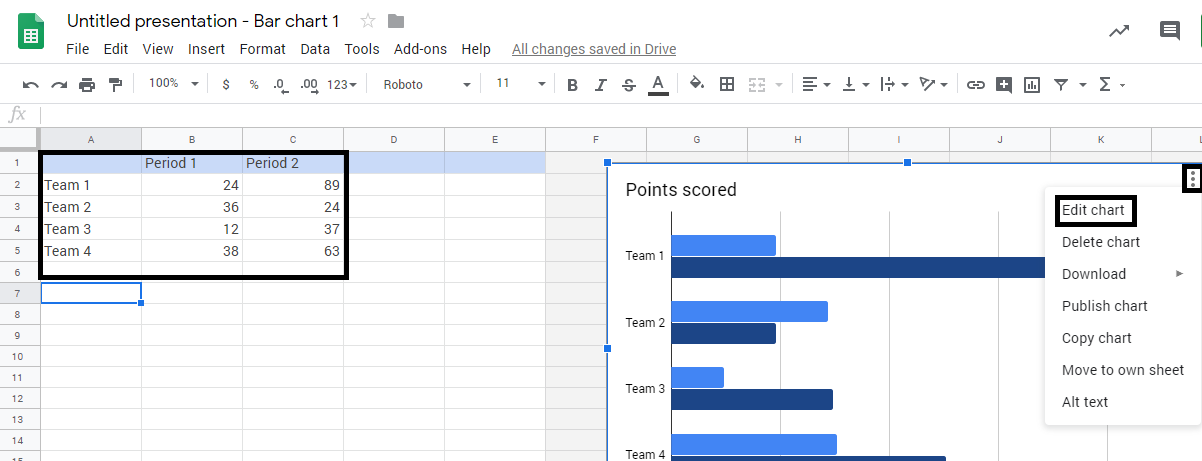
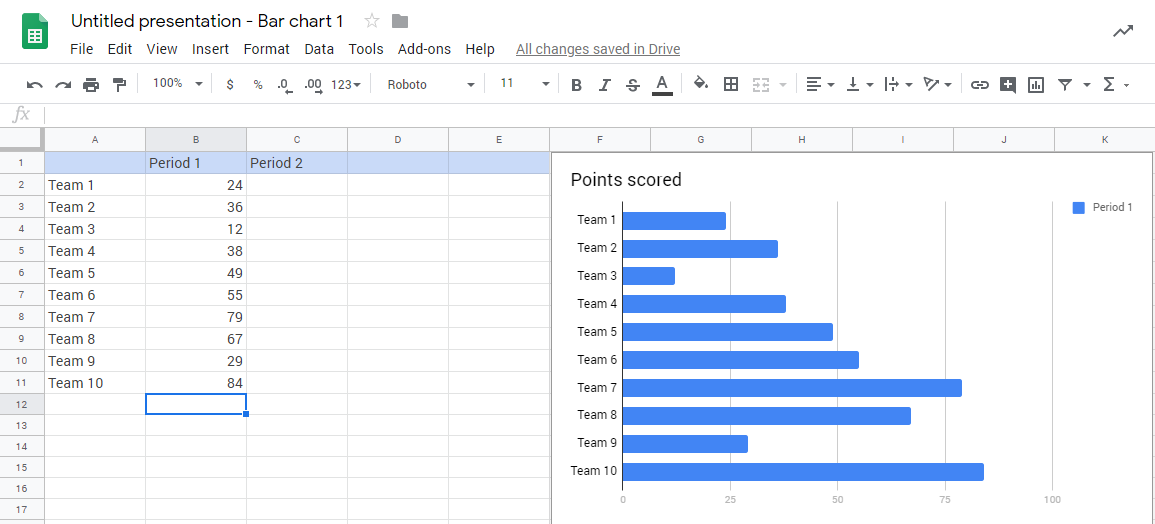
Edit the information in sheets as per your requirements.
You can modify the information as shown below
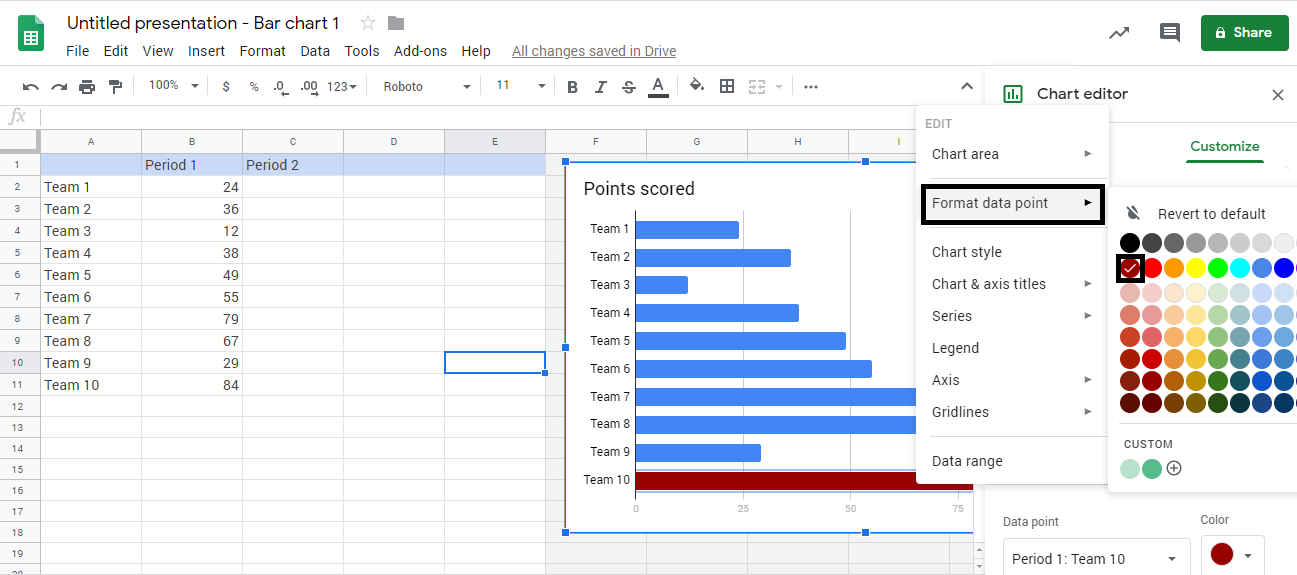
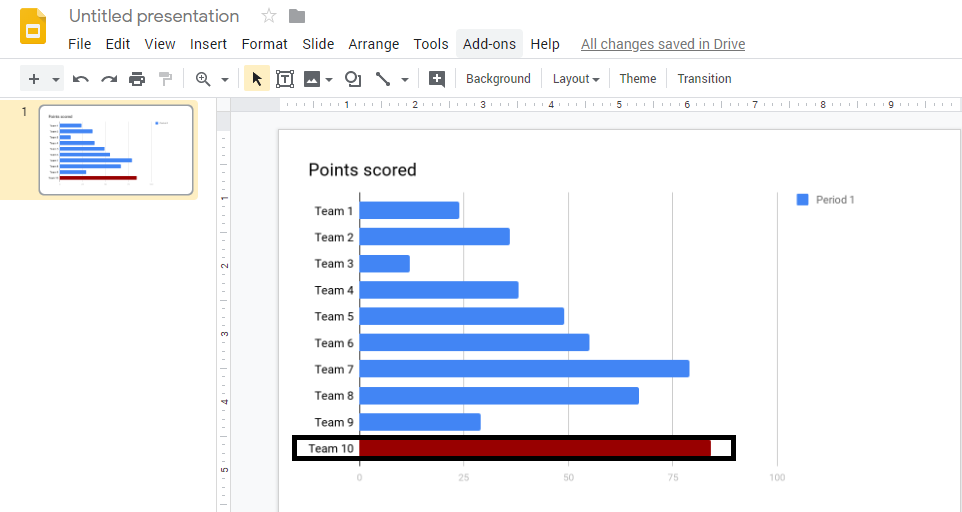
As given in the figure below, we can identify very easily that Team 10 has got the highest productivity by adding a different color to it and you can do it in one simple step.
- Right-click on the particular section and click on the Format data point Option that will show you different colors.
- After the previous step, you can just select the color of your choice
After modifying the information, go back to your presentation and click on the Update button to save the changes.
4. Forget Typing, Simply Dictate your Text
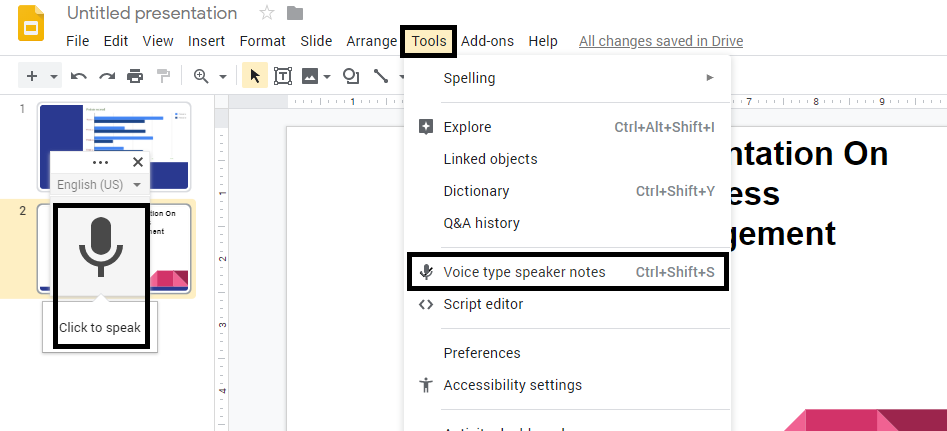
If you want to save your time by not typing in the text box, then just dictate your text by following these quick steps.
- Go to the toolbar menu and click on the Tools option
- Select the Voice type speaker notes
- After the previous step, a microphone will appear on the left side of the panel and then, Click to speak
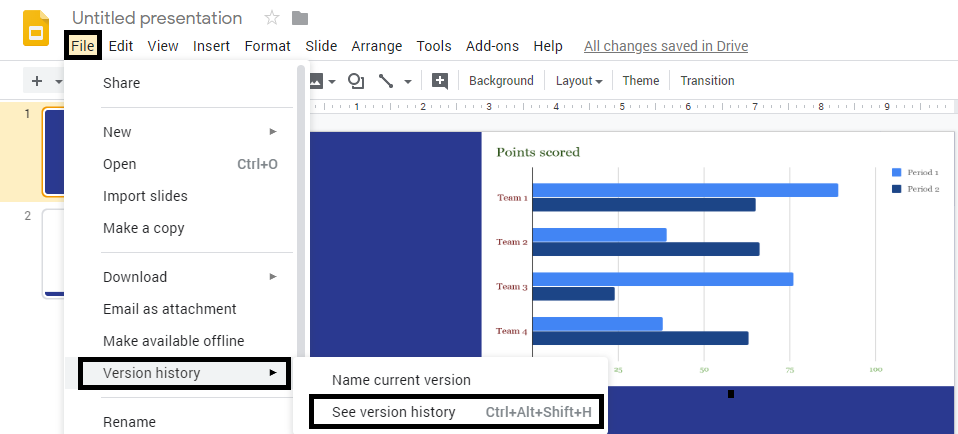
5. Restore your Old Presentation Version Anytime
Easily save all your content on a real-time basis and restore the previous version of your documents without any problem. It happens many times when you want to go back to square one, before all changes were implemented. You can go back and forth easily with just a click. Just follow the steps mentioned below:
- Go to the toolbar and select File option
- Click on the Version history button that will open two options> Select the See version history
- Lastly, select the file version that you want to restore.
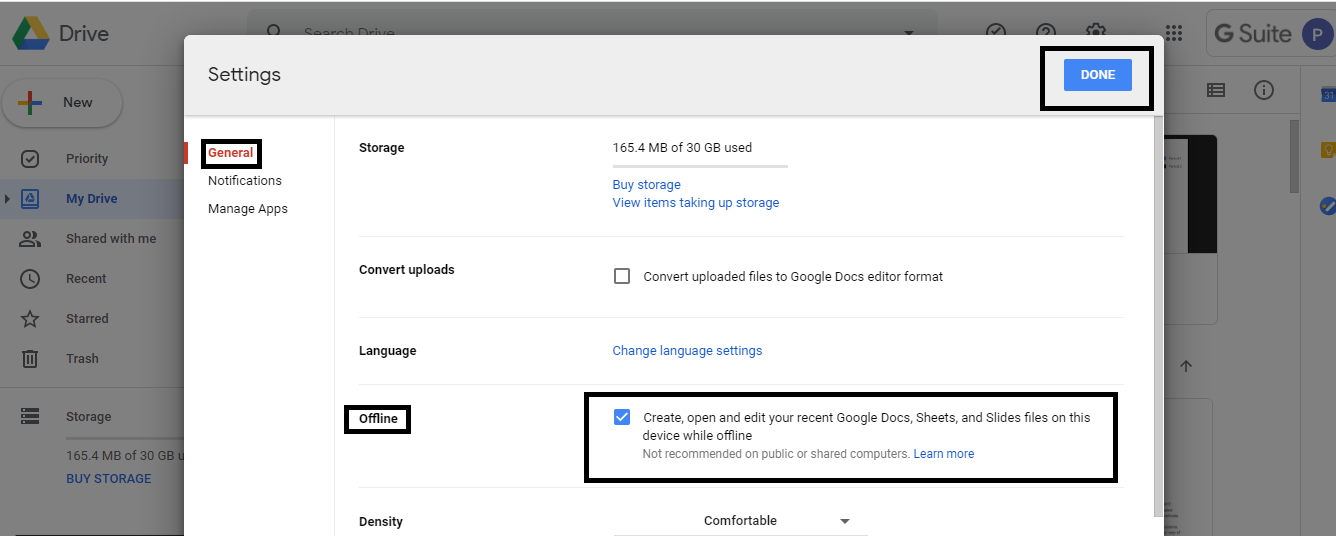
6. Work on Google Slides even Offline!
Make your presentation on-the-go when you are not connected to the internet as well. Just go through some easy steps and create your presentation on Google Slides without any hassle.
- Open your Google Drive and click on the Settings button as shown in the figure
- A lot of options will appear on your screen as shown in the screenshot
- Click on the Offline button and lastly select the Done option placed on the top right corner
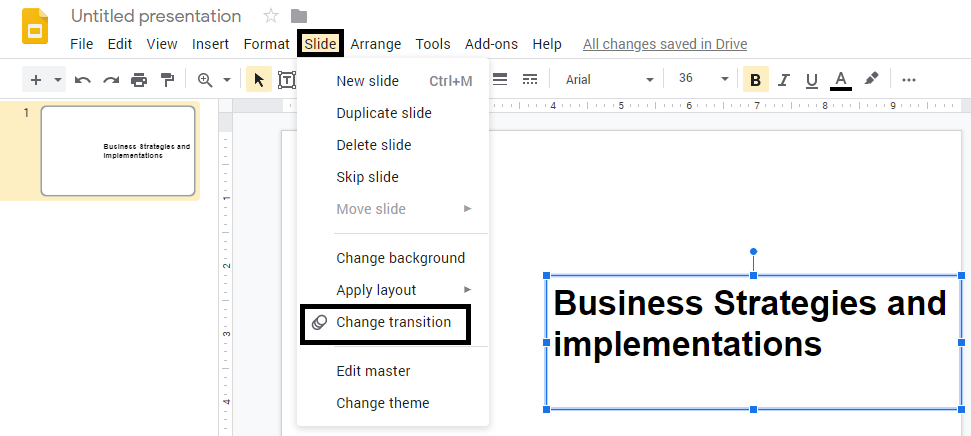
7. Use Professional Transitions for Smooth Flow of Slides
You can make your standard presentation more interesting and eye-catchy with the assistance of transitions. To add or change transitions follow the below steps:
- Go to the toolbar and click on the Slide button and then select the Change Transition option
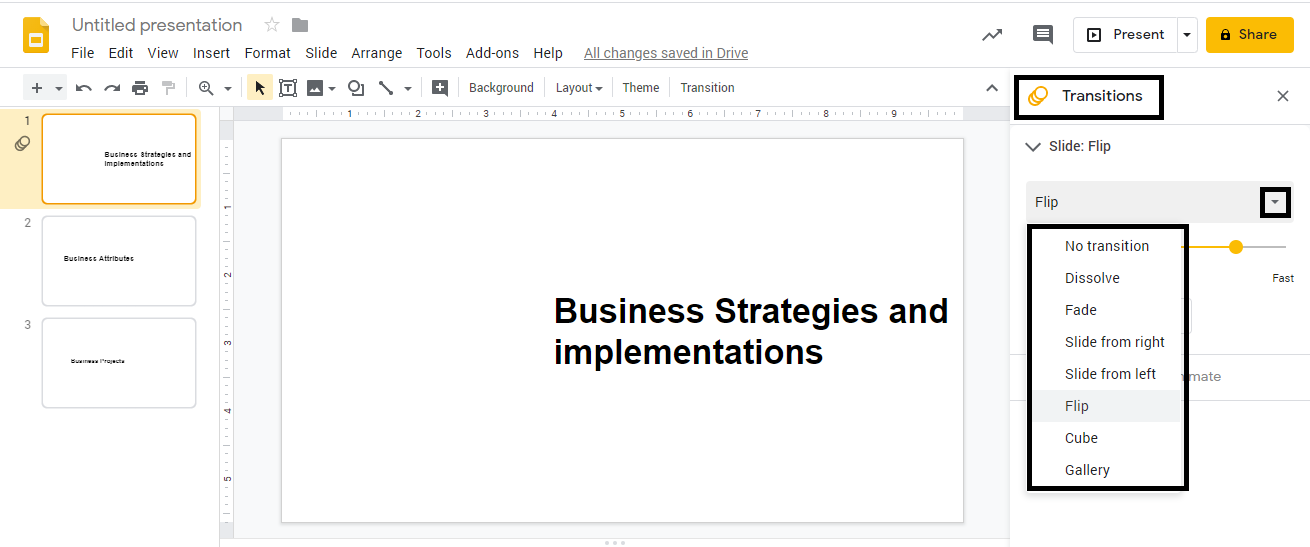
- A Transition Panel will appear on the right side of your screen
- Select the Drop-Down button and click on any of the options you want to add to your presentation
Things to keep in mind while using transitions:
If you have to give an impressive business presentation, then, you can use the transitions like Dissolve, Fade, Slide from right, and Slide from left.
Avoid Flip, Cube, and Gallery transitions as it will create a negative or casual impact on the audience.
There's a lot more you can do in Google Slides which we will cover later. Get started with these seven tips today. I hope it will help you create an amazing presentation that captivates the attention of your colleagues and senior authorities.
Get smart with Google Slides and create presentations that the audience will love!
P.S. Did you know that you can import professional templates on Google Slides and customize them with just a click!
Follow these steps to use professional PowerPoint templates in Google Slides:




 Customer Reviews

