Giving animation to the slides takes the presentation to a whole another level. It keeps your audience glued to their seats, helps you put forward your points with ease. It showcases your creativity and make your presentation impressive.
Those who have tried animation in PowerPoint must agree with what we have said, and those who have not yet experimented much with the animation are getting chance to know about these awesome options available in animations which can help you make your next presentation look interesting and professional.
Take a look at the below video.
Isn’t it simple and interesting the same time? The animation that has been used to show the movement at each stage of the funnel is the Peek Out and Peek In Animation. This animation can be used to showcase the marketing process to inspire and capture the interest of the prospects for the purpose of developing sales pipeline. Apply the animation and enthrall your audience.
Now without further ado, let’s learn the steps to create this in PowerPoint:
P.S. Download the presentation to recreate the animation on your system.
- Insert pictures in the PowerPoint. Select the image you want to give animation to. Here we are giving animations to two images. One, down arrows shaped image (or you can insert the down arrows from the Insert tab > Shapes menu) and second to dollar image. Let’s start with the down arrow shapes.
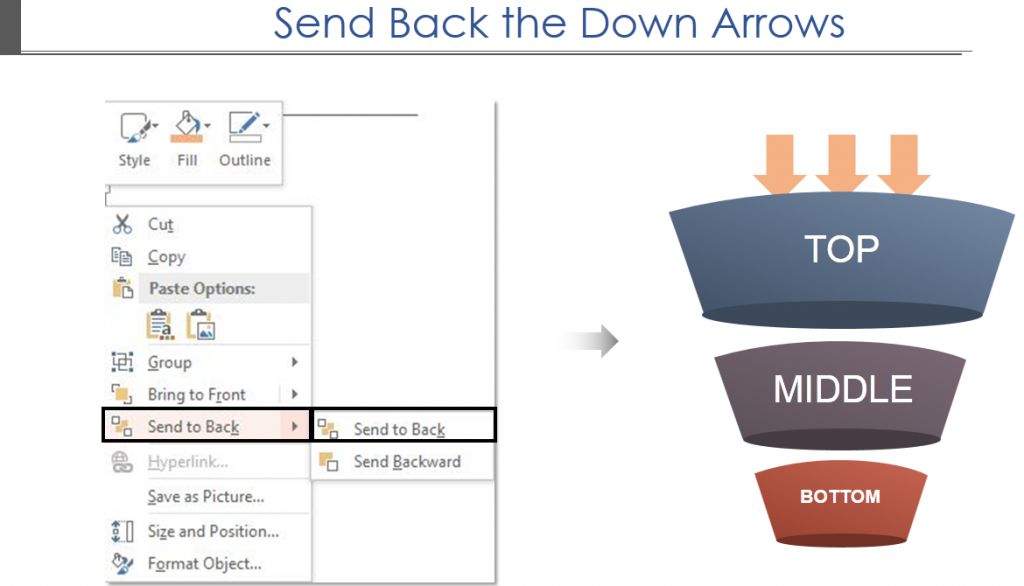
- Right click the down arrow shapes, send it backward.
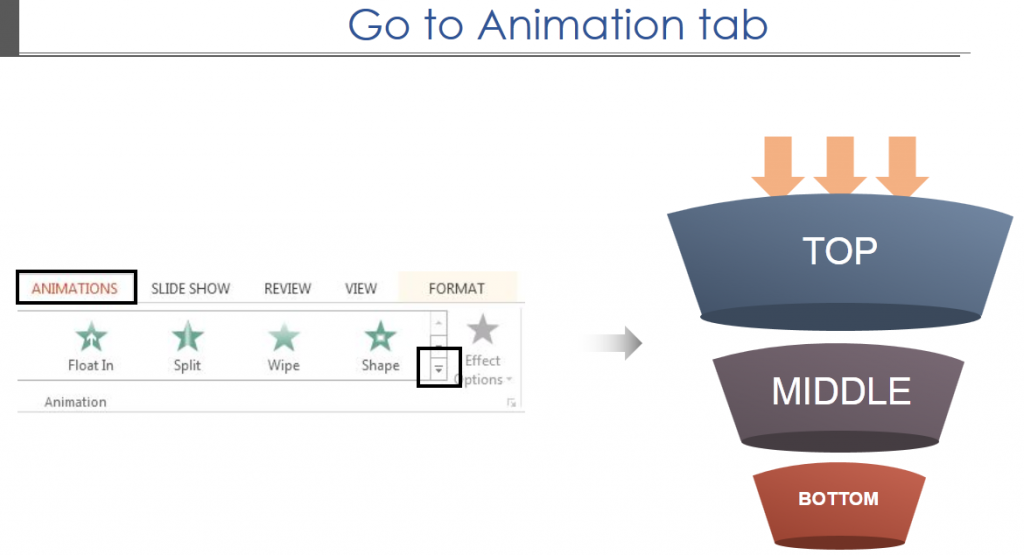
- Click on the More button at the foot of the Animations scroll bar to see more animations.
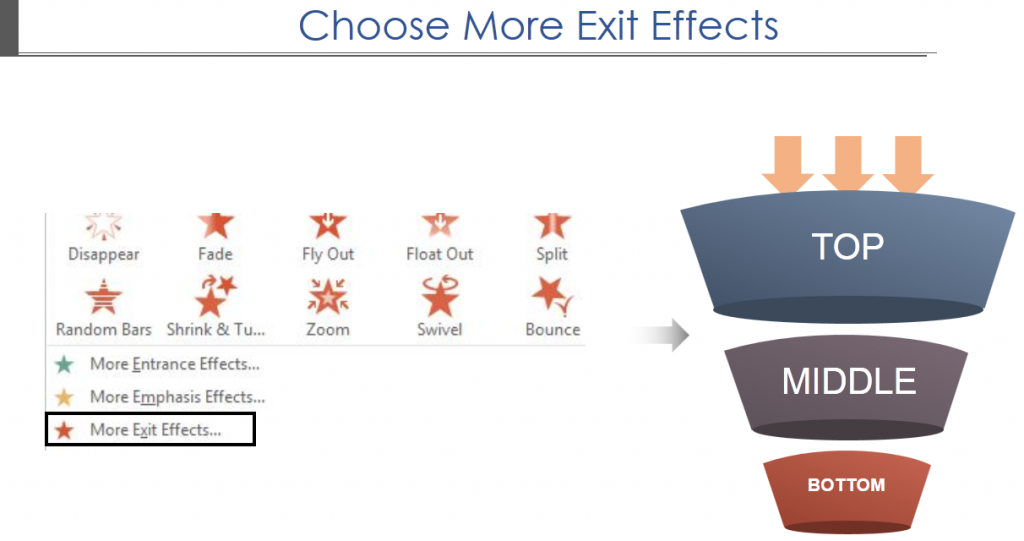
- Choose the More Exit Effects option under the animation tab.
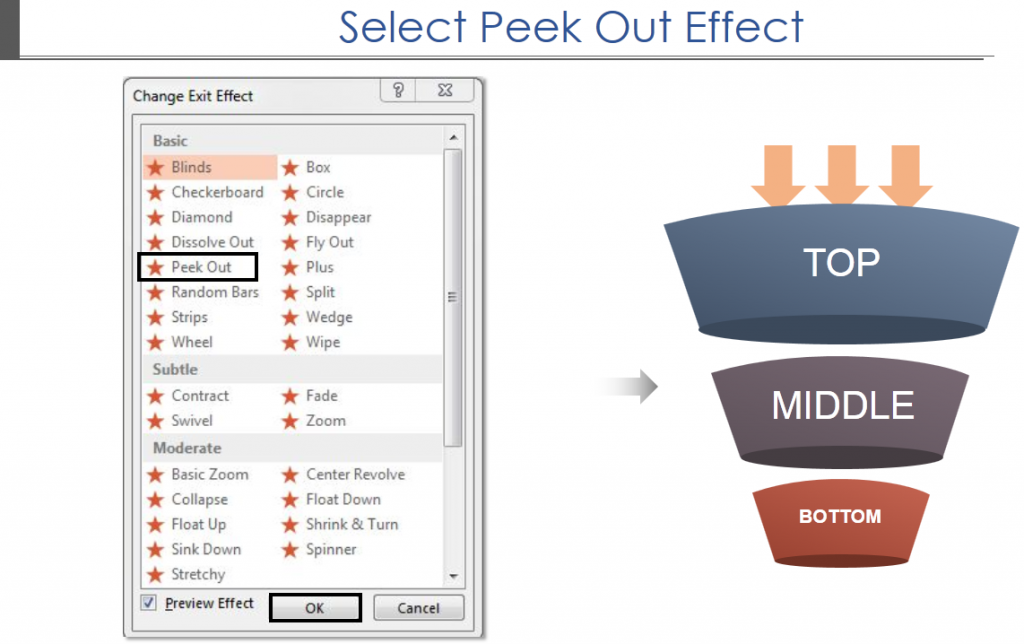
- Choose the Peek Out.
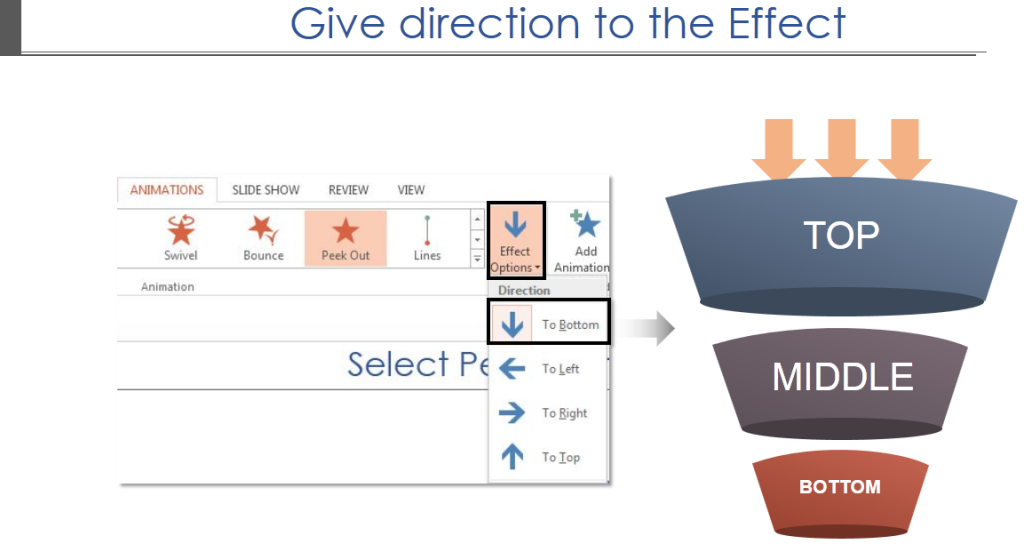
- Now let’s give direction to the effect you have chosen. Select To Bottom from the Effect Options.
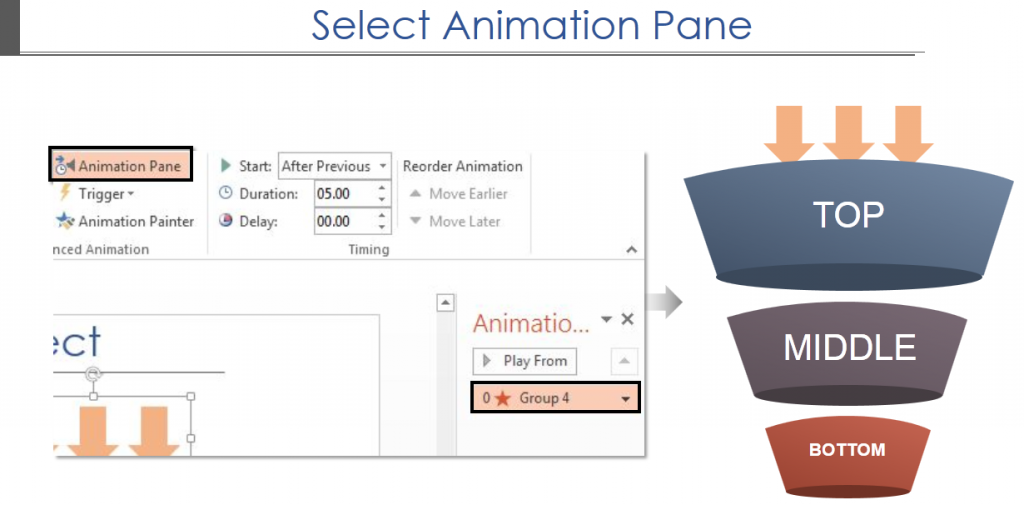
- Under the Animation tab, select Animation pane. Animation pane will open up on the right side of the slide, showing the animation effect applied.
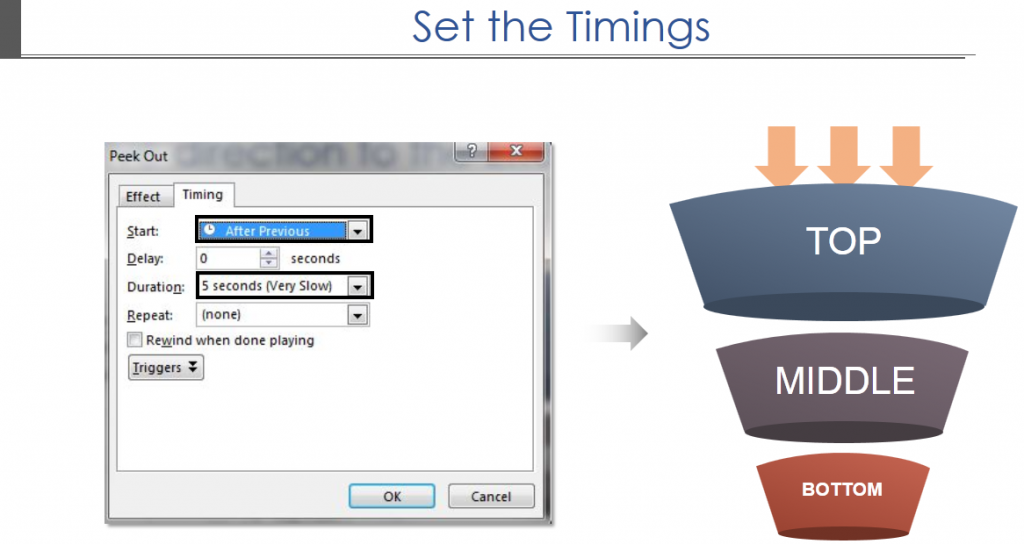
- Double click on the animation, a window will open up. Select the Timing tab and go to the Start option. Choose either of the options depending upon your requirement: on click, with previous or after previous. Set the Duration as per your preference.
Note: Now let’s show the movement of arrows between top and middle section as you have seen in the video. To do so, insert the arrows once again between top and middle section of the funnel. Right click the arrows and send them back. Apply peek out animation from the animation tab.
Insert arrows again to show movement between middle and bottom section of the funnel. Repeat the steps to apply the peek out Animation.
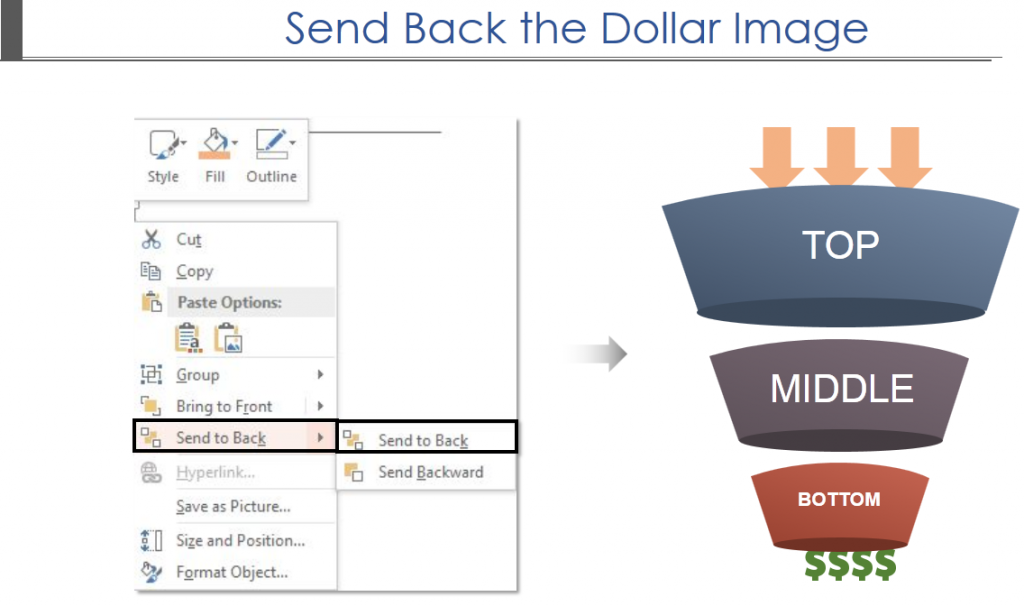
- Now select the second image- the Dollar Image- you want to give animation to. Right click the image and send the Dollar image back.
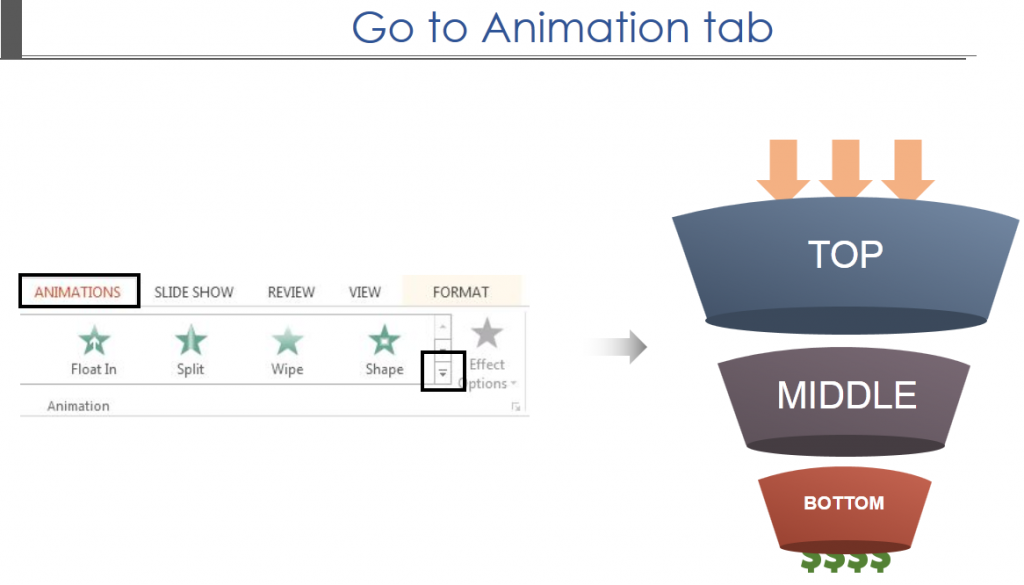
- Click on the More button at the foot of the Animations scroll bar to see more animations.
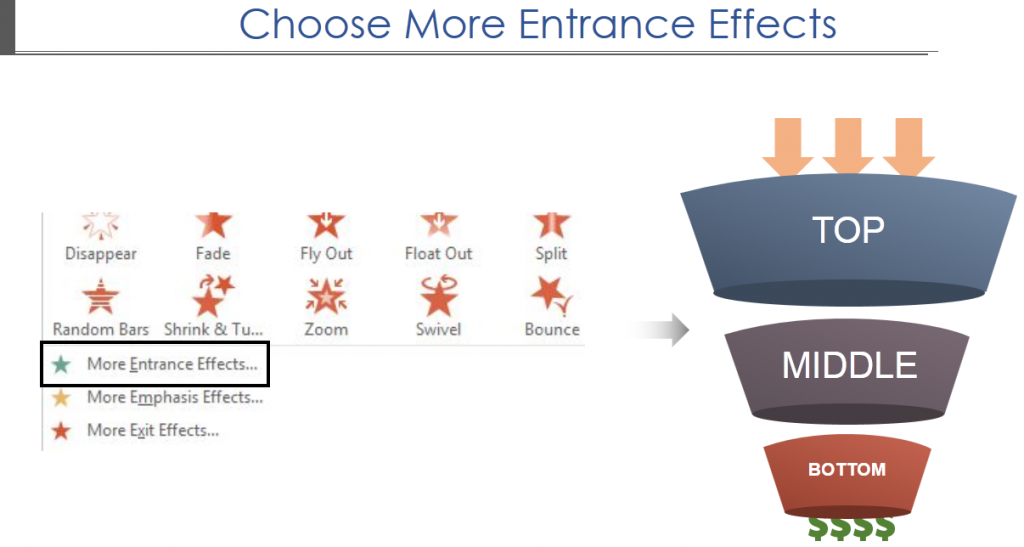
- Choose the More Entrance Effects option under the animation tab.
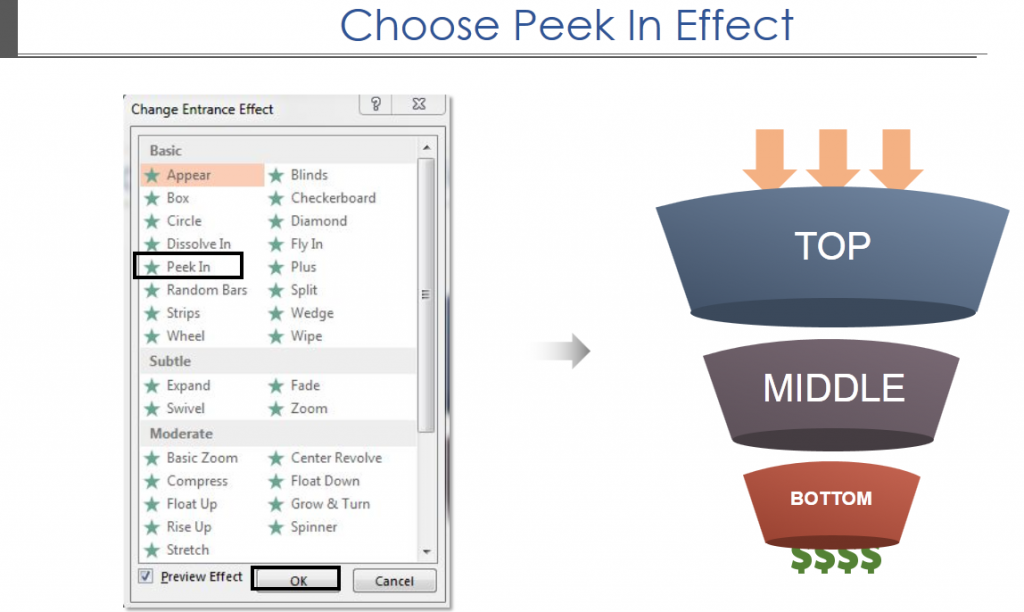
- Choose the Peek In option.
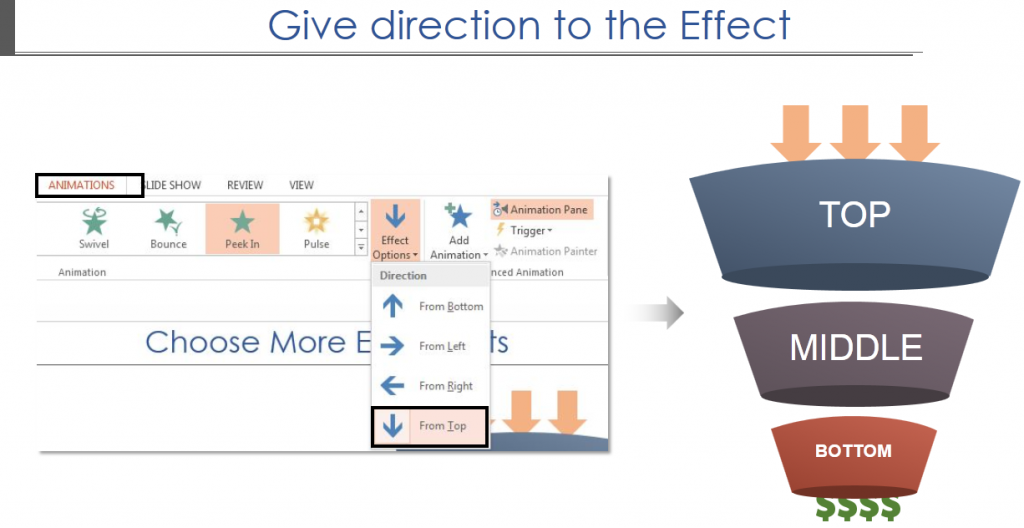
- Choose From Top from the Effect Options.
- Repeat steps no. 7 and 8- Open the Animation Pane and set the timings. And voila.
You are done with the steps.
Wait no more. Try applying these awesome options from animations and save your audience from the boredom.
Good luck.



 Customer Reviews

