If not all, most of us start our PowerPoint presentation thinking that this time I am going to add something new to my presentation and bring in the wow factor. Sadly, that thought ends only as a thought since we keep struggling with the basic shapes given as default in PowerPoint. But what if you knew tricks that would lead to awesome graphics in less than 5 minutes and which can do wonders to your presentation!
Arrows are one the most widely used graphics in PowerPoint presentation. They are frequently used in presentations to show different processes, steps, hierarchy of an organization, flow of communication and primarily in business diagrams. While there are options available by default, it would also be great to add a customized arrow which the audience has never seen before and will also help you and your content stand out from the rest.
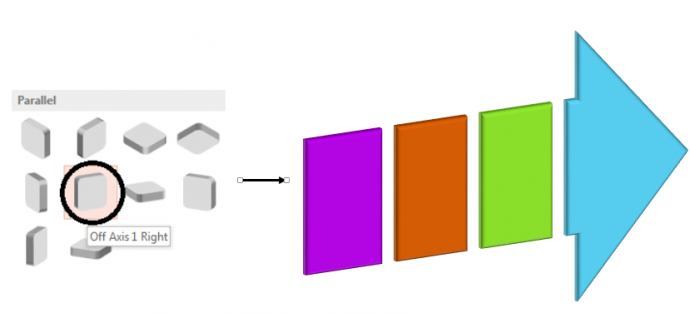
The following colorful 3-D arrow is one such design that will grab immediate attention of the audience. The figure looks attractive but complex at the same time. But once you go through this tutorial, you would be able to make the same arrow in less than 2 minutes in PowerPoint 2013.
Steps to Create Customized 3D Arrow in PowerPoint 2013
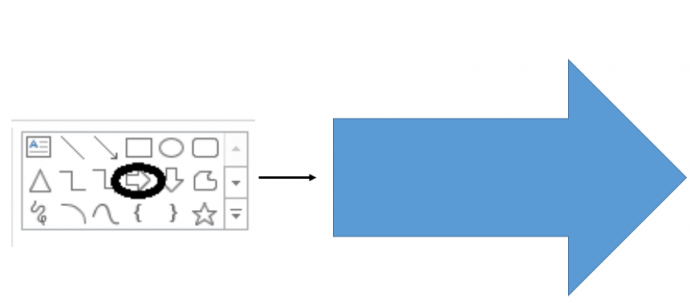
1. Insert a ‘Right Arrow’ from the auto shapes menu (Home tab).
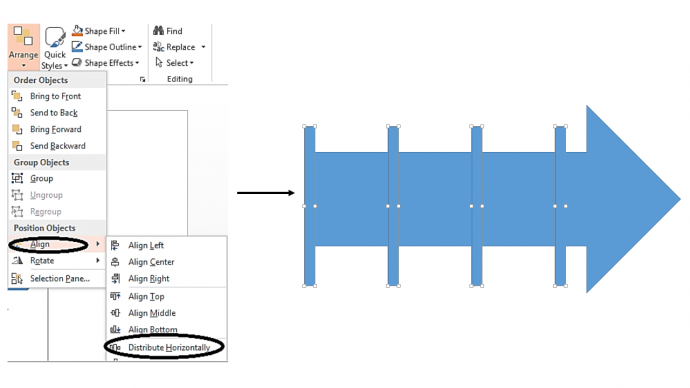
2. Now take a rectangle from the auto shapes menu and place four rectangles over the created arrow as shown below (the first rectangle starting from the corner of the arrow).
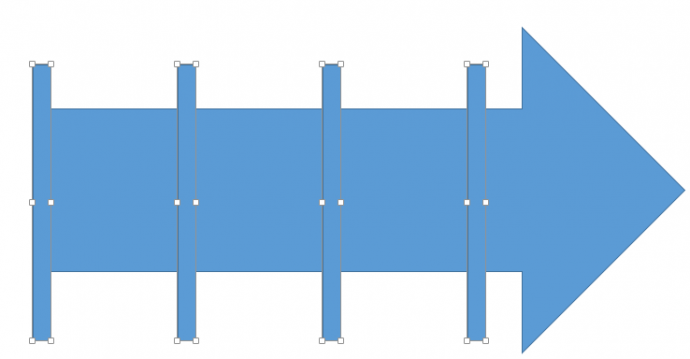
3. Distribute all 4 rectangles horizontally on the Right Arrow. To do so select all rectangles and go to the Format tab. Click on Arrange – Align – Distribute Horizontally.
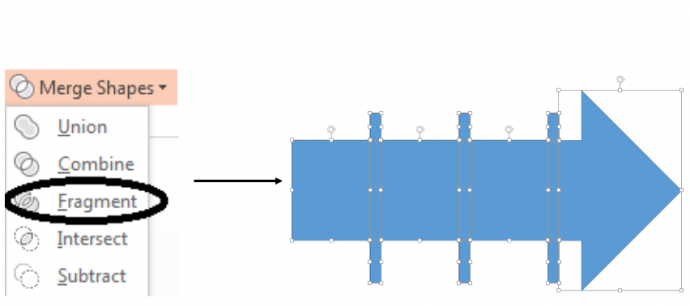
4. Now delete the first rectangle from the left. Select the arrow and rest of the three rectangles. Click Format- Merge Shapes- Fragment.
The image has been fragmented into multiple parts. Delete all rectangles from the image to get the result as shown below:
5. Remove the outlines from the shapes and give the figure color of your own choice. To do so select all present figures – Right Click – Outlines - No Outline. To change the color of the boxes, right click and under Fill, select the color of your choice.
6. Select all the present figures and group them together by pressing Control + G.
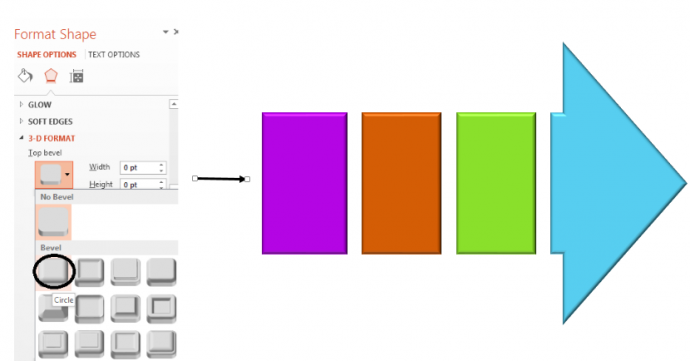
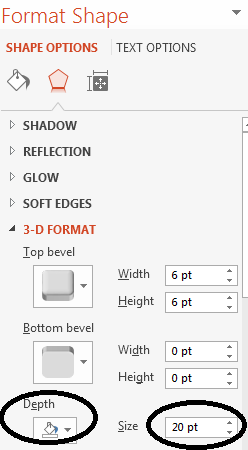
7. Select the grouped object, right click and click Format Shape. The Format Shape window will open on the right. Select the second tab under Shape Options- Effects. In the 3-D Format option, choose the Top Bevel as Circle (see the screenshot below). The result should look something like the figure shown in the image below.
Note: - Increase the number of Depth to 20 Points to get a better effect.
8. Go to 3-D Rotation (below the 3D Format option)– Presets - Parallel - Off Axis 1 Right.
You can always experiment further to get different 3-D arrows but these steps will help you create innovatively designed PowerPoint 3-D Arrows for your next PowerPoint presentation. Here are some more variations of the same arrow:
Just by changing the presets in 3D rotation, you can create customized 3d arrows:
Professionally Designed Arrow Diagrams
Looking for more options to create stunning slides? We have handpicked three arrow diagrams for you to create a stunning slide in seconds. Just download them, type your text and present confidently:
Professional PowerPoint Template #1
Click here to download this PowerPoint template.
Professional PowerPoint Template #2
Download this arrow diagram and use it to explain circular processes.
Professional PowerPoint Template #3
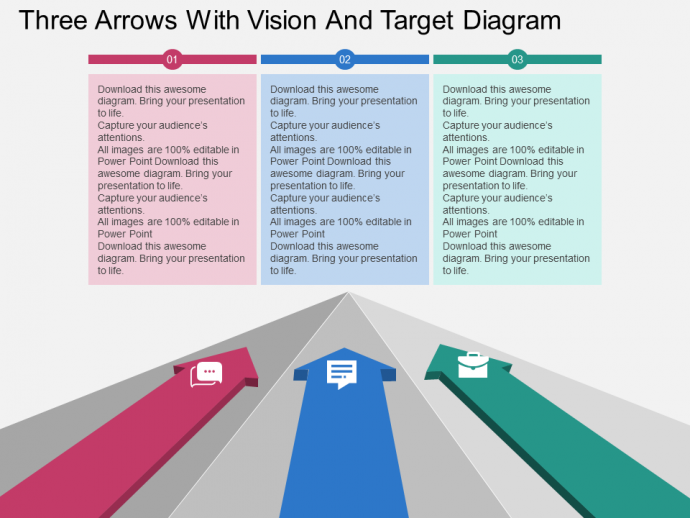
Grab this template by clicking here. It is the same template that we used for the banner image.
Hope you liked the tutorial we shared today and we hope that after this tutorial, you will ditch those cliche arrows provided as default in PowerPoint and go for customized 3d ones. Tell us your feedback in the comments below.



 Customer Reviews


