


 Customer Reviews
Arrows are probably as ancient as the first language. Their presence and usage to depict directions can be seen in ancient caves which were a habitat long before humans started speaking to each other. Arrows have been a part of the communication system since ages and are one of the first things that a child learns in his early stages of education.

The only reason that arrows are still as common as they were then is the fact that they are visual, easier to understand and are not specific to any language. To mention directions to a place in each language might not be possible or practical but a universal arrow can do it better and with lesser resources. But can arrows help us in our PowerPoint presentation?
![]()
They definitely can. Creatively designed arrows can not only enhance the visual appeal of your presentation, it can also reflect your creative side to the audience. Most successful presentations carry less text and more visuals and you can implement that with the help of arrows. Arrows can help explain steps of a process, hierarchy of a management, various stages, key issues, targets, and much more. But is it worth spending half an hour to create one arrow to be used in the presentation? Definitely not. But if the same or even more creative arrow can be created in 2-3 minutes then it’s definitely worth it. Following these steps you would be able to create different kinds of the most common used shape in PowerPoint presentation.
What You’ll Learn to Create in this Tutorial:
![]()
Arrow 1
![]()
Follow these steps to create this amazing arrow diagram:
- Insert a Bloc Arc. Go to Insert> Shapes> Basic Shapes> Bloc Arc.

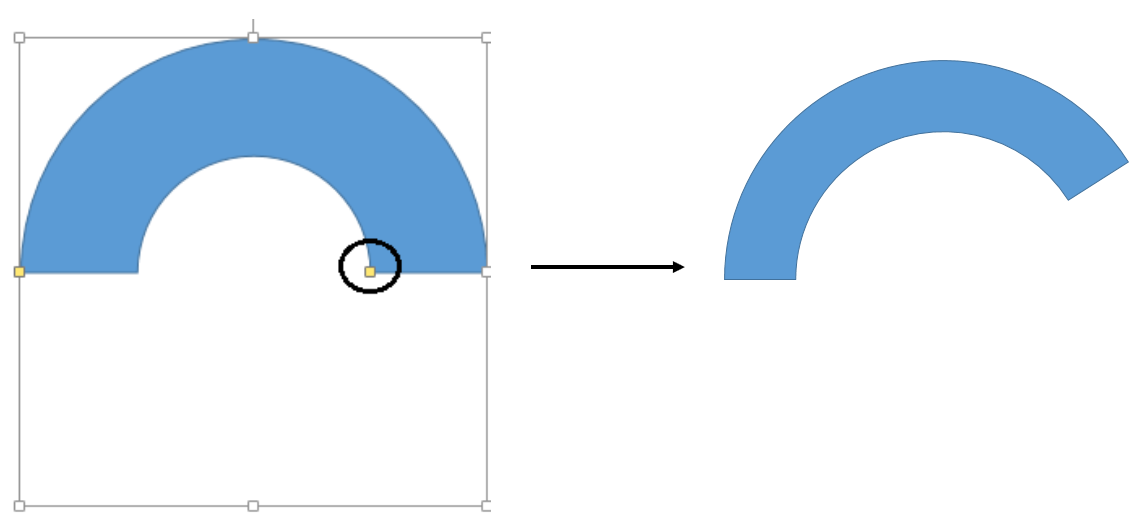
- Increase its size by dragging the corner handle as shown below in the image.

- Now hold the right yellow square box and decrease its width (see the below image).
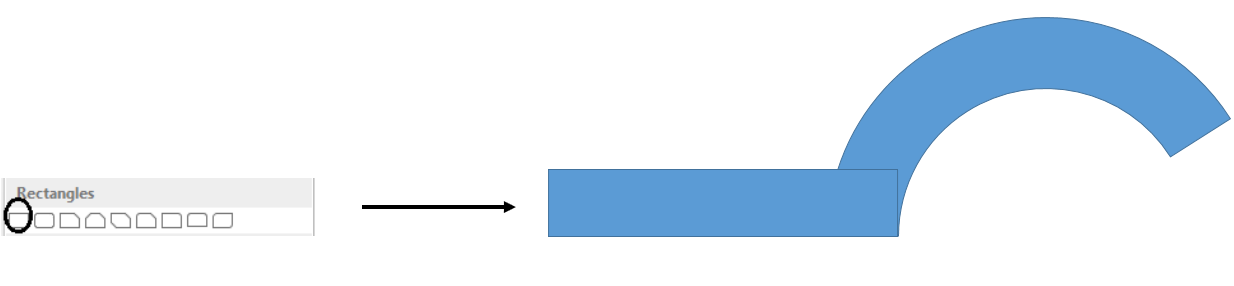
- Place a Rectangle over the Block Arc. Go to Insert> Shapes> Rectangles> Rectangle.
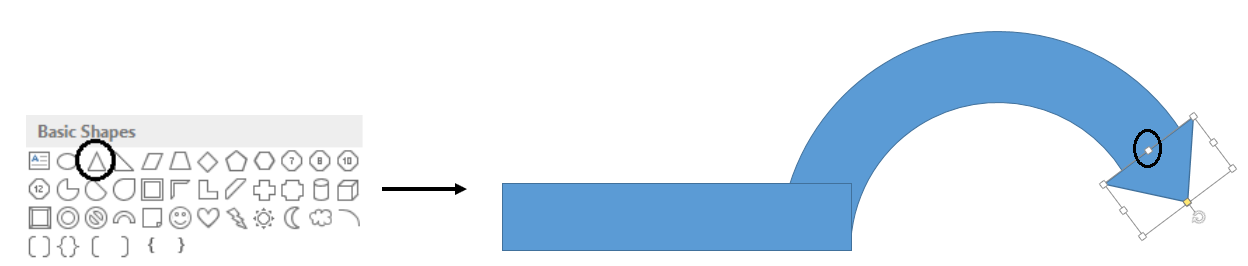
- Now place a Triangle over the arc. Select Insert> Shapes> Basic Shapes> Triangle. You can also adjust the size of the triangle while placing it over the shape by reducing its size (see the below image for your reference).
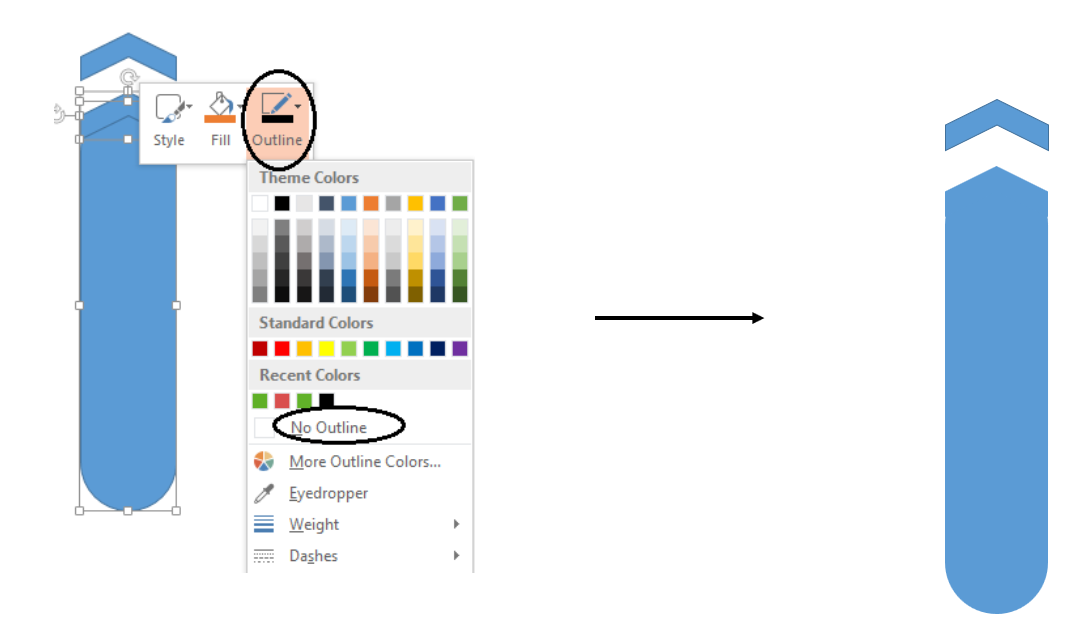
- Select all the shapes and remove the outline. Right click the image> Outline> No Outline.

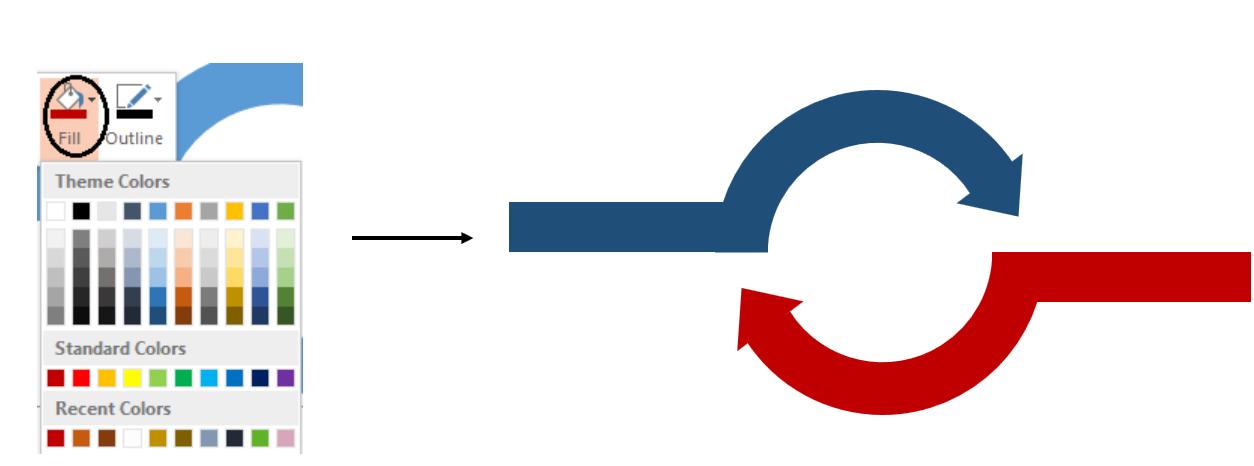
- Duplicate the original shape. Rotate the duplicate one and you will get a circular arrow diagram just like the one shown below.

- Fill the shapes with the color of your own choice.
Your professional and sophisticated arrow PPT slide is ready. Let's move on to the next one.
Related: Simplest Way to Create Circular Arrows in PowerPoint
Arrow 2
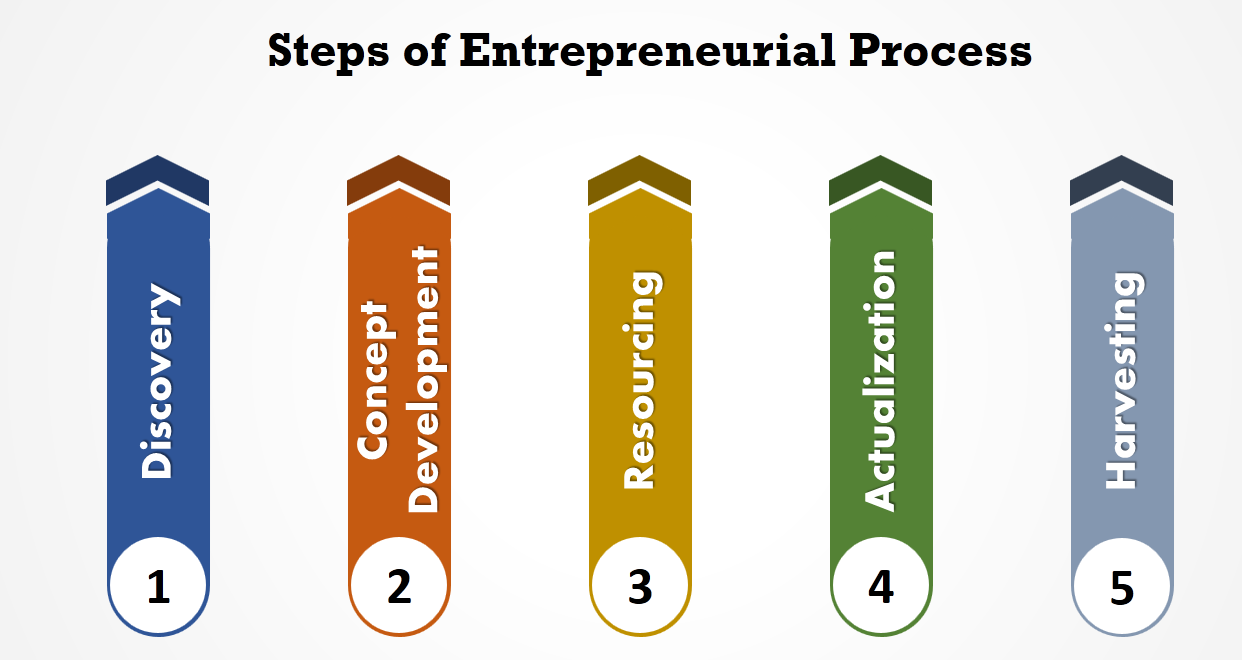
- Insert a Rounded Rectangle. Go to Insert> Shapes> Rectangle > Rounded Rectangle.
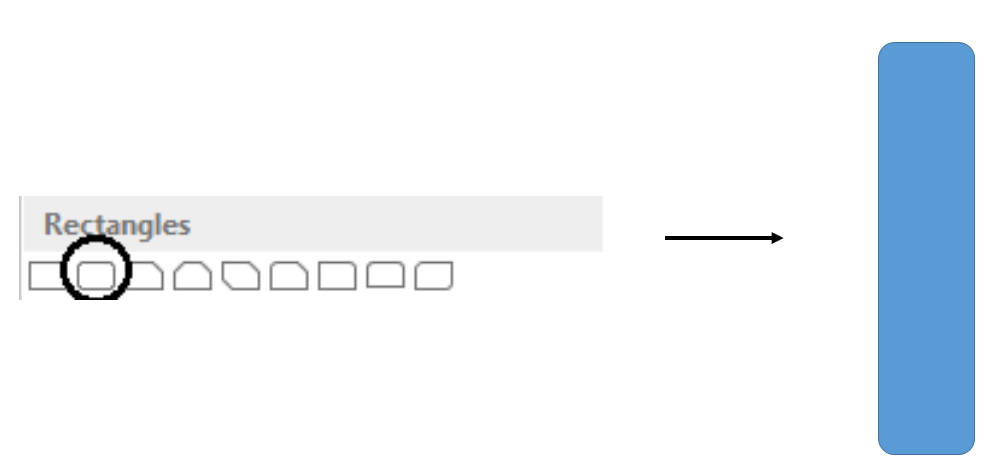
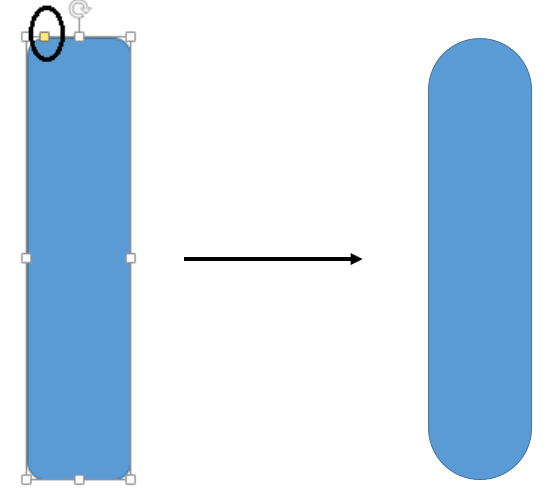
- Adjust the size of the Rounded Rectangle by dragging the yellow handle towards right (see the below image).
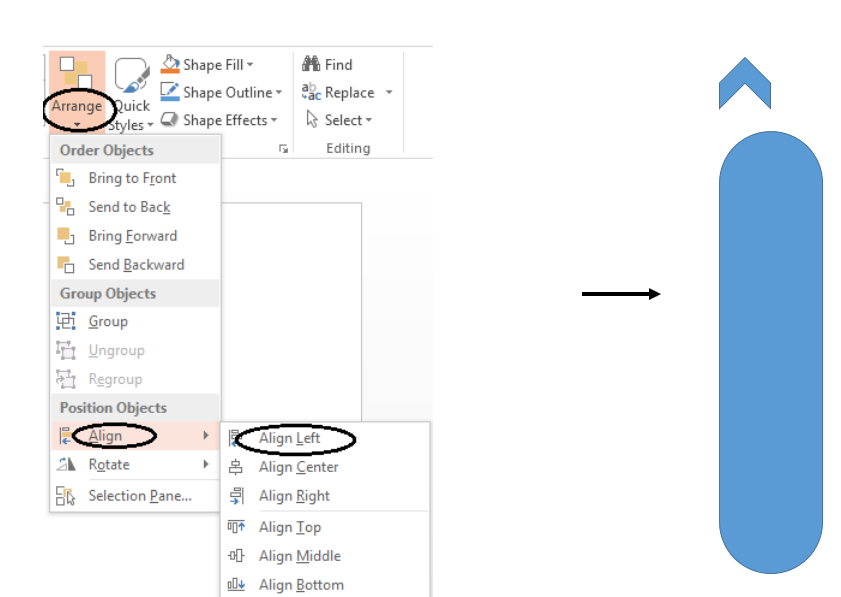
- Place the Chevron shape above the Rounded Rectangle. Go to Insert> Shapes> Block Arrow> Chevron.
![]()
- Select both the shapes. Go to Arrange> Align> Align Left.
- Increase the length of the Chevron and place it properly above the Rounded Rectangle. Copy the original Chevron and duplicate it. Place the second Chevron above the Rounded Rectangle (see the below image).
![]()
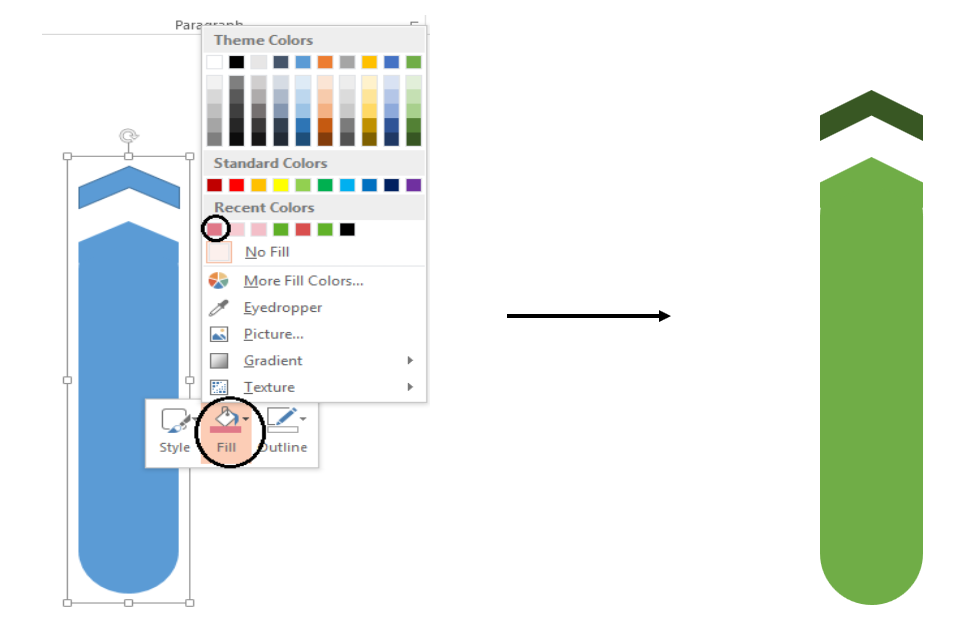
- Select the Rounded Rectangle and the Chevrons. Right click the image> Outline> No Outline.
- Fill the image with a color of your choice.
Duplicate the arrow shape to have as many shapes as the steps in your slide. Let's move on to make the last arrow diagram.
Arrow 3

- Insert a Chevron from the Shapes menu. Go to Insert> Shapes> Block Arrows> Chevron.
![]()
- Increase its size by holding the Shift key (see the below image).
![]()
- Duplicate the original Chevron by pressing Control and Shift simultaneously.
![]()
- Insert a Notched Right Arrow from the Shapes menu. Go to Insert> Shapes> Block Arrows> Notched Right Arrow.
![]()
- Increase the size of the Notched Right Arrow by holding the Shift Key.
![]()
- Place the Notched Right Arrow over the first Chevron from right. You can use the Shape Effects tool while placing the Notched Right Arrow over the Chevron so that it is placed properly. To use the Shape Effect tool, select the Notched Right Arrow> Shape Effects> Preset> Preset 8.
![]()
- Turn off the Preset. To do so, again select the Notched Right Arrow, go to Insert> Preset> No Preset. You will get an image just like the below image.
![]()
- Select all the images and distribute them horizontally. Click the Format tab. Go to Arrange> Align> Distribute Horizontally.
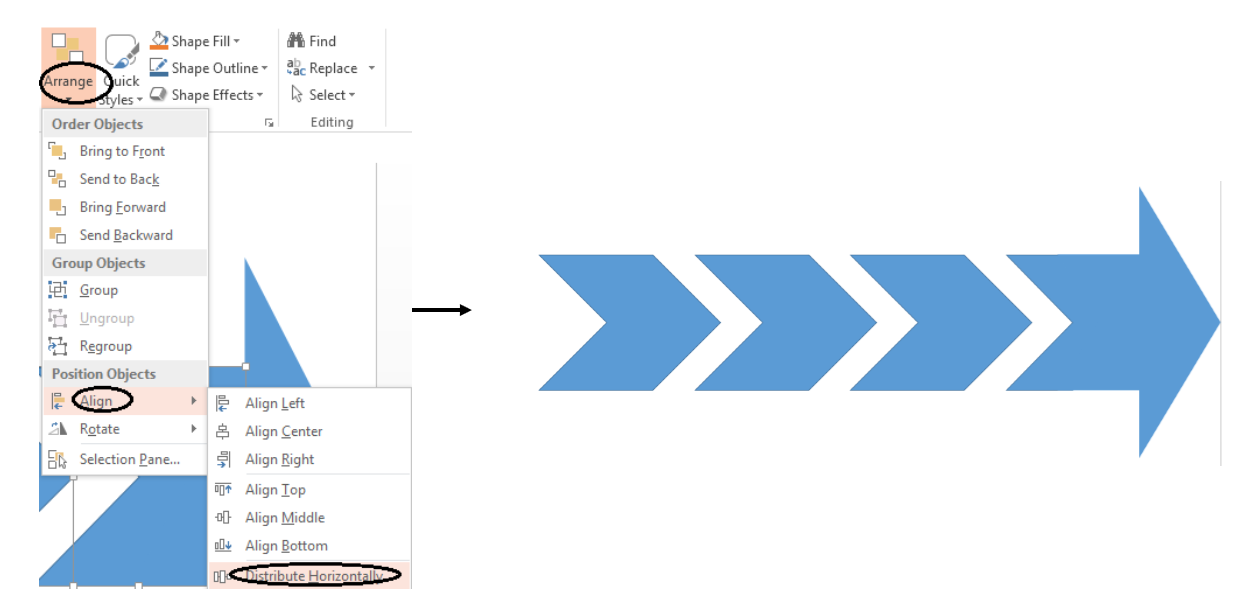
- Next step is to remove the outline. Select the shapes, right click> Outline> No Outline.

- Fill the arrows with colors of your choice. Right click the image> Fill> Color of your choice.
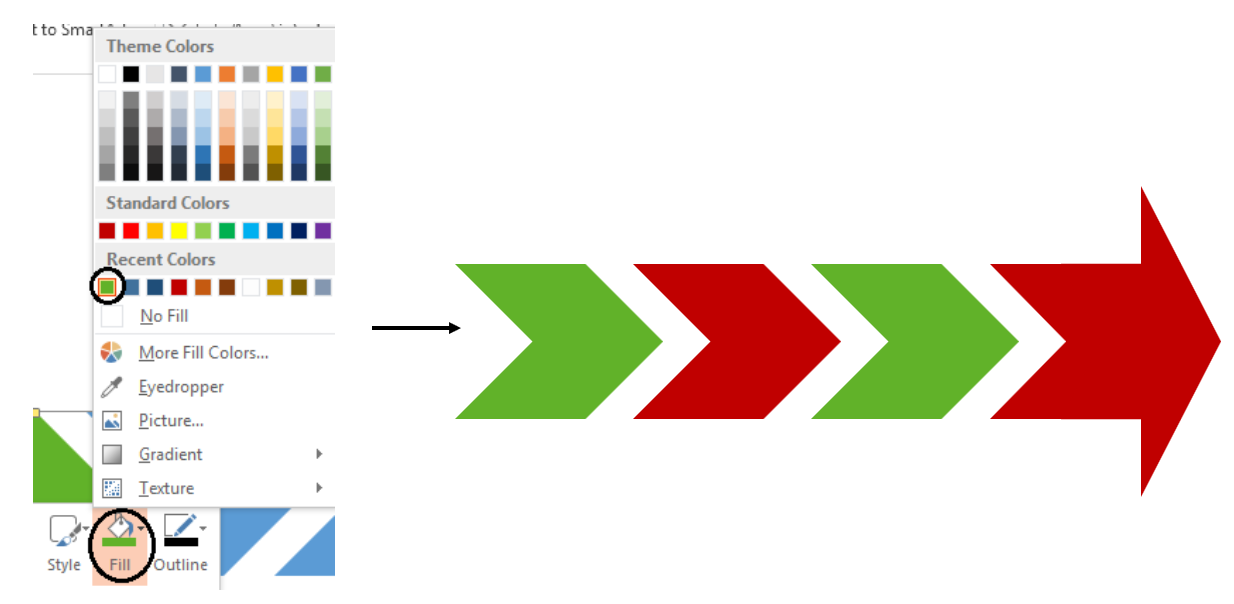
These easy steps will help you create the most stunning Arrow Diagrams for your presentation. In case, you lack time, we have handpicked creatively designed Arrow PowerPoint Templates for you. Go through them and choose the ones that suit you best.
P.S. Learn to Create 3D Arrows in PowerPoint
Professional Arrow Diagrams
Professional PowerPoint Template #1

Grab this awesome template by clicking here.
Professional PowerPoint Template #2

Download this creative PowerPoint Template and stun your audience.
Professional PowerPoint Template #3

Grab this eye catching diagram right here.
Professional PowerPoint Template #4

Download this innovative diagram, add your content and amaze your audience.
Professional PowerPoint Template #5

Catch this awesome diagram by clicking here.
Professional PowerPoint Template #6

Click here to download this stunning diagram.
Professional PowerPoint Template #7

Show pros and cons in a most stylish way ever. Click here to grab this awesome PowerPoint Template.
Professional PowerPoint Template #8

Download this awesome diagram, add your content and logo and you are good to go! Click here to download this innovative PowerPoint Template.
Share your feedback with us. Stay tuned for more PowerPoint Tutorials.


newsletter service. Do you have any? Please permit me understand in order that I may subscribe.
Thanks.