![Turn Boring PowerPoint Slides into Visual Masterpieces using these 11 Image Hacks [Presentation Hackathon Part 2]](https://www.slideteam.net/wp/wp-content/uploads/2015/10/11-Image-Hacks-to-Turn-Boring-PowerPoint-Slides-into-Visually-Breathtaking-Slides1-690x300.png)


 Customer Reviews
This article is second in the series of “Presentation Hackathon” where we share incredibly simple and quick hacks that any presenter can use to create the most professional slides without any professional designer’s help.
We, the digital natives, are visual learners. We prefer to watch a video tutorial rather than go through a PDF document, prefer an infographic over a bullet-point article and a picture quote over a text quote. Several sources claim that the human brain processes visual information 60,000 times faster than text. Studies prove our visual memory is also far superior to auditory one. We are able to recall only 10-20% of a spoken lecture but 65% if the lecture is visual and verbal.
These claims become all the more worthy of our attention if the reports of human attention span shrinking to just 8 seconds- below that of goldfish- are true. What does this mean for your presentations? Make the most of the power of visuals!
Wait, you must be asking “Where do I put all the text?”. First of all, try to brutally cut down the word count on your slide. Keep ONLY the most important words on the slide (we have to free up space for visuals!). Now what? Now, get ready to turn those slides into a visual masterpiece with these 11 hacks:
Note: You have to invest time in finding the best visuals from the web. There are plenty of free or Creative Commons licensed pics on the web that you can use for your presentation without any copyright issues.
So here we go:
Hack 1: Full-Size Image + a Transparent Text Box
Everyone loves larger-than-life things. Compare watching the tyrannosaurus rex, velociraptor and other gigantic predators on your mobile screen versus the 70 mm screen. Now, compare seeing on projector a slide full of words on leadership versus a slide with Chris Pratt leading raptors to a dangerous mission (it didn’t work out well for Chris in that movie scene though). That would be an unforgettable slide, right?

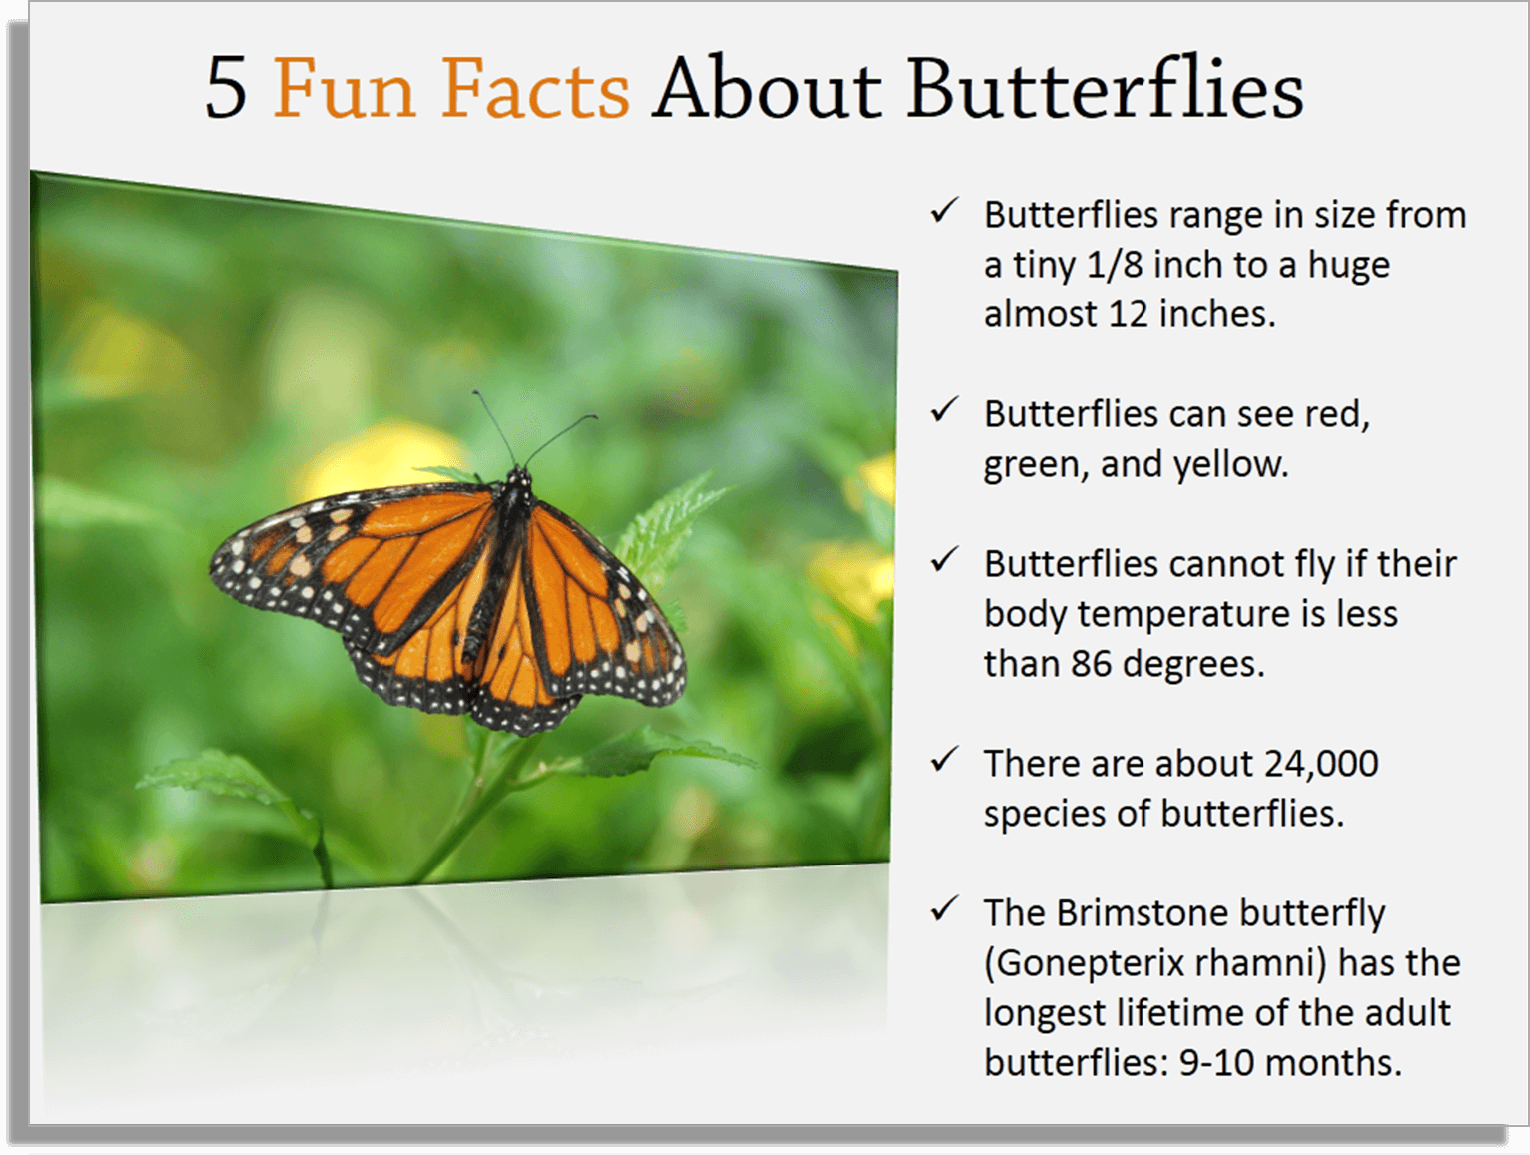
But time to get more serious now. Every slide, be it on some complex chemical equation or an organization’s new marketing strategy, can have a striking visual that you can play up on your slide canvas. Next, take your text box, give it a solid fill and set the transparency to a level so that you have the best of both: Visuals as well as text. With this simple, no-brain hack, you can turn a text slide into a visual feast. Here’s an example for you:

It’s pretty simple to create transparencies behind your textual content:
- Select the text box
- Right click and click Format Shape
- Select the Solid Fill radio button
- Adjust the level of transparency so that text is visible and the visual is not cut off either.
Alternative: Put Text Inside a Shape and Give Transparency to the Shape
Try choosing a shape from the Shapes menu (under the Insert tab) and placing text inside it. Keep the image full-size, and this time set transparency to the shape rather than the text box. Look how placing a circle at the centre of the image with 35% transparency creates a beautiful visual effect:

Hack 2: Split Slide into 2: Image and Text (Without Transparency)
An alternative to the first hack is to give as much importance to the text as to the image. You need not necessarily split the slide into 50:50 ratio, it can be 60:40 or any other. The idea is to treat text here as a visual element itself. You can either crop the image or give a Solid Fill color to the text box without setting any transparency. Check out the slide below to have a clearer understanding:
Vertical Split:

Horizontal Split:

Hack 3: Split Slide into 2: Image and Text (With Transparency)
This is simply a variation of the second hack or you can say a combination of the first two. If you love the visual and do not wish to crop it in half, then don’t. Simply put a transparent layer on one half of the slide and place your text there. The visual would not be sacrificed for accommodating text in this case. Here’s how the variation now looks:
Vertical Split:

Horizontal Split:

Hack 4: Use Gradient Fill to Mask the Image
There is an alternate technique to set transparency over images. In the above hacks, you can clearly make out that a separate element, with transparency given to it, has been added over the image. In this hack, we’ll show how you can deceive the viewers by masking portion of the image in such a manner that the transparency looks part of the image. It gives a very professional look to your slide as you can see below:

Here are the steps to apply this hack:
- Insert a rectangle from the Shapes menu under the Insert tab
- Right click on the shape and click Format Shape
- Under Fill, select the Gradient Fill radio button
- Add two to three gradient stops and choose their color as white
- Keep decreasing the transparency level of each gradient stop (the first stop with transparency between 95-100%, the second stop with transparency between 40-50% and the last having transparency between 0-5%).
Hack 5: Small Image + Customized Shape
Big is better, but not always. You can make your slide look visually attractive by using small visuals too. The trick is to give it a customized shape so that it stands out. If you want to put your mugshot in the slide, filling the complete slide space with it would look narcissistic and non-professional. There are 2 ways to do this:
Option A: Insert a shape and give it a picture fill
We shared this hack in the first hackathon guide: 5 Incredibly Simple Hacks to Create Stunning Slides. Having picture enclosed within a shape, say a circle, looks very professional. Take a look at this slide for instance:

Follow these steps to create the same effect in your slide:
- Click the Insert tab
- Under Shapes, choose the oval shape
- Press shift and drag to have a symmetrical circle
- Right click on the circle and click Format Shape
- Under the Line menu, give the circle a solid outline and increase the width of the line (dark blue outline with 1.75 width in the above slide)
- Under the Fill menu, select Picture Fill
- Locate the file on your computer and insert the same
To move the picture within the circle, follow these steps:
- Select the image in the circle
- Click the Format tab
- Under Crop drop down, click Fill
- Move the image in the crop rectangle as per your requirements
Option B: Crop Image to a Shape
This is a wonderful feature that, if used well, can make your slide look pretty unique. Say you are making a presentation on Valentine’s Day. What better than to have an image of a couple cut into a heart shape!

You can achieve this and many such interesting shape effects in PowerPoint in just 10 seconds! Just follow these simple steps:
- Insert a picture into the slide
- Click the Format tab on the PowerPoint ribbon
- In Crop drop-down menu, choose Crop To Shape
- Select the shape you would like your picture to be cropped into.
You can tilt the shape a little and give it a shadow and outline to make it stand out even further. Like we did in the Valentine slide above. Play with different shapes but don’t crop the image into any shape just for the heck of it. It should complement the slide.
Hack 6: Create a Grid Collage
Grid Collage is different from other collages in that it doesn’t have multiple pictures scattered randomly at different angles. You can do that too if you are creating a picture album or showing your portfolio. A Grid Collage, on the other hand, places multiple images around specific grid lines creating neat blocks of graphics that look sleek and professional.
For this hack, we advise you to use the 16:9 slide ratio. PowerPoint 2013 uses this aspect ratio for a new presentation by default. You can limit the number of visuals to three or four in order to free up space for your written content. Infact, with this style, your text will stand out more prominently and balance out the visual-heavy slide. You can free up some space on the left, right or centre of the slide for your content. Take this slide for example:

If you want more space for your content, then simply change your layout. Like this:

You can create equal picture blocks either using your own judgement or the "Gridlines" feature in PowerPoint. It requires just 2 clicks:
- Click the View tab on the PowerPoint ribbon
- Under the Show group, select the Gridlines check box (see the screenshot below).
Or you can simply use the Shift+F9 shortcut.

Hack 7: Blur the Image (Partial or complete blur)
This is the hack to use when you have a lot of text on your slides. Also the best hack if you wish to give an artistic effect to your slide. You needn’t install a photo app on your system to give some artistic effects to your slide. Microsoft PowerPoint gives you tons of options to choose from its built-in Artistic Effects. Locate them right on the PowerPoint Ribbon by following these steps:
- Insert an image (with strong colors, preferably not more than 2 or 3 colors) into the slide
- Click the Format tab in Picture Tools on the ribbon
- Click the Artistic Effects drop down menu
- Select the Blur option.

You can now easily place your text in contrasting color over the blurred image. Although the purpose of this hack is to give prominence to your text without sacrificing the visual appeal, you get an added advantage. Your audience would definitely stare at the visual to know what is being blurred out. That’s good for you as the audience will be forced to engage their senses.
You will however have to invest time in choosing a visual with colors that matches your topic and content. For instance, we chose a visual having yellowish-orange and black colors to speak about innovation in the slide below:

You can increase the size of the blur so that only the hues remain on the slide thereby giving it an abstract touch.
- Click Artistic Effects Options in the drop down (see the screenshot below)
- Format Picture pane will open on the right
- Move the Radius slider or manually enter a number in the box next to the slider. The larger the radius, the blurrier the picture will be.

Hack 8: Use Picture Styles
Why rack your brains when PowerPoint has in-built picture effects to make your slides look spectacular! We are talking about Picture Styles: a group of ready-made picture effects such as picture frames, drop shadows, reflected rectangles, etc available in PowerPoint. Have a look at the slide below. The reflected perspective effect given to the image creates a dramatic effect. Imagine if the same image had been placed as a regular rectangular box. It would have surely looked a deliberate addition to the slide and give the impression that the presentation was made by an amateur. But not this one:
If you haven’t already tried your hands at these styles, you can do it right away by following these steps:
- Insert an image into the slide
- Click the Format tab on the PowerPoint ribbon
- Locate the Picture Styles group and select the one you like

Hack 9: Use Picture Embellishments like transparent stickers, clips, etc.
Small embellishments can make large differences to the overall look and feel of your slide. Where can you get such embellishments from? You'll find many design elements for your PPT slides in our Free Business PowerPoint Templates section. You can download free PowerPoint templates, free maps and free icons without shelling a penny. Here are some embellishments you must try on one of your presentations:
Transparent Stickers: These give an old-look and a handmade touch to your slide. It’s great for use when you are presenting on personal experiences, sharing images of your latest getaway or going a trip down the memory lane. It can be used for a PPT on historical monuments, wonders of the world or any image that would have been worth sticking in your scrapbook. You can download the transparent sticker from this PowerPoint template.

Thumbtacks: Just as you use sticky notes and pin it on your boards with thumbtacks to post important info, why not do the same on the slide canvas. Pin the visuals on your slide to give a personal touch to the slide. Download embellishments like thumbtacks and others from this page.

Paper Clips: This is a great embellishment to give an academic touch to your presentation. You can include multiple images and clip them on to the slide or use a single image clipped to a piece of paper as shown in the slide below:

Hack 10: Create a Filmstrip to Add Drama to Slide
Another cool way to include multiple pictures within a slide is to create a film strip or reel. This hack is surely going to help you capture the audience attention. It can be used to show a sequence or your company’s timeline. Just ask yourself: would the audience like to see a bullet point list of your achievements or through a filmstrip like the slide below. The answer is obvious.

It’s pretty easy to create a filmstrip on your own. All you need to do is create a black rectangular box, then create a small white square box, duplicate it and spread the white squares in a line at the top and bottom. Or else, you can simply download the filmstrip template and place your own images in the slide.
Hack 11: Use an Abstract Pattern on Slide Corners
Use this hack when you are clueless which visual to use for your slide. An abstract image such as a geometric pattern can bring visual relief to your text-heavy slide. You’ll find plenty of such designs on web. Place them on the corners freeing the entire middle portion for your text.
An alternative can be to fill the entire slide canvas with the abstract image and place a square box for text in the centre for your content. The pattern will thus be visible only on the corners.

That’s all we had to share with you for today. You must give these hacks a try in your next presentation. Trust us, in no time you’ll become a master at creating visually breathtaking slides!
If you need to hire services of a Professional Presentation Design Agency, SlideTeam has a 50+ team of PowerPoint designers that daily churn out high-impact slides for Fortune 500 companies and business professionals. Why should you spend a few dollars on a presentation design company? One if you have a deadline hanging like a sword on your head. Secondly, an ugly looking slide will cost you a lot more instead!
Of all the hacks we shared today, which one did you like the most? Let us know in the comments below.