Looking for a tutorial to create a customized envelope for your PowerPoint presentation? Halt! Check our easy to follow steps to make a creative envelope like the one shown below in PowerPoint 2013:
The Final Image-
Why create an envelope in first place? To showcase awesome images that pop out of the envelope or highlight some content of a letter. Even, make special announcements or proclaim awards for an event. Let’s get started:
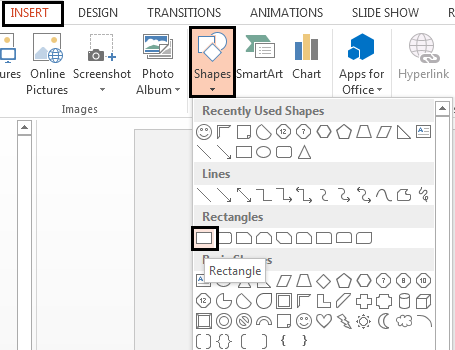
1. Create the envelope base: To draw the envelope, first select Rectangular shape from the auto shapes menu under the Home tab. Or you can select the shape from the Insert tab by following these steps:
- Click Insert, then Shapes and locate the rectangle tool.
- Drag to draw the rectangle on the slide.
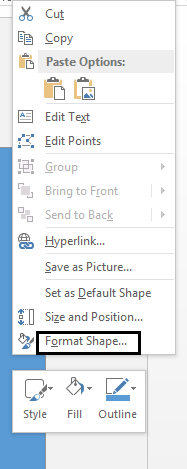
- To change the default color, Right click > Format Shape > Solid Fill > Select the white color.
NOTE: Change the background color of the slide so that the selected rectangle does not merge into the background.
2. Draw lines on the envelope: Drawing lines on the rectangular box will be very time consuming. So why not try an easy method by drawing an inverted triangle.
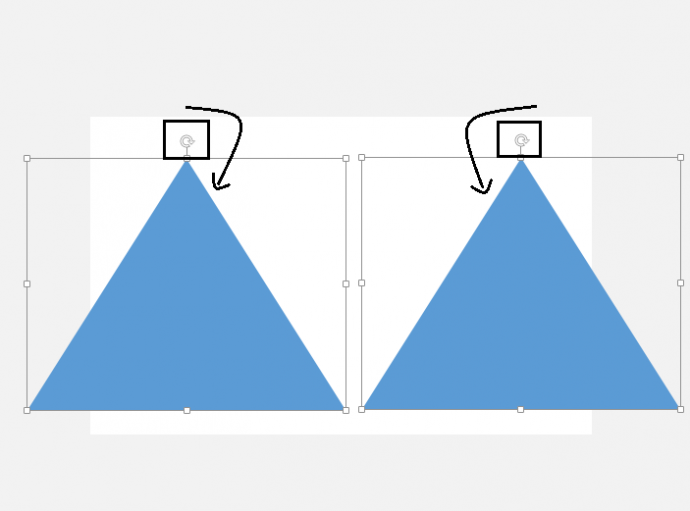
- Go again to the Shapes menu and select triangle twice this time.
- Turn the triangles using the rotation handle on top such that the pointed edge of both the triangles meet each other and their base get aligned to the left and right edges of the rectangle.
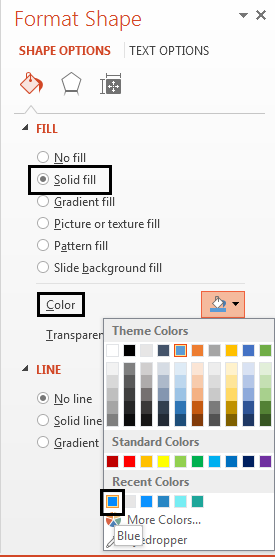
- Select the desired color from the color menu or use the Eyedropper tool to use the same color as the one we have used (see the screenshot below).
- Select the NO LINE option in Format Shape.
The image will now look like this:
3. Draw triangle on rectangle’s base:-
- Select one more triangle bigger in size to cover the bottom part of the rectangle.
- Let the base of this triangle align with the bottom edge of the rectangle and cross the pointed edge of the other triangle.
- Go to Format Shape > Select color as of the other triangles by clicking Solid Fill > Select Solid Line in LINE Option > Fill it with White color and 4 point Width.
Once you have followed all the instructions, your envelope will look like this:
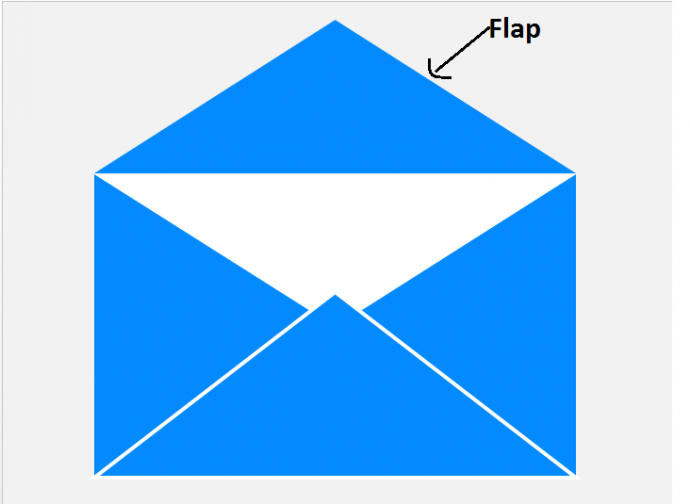
4. Create the envelope flap: After you have constructed the above triangles, making flap would certainly be an easy thing for you. Simply add another triangle on the top, its base aligned to the top edge of the rectangle.
5. Place the Text Message: Create a message box be it for a proposal letter, invitation or appreciation message. Now, let us place the text message over the envelope and send it inside the envelope. Follow these steps:
- Draw a smaller rectangle to fit inside the envelope.
- Right click, go to Format Shape > Solid Fill > Select any color of your wish.
To write a message on this box.
- Click Insert and select Text Box.
- Draw the text box on the smaller rectangle and type the text.
- Select the text box and the rectangular shape and Press Ctrl + G to group them together.
This letter should now appear coming out of the envelope. To do that, follow these steps:
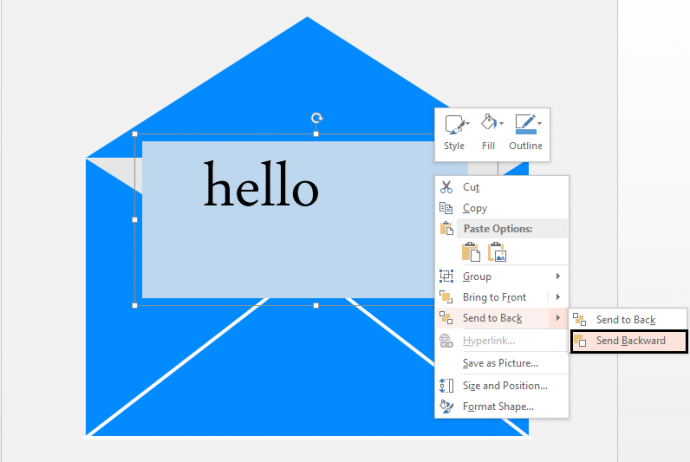
- Select the message box
- Right click on the box and in the Send to Back option, you will find Send Backward
Thereafter, press F4 key till the text box fits inside the envelope (see the screenshot below).
Now deliver your message to the audience with this eye-catchy envelope.
Isn’t it a handy hack? Implement these steps in your PowerPoint presentation and create awe-inspiring envelopes starting today.
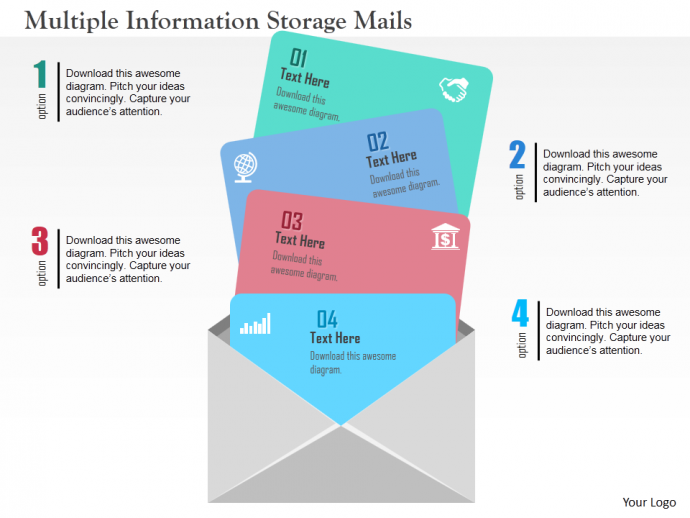
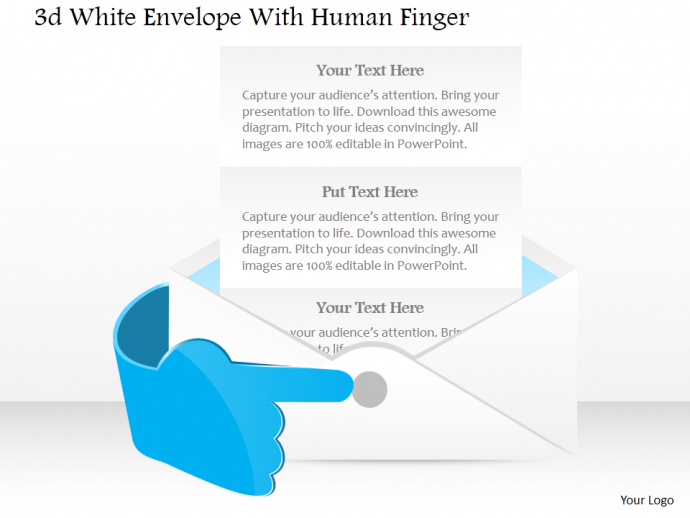
Need customized envelopes for your PowerPoint presentation? You can use the following professionally designed Envelope samples in your presentations.
Click here to download this stunning envelope.
You can download this envelope by clicking here.
Visit our website www.slideteam.com to browse through an impressive assortment of Envelope PowerPoint Presentation Templates.
Hope you liked this Envelope PowerPoint tutorial. We have more PowerPoint tutorials in pipeline for you. Stay tuned!




 Customer Reviews

