Create an interactive animated timeline and give your cluttered data a complete makeover. Animated timelines can be used to present your business goals, milestones, growth, targets, sales, steps, and more.
Another reason why you should be adding these amazing animated timelines is that it helps in engaging the audience. It changes the entire feel of the presentation, looks very professional and creative.
Take a look at the below video of animated timeline.
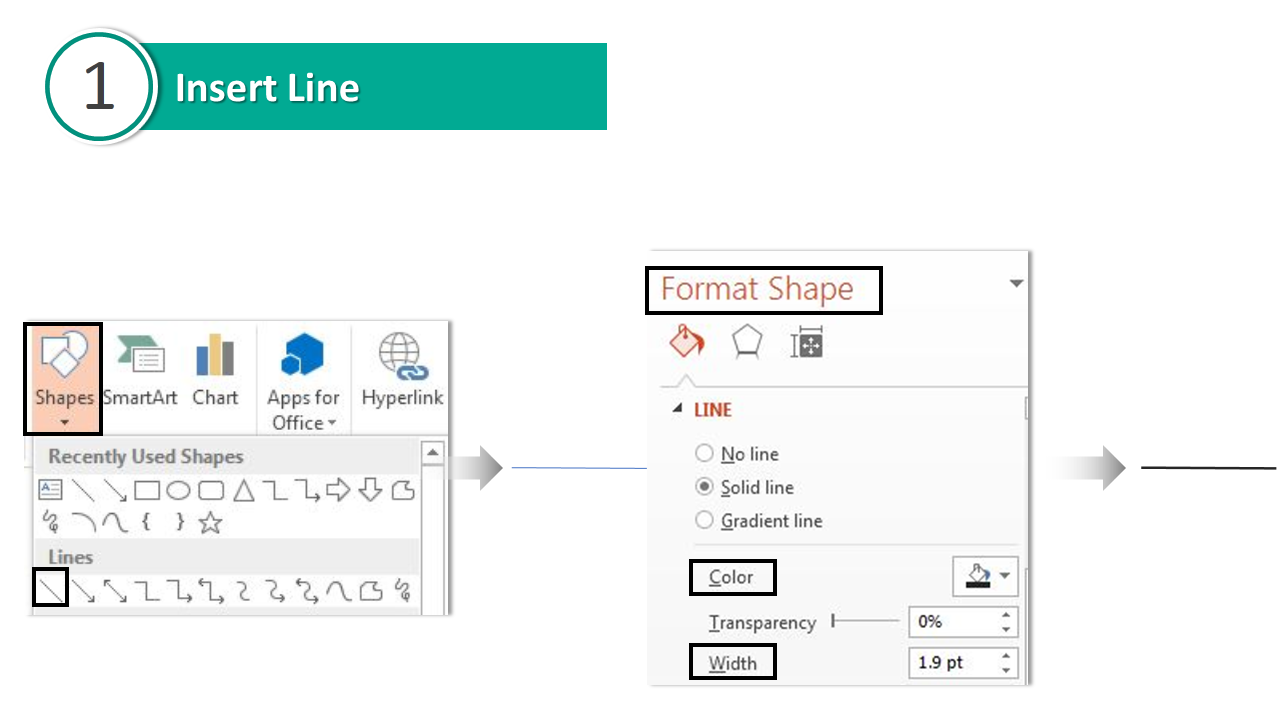
- Insert Line. Go to Shapes> Lines> Line. Adjust its width. Change the color as per your choice.
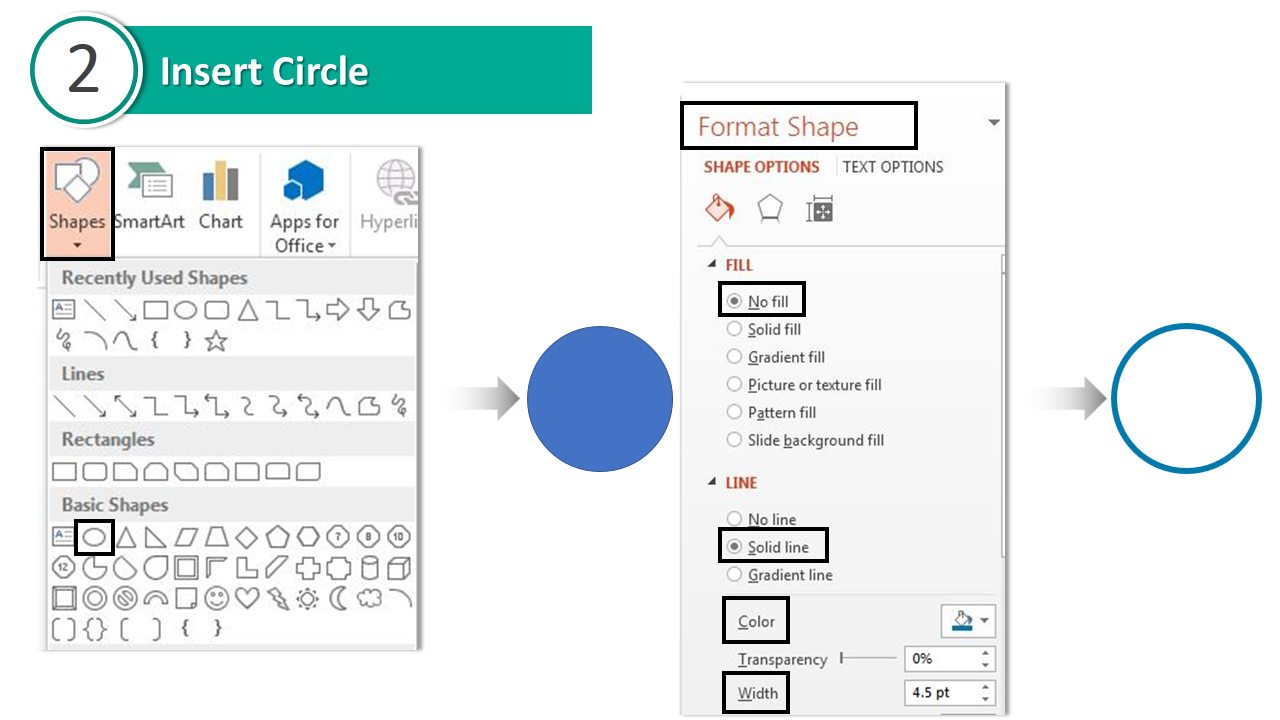
- Insert Circle. Again go to Shapes> Basic Shapes> Oval. Change its width. Give shape an outline color.
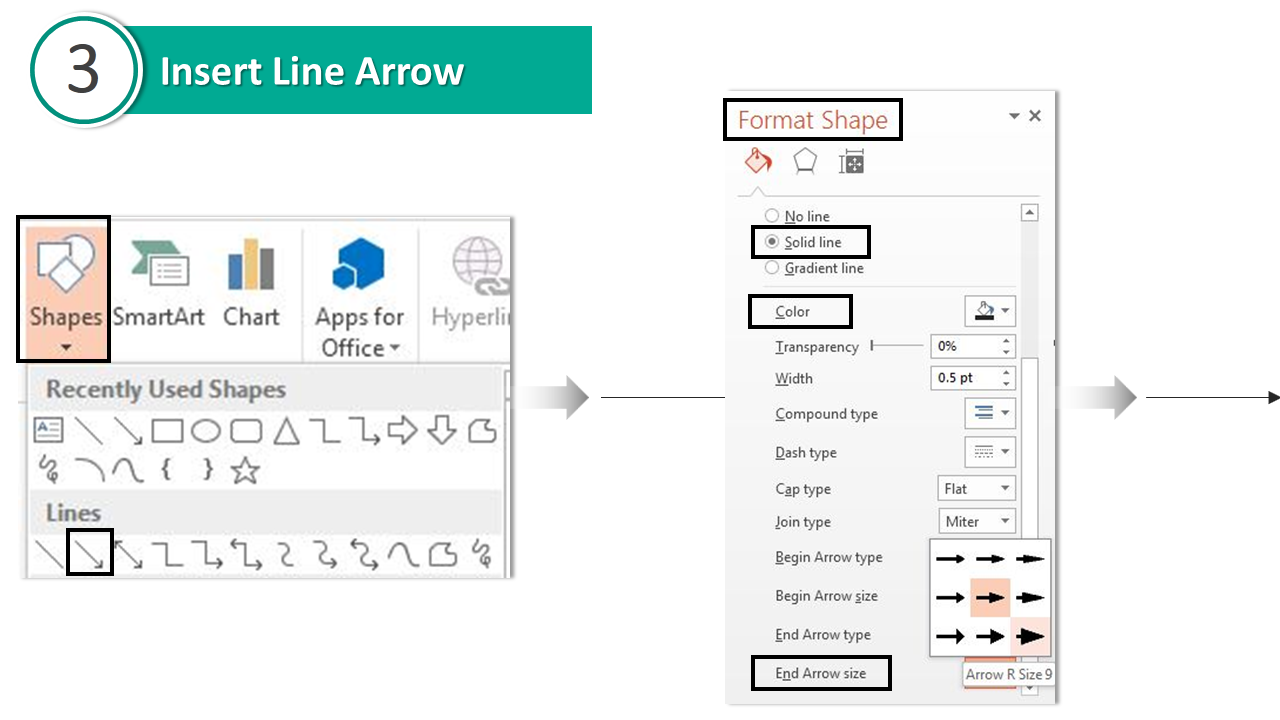
- Insert Line Arrow from the Shapes menu. Choose Shapes> Lines> Line Arrow. Go to End Arrow Size under the Format Shape menu to adjust its size.
- Insert text boxes and an icon of your choice inside the circle.
Stage 2- Apply Animation to the Timeline
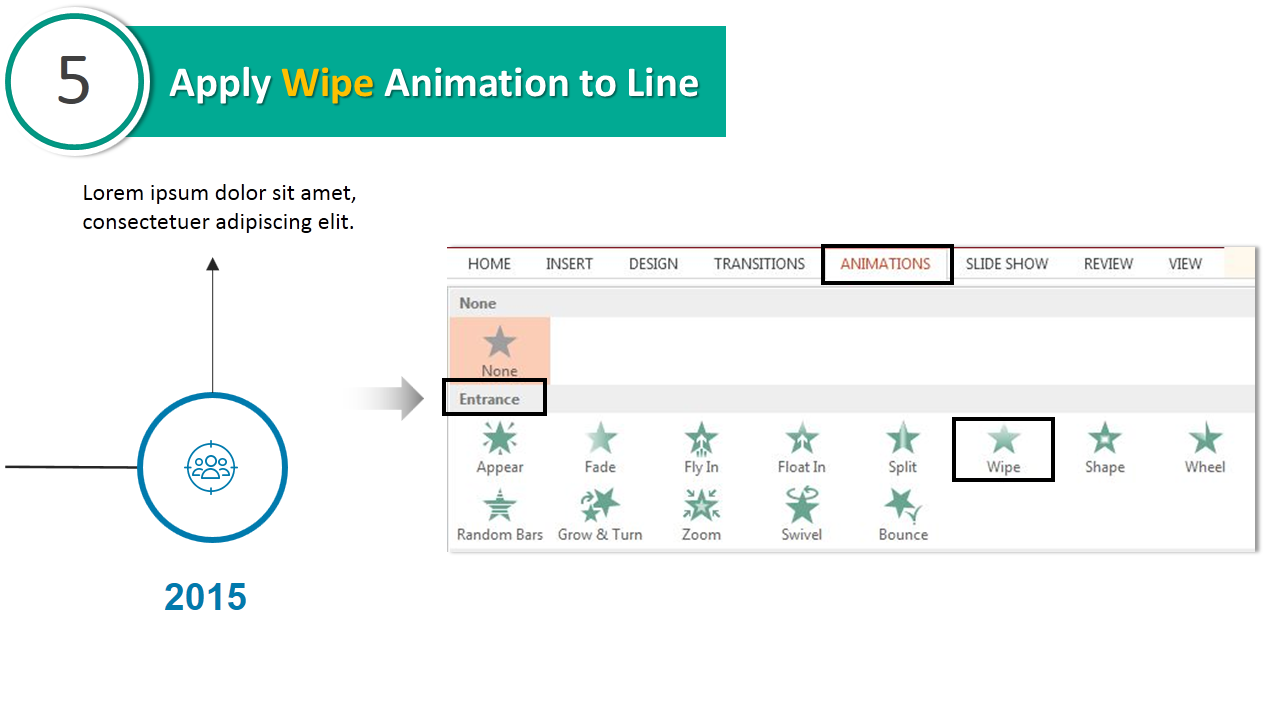
- Select Line. Go to the Animation Choose Entrance> Wipe.
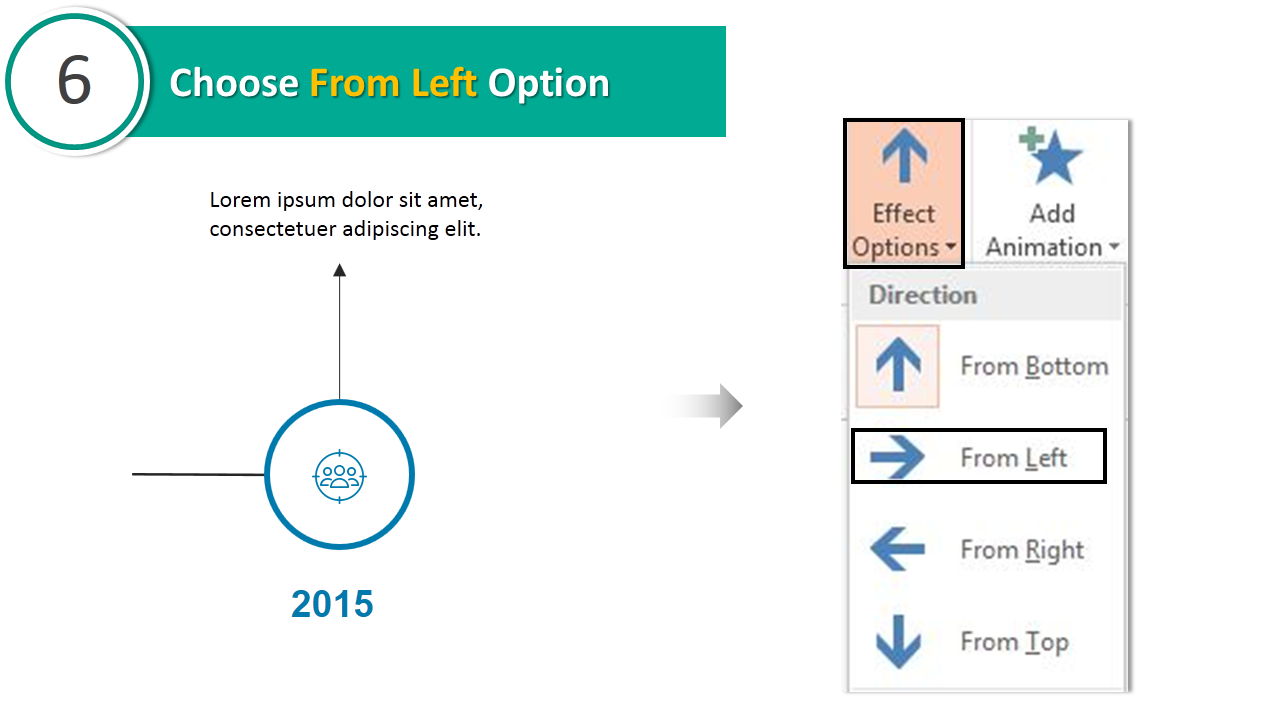
- Once the animation is applied, choose “From Left” under Effect Options.
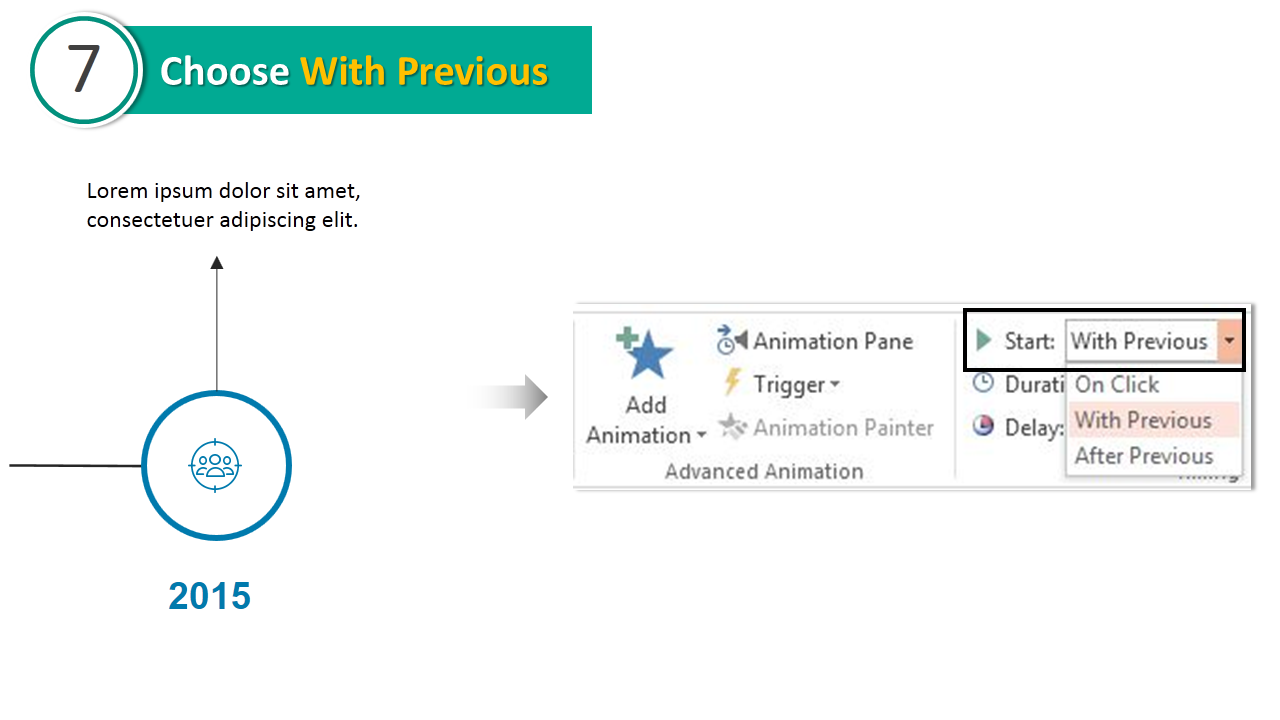
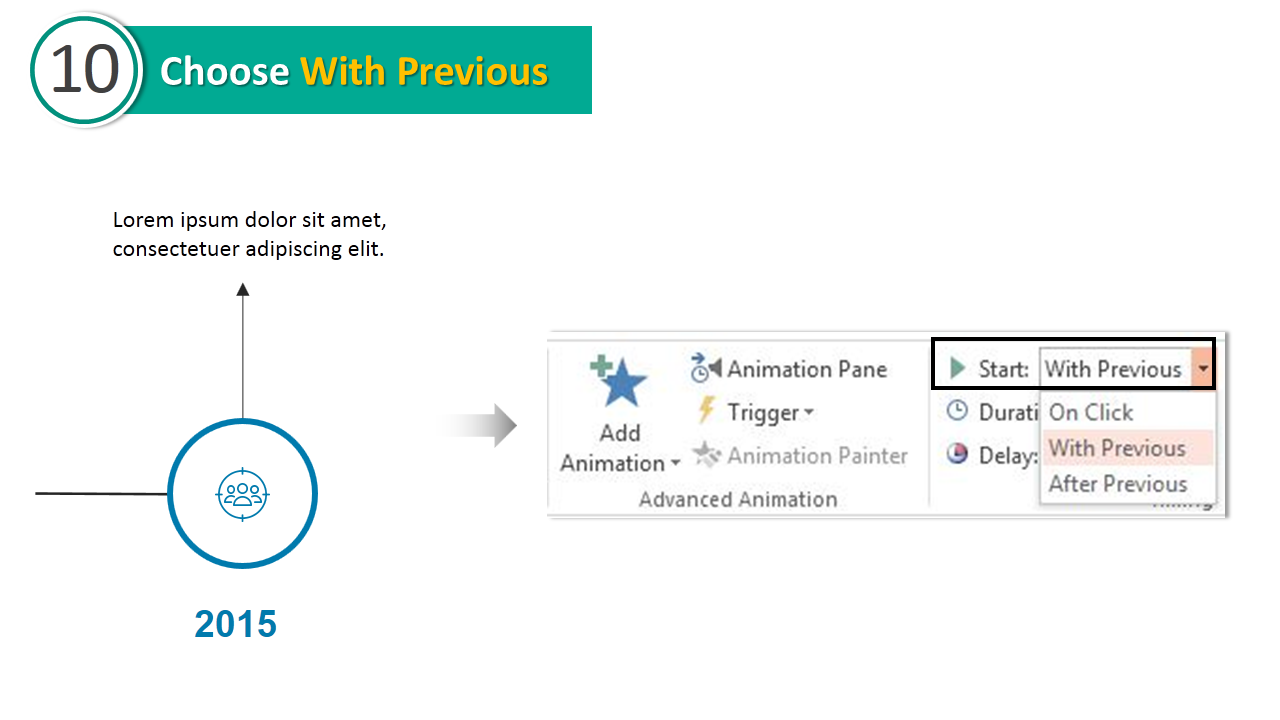
- Go to the Start option in the Animation tab. Select “Start with Previous”.
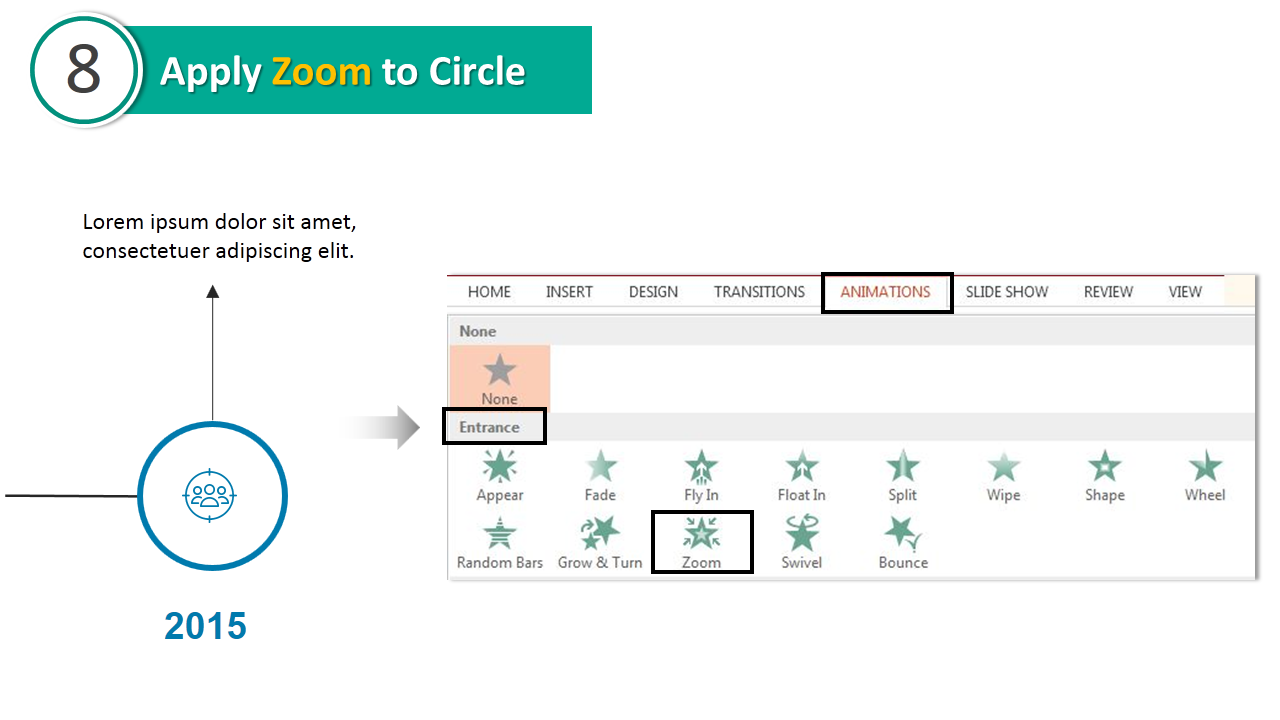
- Select the circle. Apply Zoom effect from the animations available.
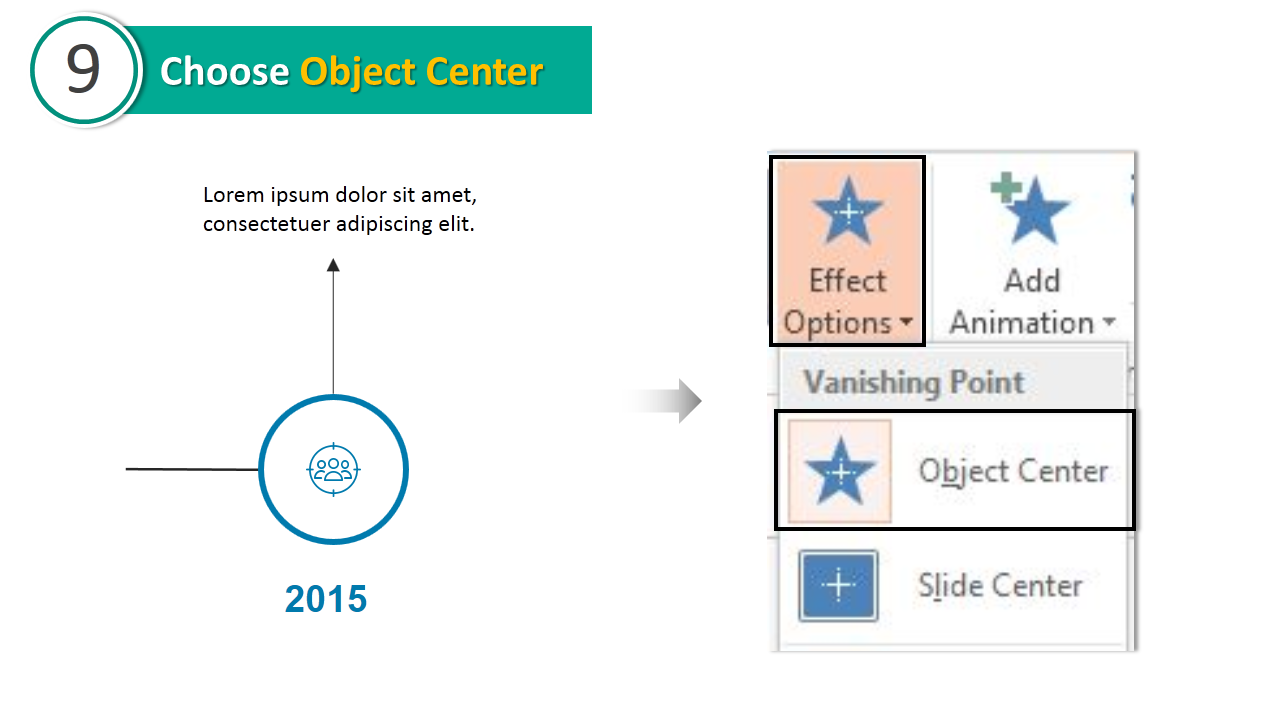
- Choose Object Center under Effect Options.
- Choose “With Previous”.
Note: Apply the same steps as circle (step 8,9 and 10) to icon as well.
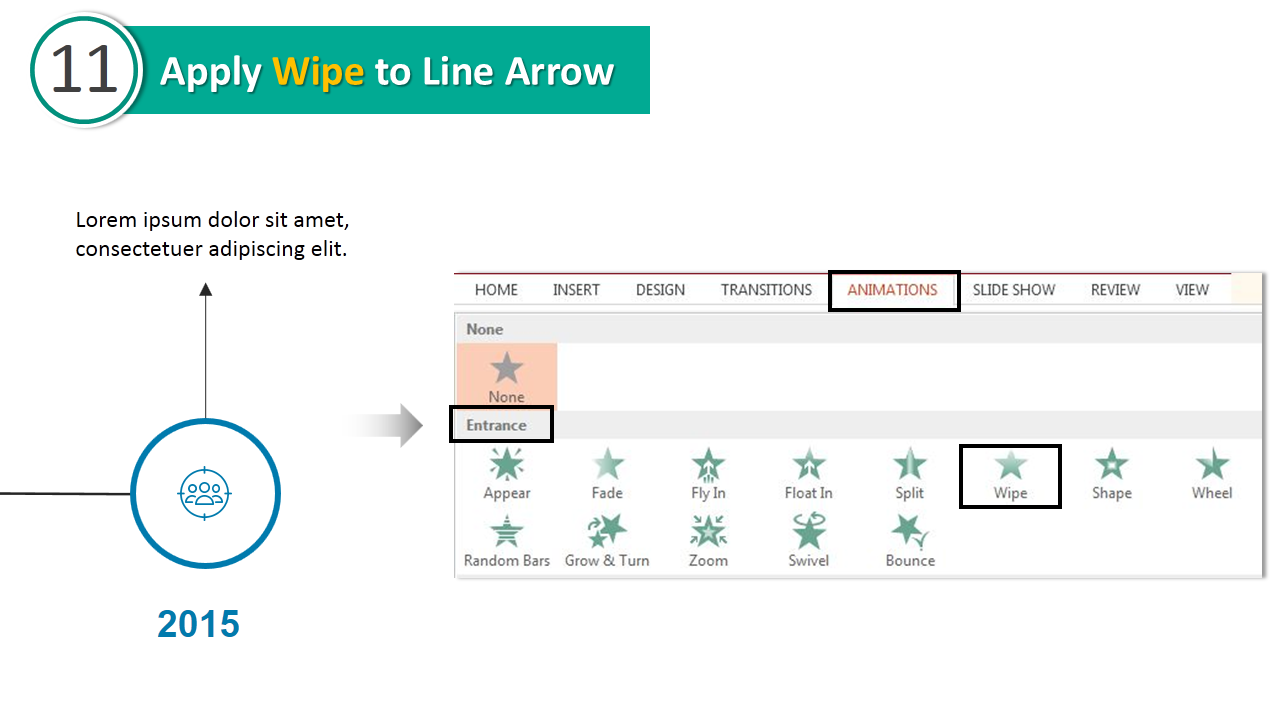
- Now let’s pick Line Arrow. Give it a Wipe
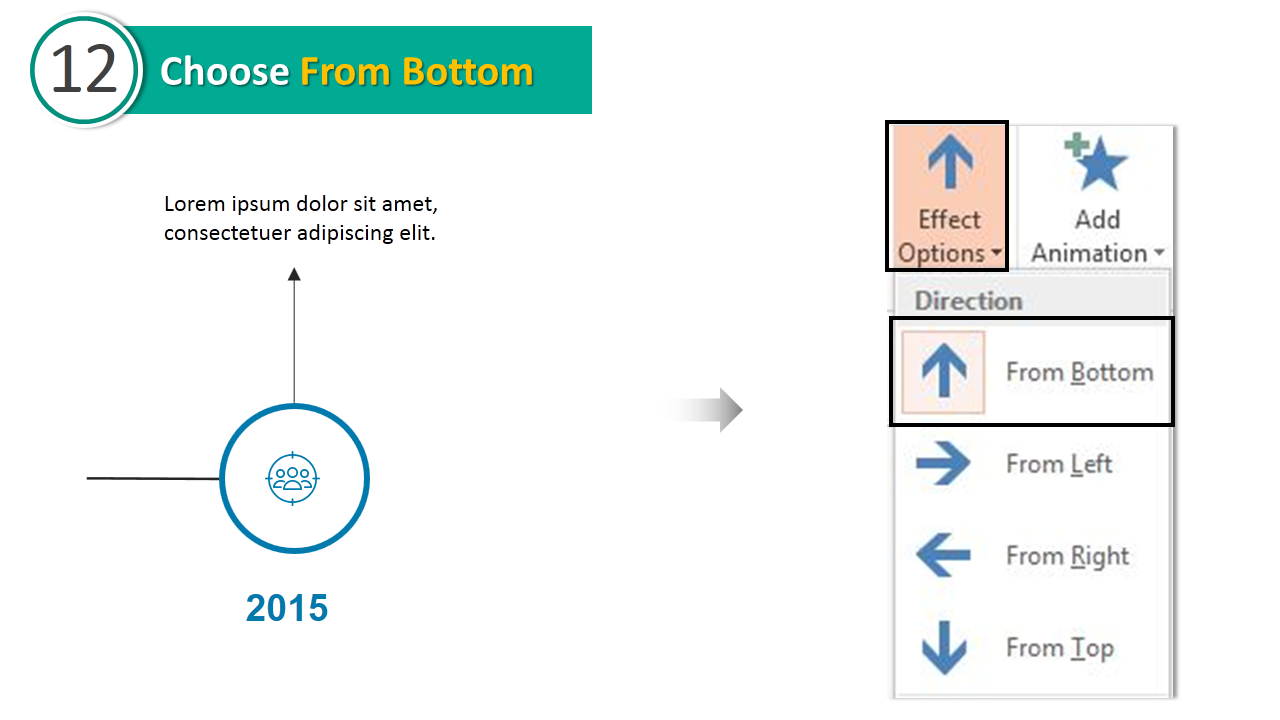
- Choose “From Bottom” under Effect Options.
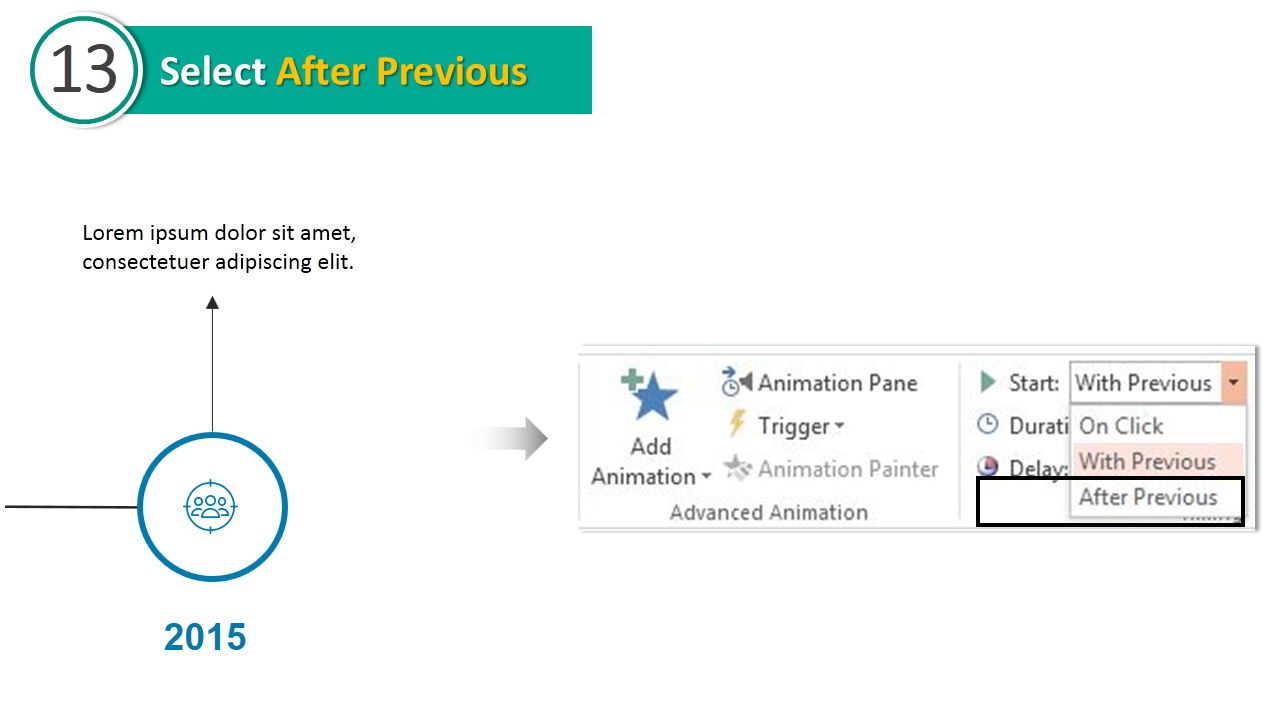
- Select “After Previous” this time.
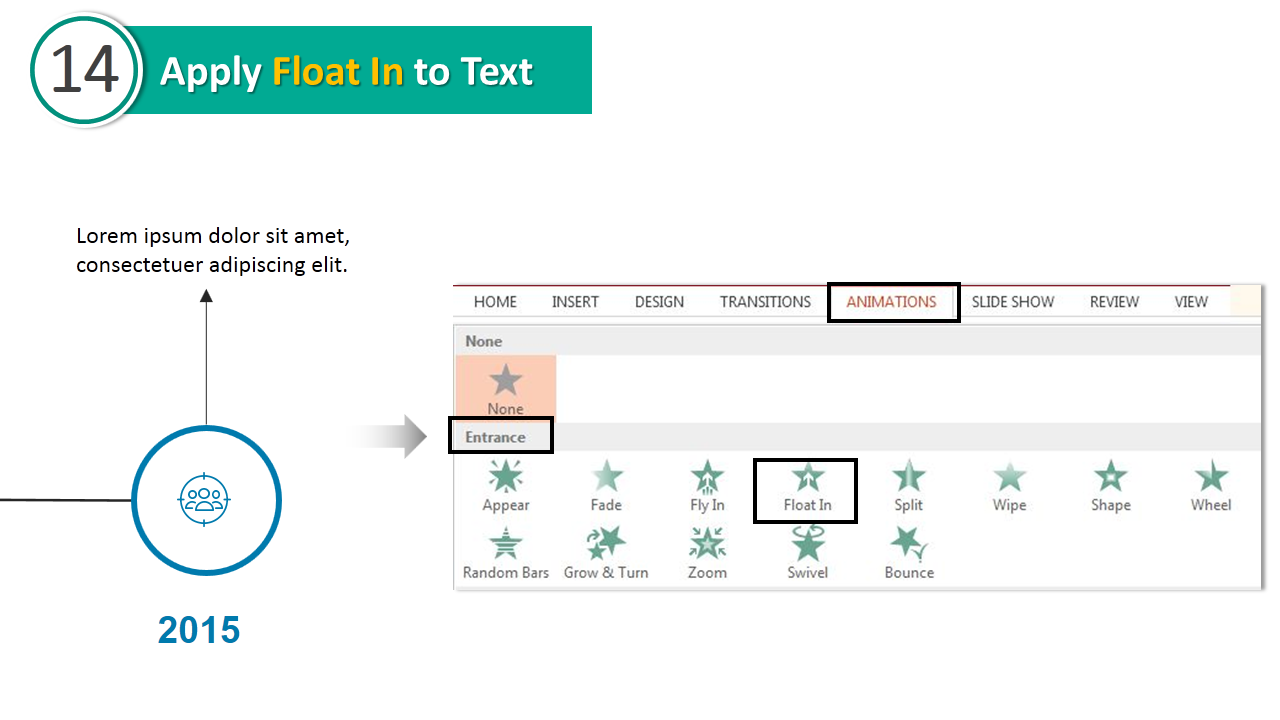
- Apply Float In animation to text boxes.
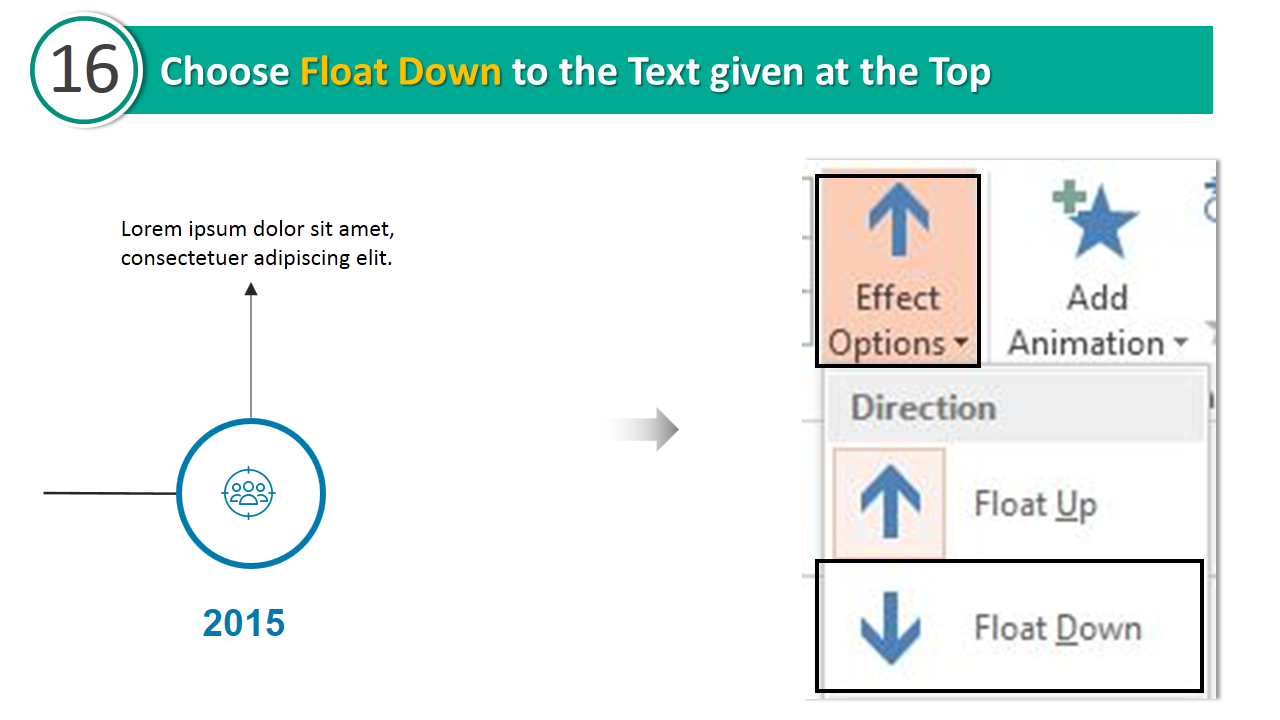
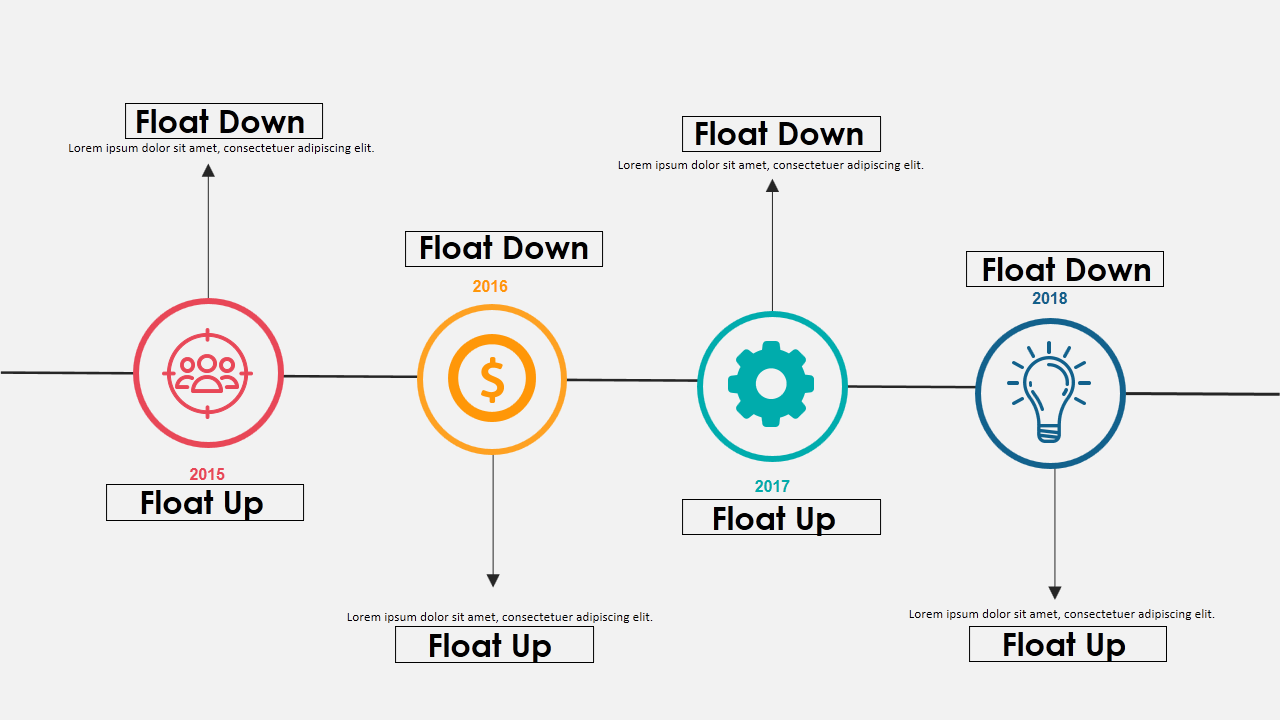
- Choose Float Up option to the year.
- Select Float Down option to the text box at the top.
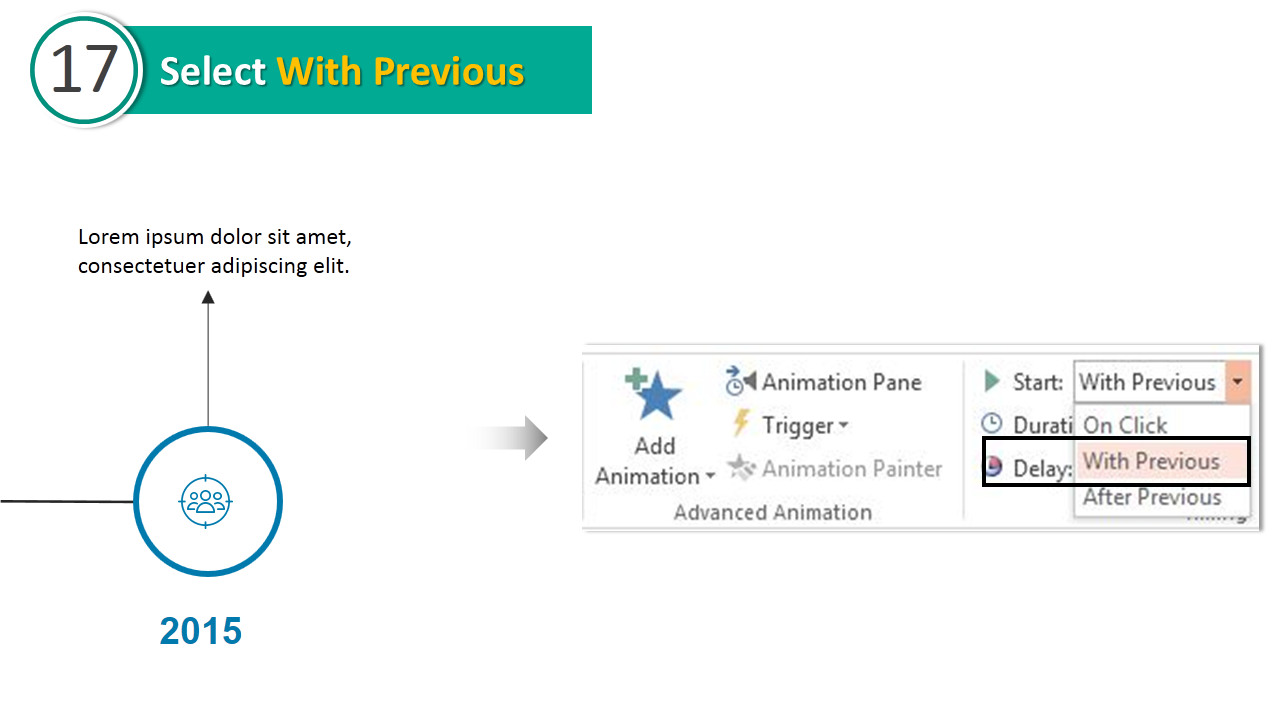
- Select “With Previous” for both the texts.
Your animated timeline is almost ready. We now only need to copy, paste the elements to extend the timeline further.
Stage 3- Duplicating the Timeline
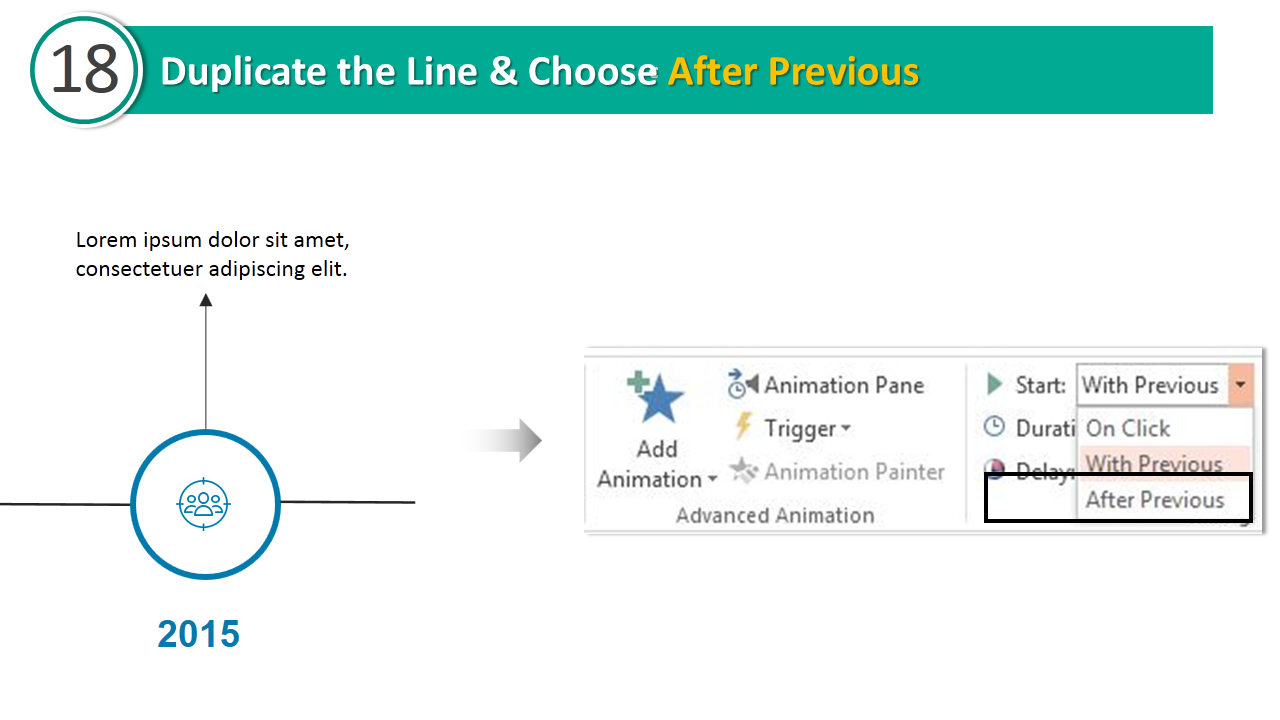
- Now copy the first line and duplicate it by pressing Control C and Control V. Change the option from “With Previous” to “After Previous” under the Start option.
- After duplicating the line, copy the rest of the elements (circle, icon, line arrow, text boxes). The animations will automatically get copied.
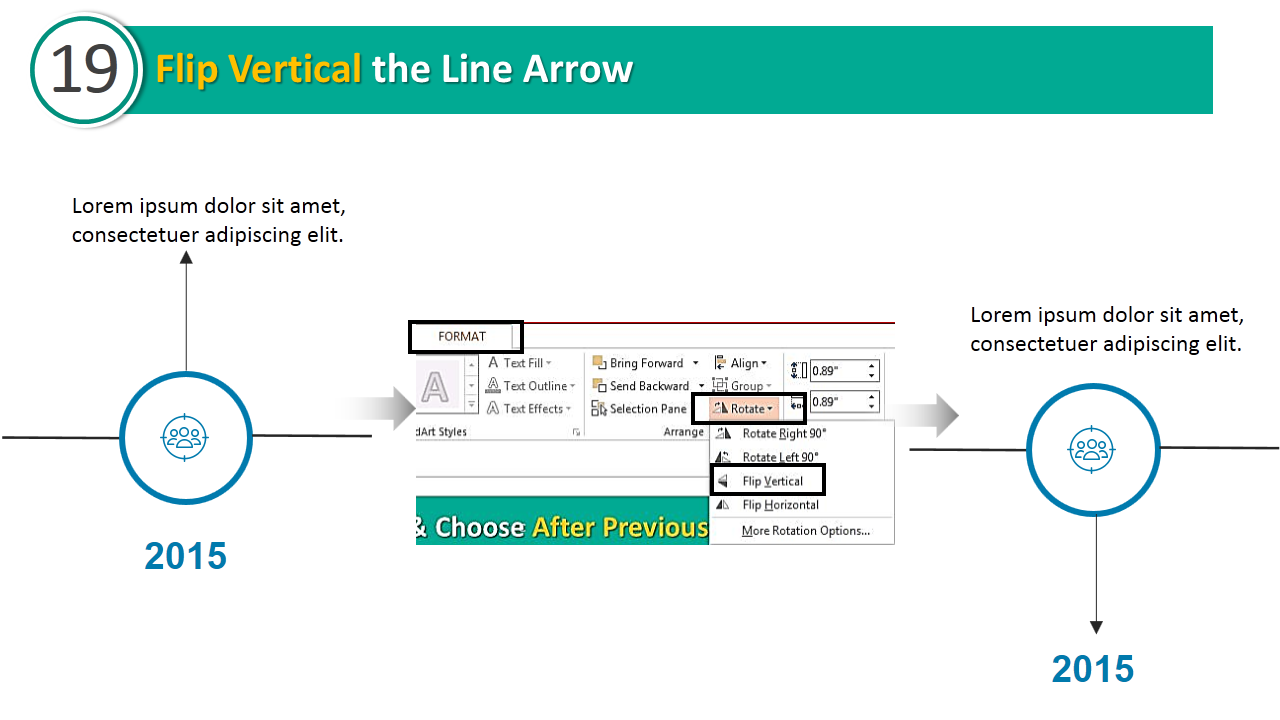
Note 1: When you copy the line arrow, don’t forget to flip it so that every alternative timeline is in opposite direction to the first. That improves the aesthetics of your timeline. This is how you flip the line arrow with click of a button:
Note 2: Also manually arrange the text boxes so that the timelines are arranged in opposite direction.
Note 3: The animations get reversed for the text boxes. For text box present at the top earlier comes at the bottom; apply Float Up this time. Text box present at below earlier comes at the top; apply Float Down to that.
Save your presentation and preview it. Within minutes, you are able to create an animated timeline. Go ahead and give it a try for your next presentation.
Good luck.


![Learn To Create Animated Timeline in PowerPoint in Minutes [Animation Tutorial]](https://www.slideteam.net/wp/wp-content/uploads/2018/04/Learn-To-Create-Animated-Timeline-in-PowerPoint1-1001x436.png)

 Customer Reviews

