


 Customer Reviews
In the right hands, PowerPoint is a creative powerhouse. In the wrong hands...well, better left unsaid.
What makes PowerPoint such a powerhouse is its user-friendliness that allows amateur designers (like me) to create decent and sometimes extraordinary designs that seem as good as those designed by a professional using Photoshop, CorelDraw or other advanced software.
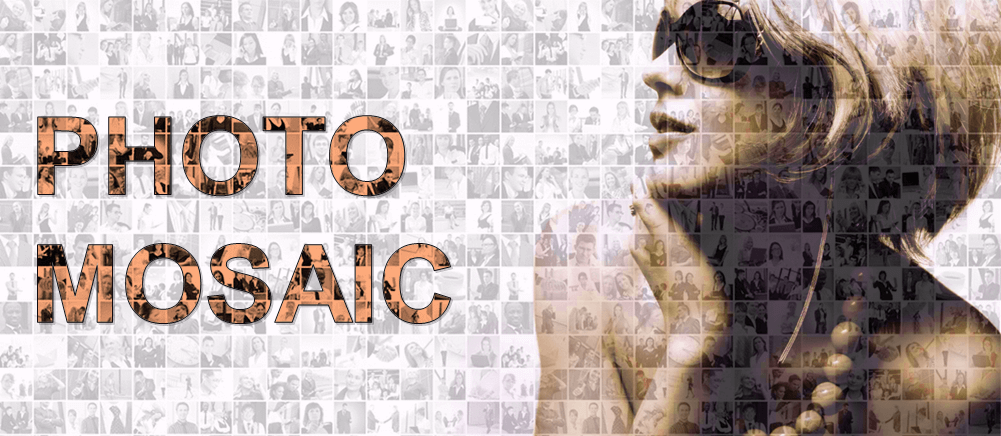
One such extraordinary design trick that PowerPoint lets you accomplish is the Photo Mosaic. Tens or hundreds of tiny pictures blend together into one big picture to create a wow effect. From far, you can see one big image forming out of tiny shapes. As you zoom in, those tiny shapes give way to small pictures that speak a thousand words in themselves.
P.S. You’ll find online websites and apps that do this for you and charge a small fee for downloading the mosaic in higher resolution. PowerPoint lets you do everything for free. Besides, nothing beats the satisfaction of creating a professional mosaic on your own from scratch!
What you will learn to create in this tutorial:

Download this Editable Photo Mosaic Template
Step by Step Process for Creating Photo Mosaic in PowerPoint:
First of all, let’s be clear about the utility of a photo mosaic. It’s THE BEST cover slide you can have for your presentation. A photo mosaic captures audience interest like nothing else. They will marvel at your design and expect good value from your presentation.
A photo mosaic is also a great section header slide and will lend design consistency to your deck if you had used the mosaic in the opening slide of your presentation. If you want to create a poster in PowerPoint or commemorate a famous personality, then you will greatly benefit from this tutorial. Enough talk, let’s get started:
Step 1- Insert Pictures
We need a complete set of 15-20 images that will fill up the one big picture. Ideally, the images used in the background should blend with your main image in the foreground. But there is no hard and fast rule. If you want to create a mosaic of Obama or any other famous personality, you can choose random images of people to create the mosaic. Not all images have to do with Obama himself. You want to portray him as a people’s man; so diversity of images will be perfect for your mosaic.
Put all images that you will use in the background in one folder. Then go to the Insert tab in the PowerPoint ribbon and click the Pictures button:

Locate the folder where you have kept all the images. Select all using the Ctrl+A shortcut and click the Insert button:

All pictures will stack upon one another in the blank slide. Looks chaotic? Let’s fix it up by following the next step...
Step 2- Choose Picture Lineup from Picture Layout
Thanks to a genius hack shared by Taylor Croonquist from Nuts and Bolts Speed Training, we learnt a very easy way to arrange all images next to each other and in one dimension. No manual cropping of images. And no spending hours to create a decent collage. With just one click of a button, we will have all images formatted in the same dimension and arranged neatly in a line.
Select all the images on your slide using the Ctrl+A shortcut again, go to the Picture Tools Format tab, open the Picture Layout dropdown menu and select the Picture Lineup option (highlighted in the screenshot below):

Bam! All your photos are neatly arranged in a line and cropped without you having to do anything. We do not need the text boxes below each image and the blue boundary lines (see the screenshot below). So, delete all the text boxes and the lines first. Next, select all the images, right click, click Format Object, select the No Line option in the Line menu. Last, group all the images as one object by pressing the Ctrl+G shortcut. Here’s a visual reference for the steps followed:

Step 3- Paste the Grouped Image as a Picture
Using so many images in your slide will make your presentation very heavy. To avoid slowing down of system, follow this simple trick- Cut the grouped image using Ctrl+X shortcut and paste it using the Ctrl+V shortcut. When you paste the grouped images, you will find a small down arrow next to the Ctrl option. Open the arrow and click the second option (Picture). This will turn all 15-20 images that you had grouped into 1 image! Image size issue solved, yippee!

Step 4- Randomly Place Grouped Picture all over the Slide
Now, we need to fill up the entire slide canvas with our images. So copy the image that we have created just above and randomly place them all over the slide. Do not paste it directly below the first as it would create a symmetrical pattern. All yellow images will appear in a line, all blue in another. We want to create an asymmetrical pattern. Here’s how we did it:

As you can, we have let the images go out of the slide area. That’s ok. No need to manually crop the extra areas. Simply, go to the File tab in the PowerPoint ribbon, click Save As and choose the PNG option from the dropdown menu. See the screenshot below:

PowerPoint will ask you if you want to save “All Slides” or “Just This Slide” as a PNG. Click Just This One.

Step 4.1- Insert the Collage in the Slide
Insert the collage that you just now saved as a PNG on to your slide. If the size is still heavy, compress it using Paint or tinypng. Go to the Insert tab, click the Pictures button and add the collage. It will automatically cover the complete slide area. The background of your picture mosaic is ready!

Step 5- Add Rectangular Shape and Fill it with Main Image
Now is the time to add our big image. The image has to be striking since this is the first image that the audience will see. For a superior photo mosaic, prefer taking a close up shot. We won’t be adding the main image directly on to the slide. First, insert a rectangular shape on the slide. Go to the Insert tab, open the Shapes menu and choose the Rectangle. Draw it over the complete slide area thus covering the background collage completely. Right click on the rectangle> Outline > No Outline.

We will now fill this rectangle with our image. The reason behind this step is to give us the flexibility to alter the transparency of the image which is not possible otherwise. Right click on the rectangle and click Format Shape. A Format Shape window will open on the right side of the screen. Select the Picture or texture fill radio button (see the screenshot below). Locate the file on your system and insert it.
Step 5.1- Give Transparency to the Main Image
Last but not the least, give transparency of 30-40% to the main image so that the collage in the background is also visible.

That’s it. Our photo mosaic is ready! Your close up image seems created out of hundred tiny pictures! To make the mosaic look more polished, you may or may not follow these optional steps:
Optional Step 1: Increase Brightness or Contrast of Front Image
If you want to increase the visibility of the main image or tone it down a little, you can easily adjust its brightness and contrast depending upon your requirements. Right click on the main image and click Format Pictures. Under Shape Options> Picture, open the Presets menu to pick a desired effect or manually adjust the brightness and contrast (see the screenshot below). You can also change the Picture Color from this window.

Optional Step 2: Give Artistic Effects to the Mosaic
To make your photo mosaic more rough and thus more authentic, you can add artistic effects to the main image. PowerPoint offers a range of such effects- Film Grain, Texturizer and even Mosaic Bubbles. We will try the Texturizer effect as it is subtle and gives our mosaic the perfect old, handmade look. Select the front image, go to the Picture Tools Format tab, open the Artistic Effects menu and choose the Texturizer option (see the screenshot below):

So, this is how your final mosaic looks:
Breathtaking, isn’t it? If you want to replace the above image with your own, simply download the above template and create your picture perfect photo mosaic!
Professional Photo Mosaic Templates across Categories
Our Presentation Design Services team has created some really cool photo mosaic templates for multiple industries and to give you ideas. All these templates are fully editable. How? Simply select the front, big image, right click, click Format Picture. Click the File button to replace our image with yours and you’re good to go! Here are some handpicked mosaics for you:
Self Introduction Photo Mosaic

Download this Editable Photo Mosaic
Education Reading Books Photo Mosaic

Download this Education Photo Mosaic Slide
Leadership Photo Mosaic

Download this Creative Leadership Mosaic Template
Globe Photo Mosaic

Download this World Picture Mosaic Slide
Environment Conservation Photo Mosaic

Download Saving Tree Picture Mosaic
Employee Photo Mosaic

Download this Person Photo Mosaic Template
American Flag Photo Mosaic

Download this Fourth of July Picture Mosaic
Real Estate Photo Mosaic

Christmas Photo Mosaic

Download this Santa Claus Picture Mosaic
Entertainment Photo Mosaic

Vision Photo Mosaic

Download this Vision Future Photo Mosaic
How did you like the mosaic effect? Share your feedback in the comments below. And if you liked the post and want to share it with your followers, here's a pre-populated tweet to get you started:


