Balanced Scorecard is a performance and financial measurement concept developed by Robert Kaplan and David Norton. It is a strategic approach to align business activities and performances with company’s vision and strategy. They enhance both internal and external communications. Balance Scorecard generates the metrics that collect the data and measure it. Moreover, it monitors the enterprise performance against strategic goals.
The four major perspectives of the business framework are: Learning and growth perspective, Business process perspective, Customer perspective and Financial perspective.
The other benefits of using Balanced Scorecard are:
- It ensures everything is in the right proportion in the sales process.
- Using performance management balanced scorecard you eradicate errors. You also gain confidence that your assessments will be accurate to the core.
- Balanced Scorecard endeavors to excel at communication
- It enables comprehensive coverage. Give a detailed account of every aspect to your management team.
When it comes to showcase the drawbacks of prior performance measurements in presentation, corporates usually end up using the SmartArt metrics that are easily available in PowerPoint. But, the tendency for most people is to fall back on the same old design: 4 rectangular boxes filled with a lot of clutter resulting in (not surprisingly) a dull presentation.
We must understand that a compelling presentation needs equally enthralling designs in it. Learn to create riveting Balanced Scorecard in a shorter span of time and get your act going to impress the audience.
What You’ll Learn to Create in this Tutorial:
Steps to Create Balanced Scorecard Template
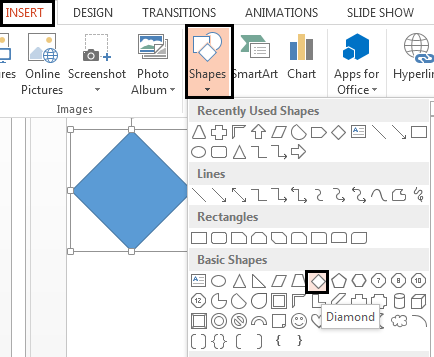
Step 1- Insert Diamond Shape
To create the diamond shape, go to the Insert Tab > Shapes > select the Diamond shape. Press SHIFT + CTRL while dragging to get even distribution.
Step 2- Place four Pentagon Shapes around the Diamond
Follow these steps to place the pentagon:
- Click the Insert Tab > Shapes >Pentagon shape.
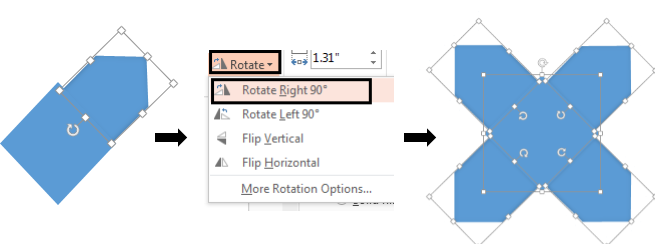
- Place the base of this pentagon on one side of the diamond shape (see the screenshot).
- Rotate it to 90o Right and follow the clockwise direction for other three sides too. For this, first select the shape > Format Tab > Rotate option > Rotate Right 90o (see the screenshot).
Step 3- Create one more diamond shape
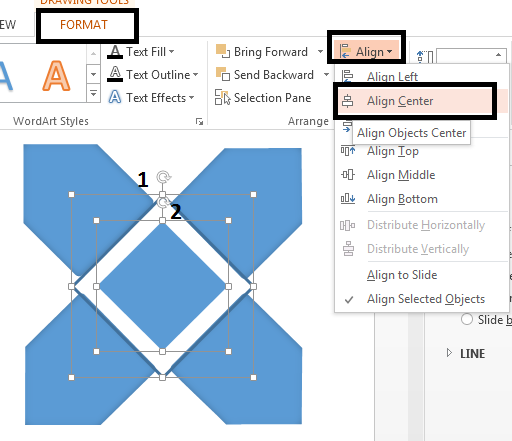
- Place one more diamond in the center of the shape created; its size being smaller than the previous one. Fill the previous (the larger) diamond shape with white color. To fill the color, first right click on the shape > Format Shape > Fill > Solid Fill > White.
- Align both diamond shapes to center. First select the larger diamond in back, press Shift and select the smaller diamond in front too. Go to the Format Tab again > Align > Align Center (see the screenshot).
Now you can delete the white diamond shape. This was done so that all the four pentagons are evenly distributed around the smaller diamond shape in center.
Step 4- Give 2D look to Pentagon shapes
Enhance your pentagon shape for a more aesthetic look. Let’s learn to give it a 2-D look.
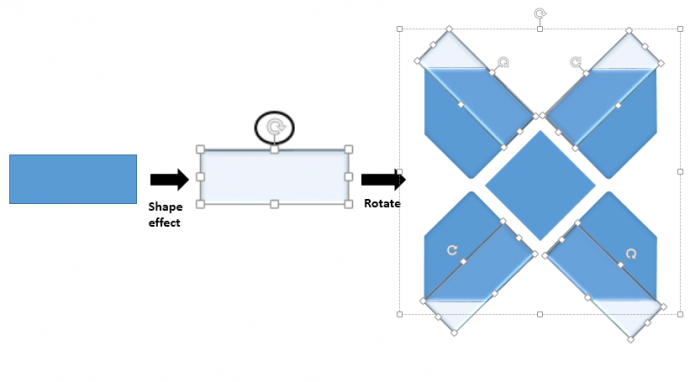
- Click the Insert Tab > Shapes > Rectangle.
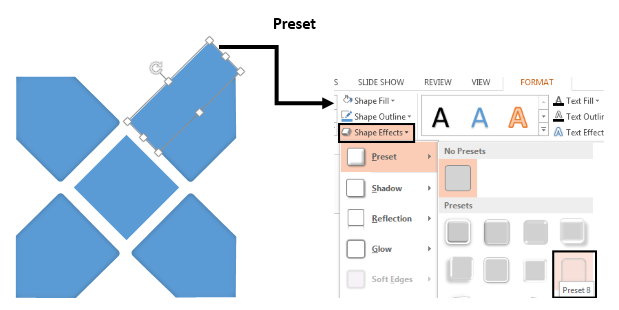
- Rotate it using the rotating handle and place it over the one half of the pentagon (see the below given image for assistance).
- Note: Give the rectangular shape more transparency in order to get precise details. Go to Format tab > Shape effects > Preset 8 as shown below.
- Copy this rectangle and place it over the half of other pentagons too. You can use rotating handle or Rotate 90o Right option in the Format tab> Rotate menu.
Step 5- Color the Shapes
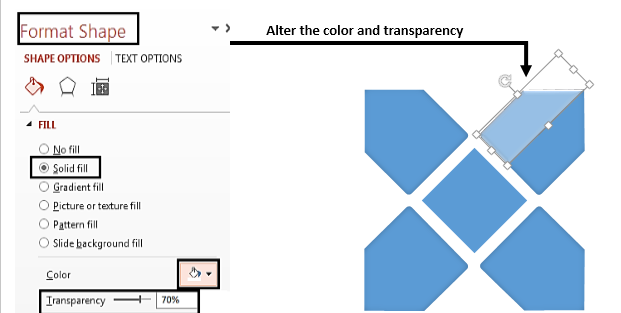
- Rectangle: Press Shift key and select all rectangles. Go to Format Shape > Solid Fill > White > Transparency 70%.
- Pentagon: You can give a different color to each of the pentagon shapes. Right click on the pentagon, select Format Shape > Fill > Solid Fill > now you can select color of your choice or use the eyedropper tool to get the ones we used. Select No Line
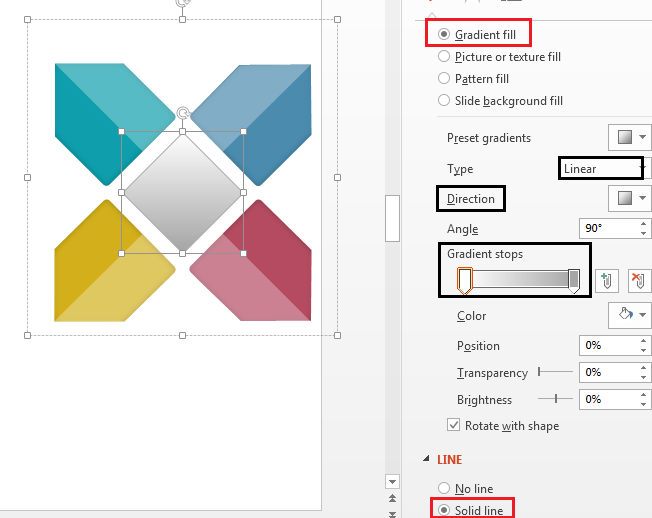
- Diamond: Give your Diamond shape a gradient fill. Click Gradient Fill in the Format Shape menu > Type- Linear > Direction – Linear Down > Fill Gradient Stop 1- White and Stop 2- Also Fill Solid Line with Grey color (see the screen shot shown below).
Step 6- Create a Square Frame
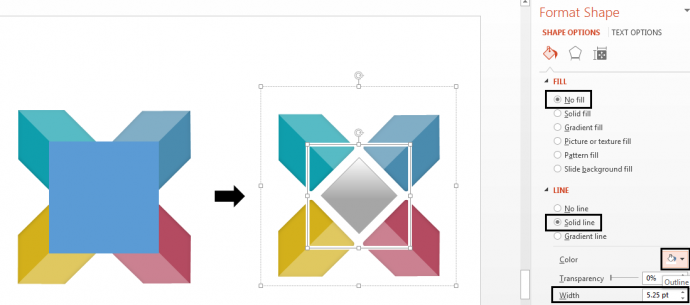
- Select a Square box from the Shapes menu in the Insert Tab.
- Place it in the center of the shape.
- Go to Format Shape > Select No Fill > Line > Solid Line > Fill White Color > Width – 5.25 pt. (screenshot below)
The last step is to group all the shapes together. Select all and press CTRL+G to do so. That's it!
If your presentation deadline is near and you do not have the time to go through all these steps, then download this ready-made design by clicking the link below:
Download Editable Balanced Scorecard Design Now
For placing Icons, browse through our website or click here and select as per the need of your template. Bang on! Your Balanced Scorecard PowerPoint template is ready to rock your presentation.
Professionally Designed Balanced Scorecard Template Designs
Professional Template Design #1
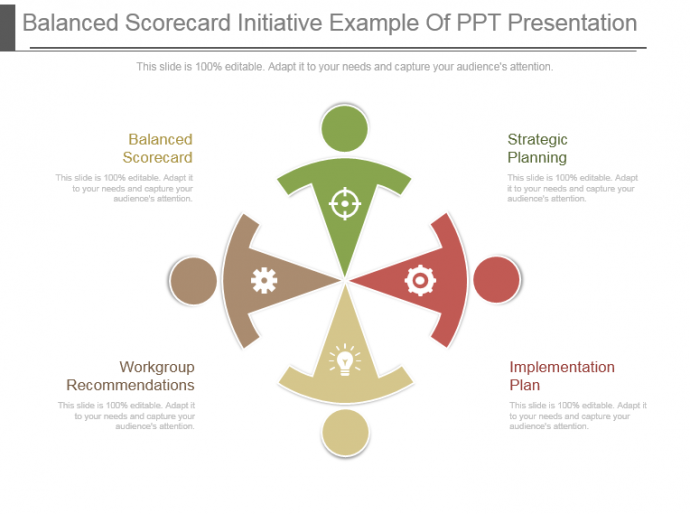
Click here and download this awesome balanced scorecard PPT template.
Professional Template Design #2
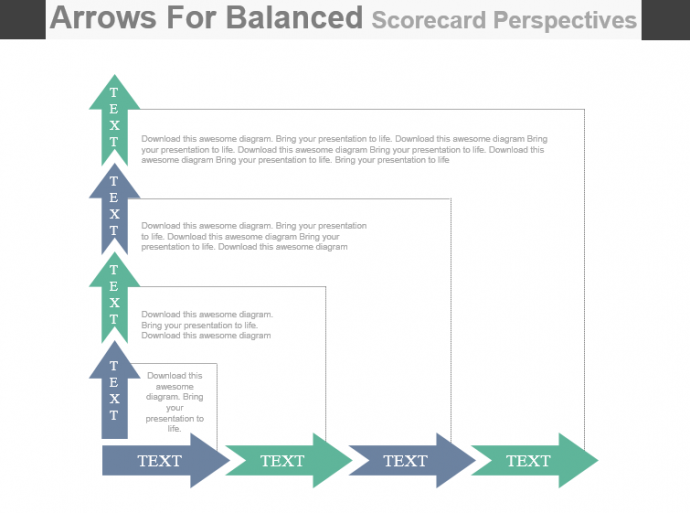
Download this stunning balanced scorecard presentation slide.
Professional Template Design #3
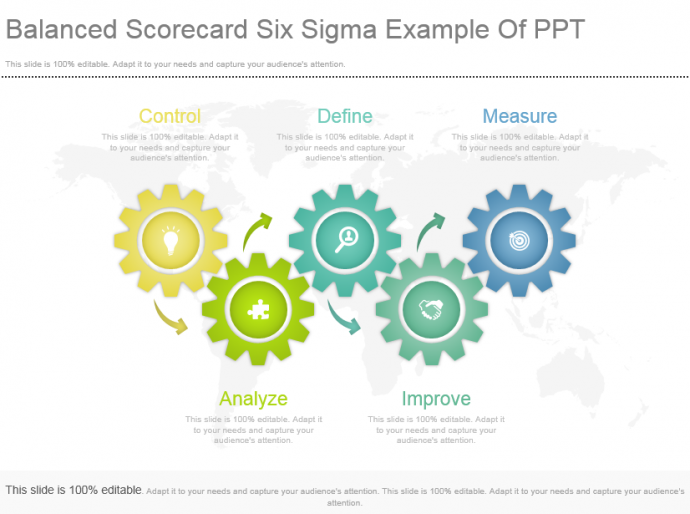
Click here to download this professional PowerPoint presentation slide.
Professional Template Design #4
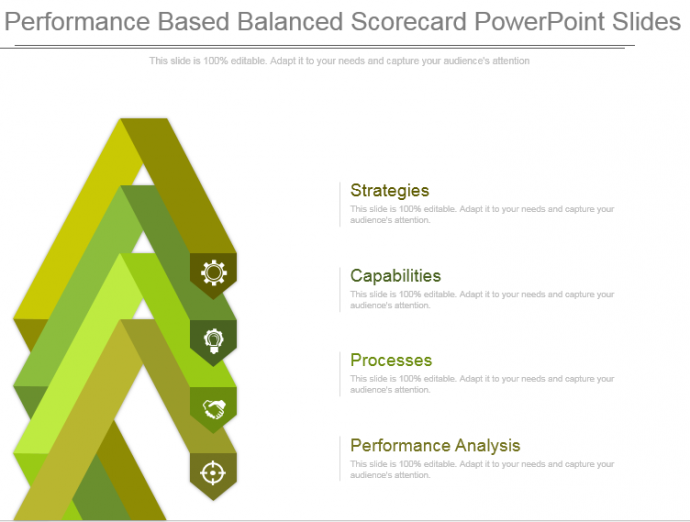
Visit here to download this balanced scorecard PPT slide template.
Professional Template Design #5
Download this professional balanced scorecard PowerPoint slide design.
Professional Template Design #6
Click here and download this stupendous PPT template.
Professional Template Design #7
Grab this creative balanced scorecard PPT presentation template.
Professional Template Design #8
Visit here to download this professional presentation template.
Hope this PowerPoint tutorial helps you fire up your presentation. Do share your feedback with us 🙂



 Customer Reviews


