Thinking to kick start your next presentation? We know the best way out which is why we are here to help you.
The answer is Animation. Yes.
But why choose animation? Because it is interesting, informative and inspiring.
Apply animation and impart the information you have with a twist and style.
Today we will show you how to apply animation to a Speedometer.
Take a look at the video first:
Let’s begin.
Insert Speedometer with needle. You can find ample of amazing speedometer designs on our site. Just browse through and pick the one you like. Or you can learn to create speedometer in PowerPoint too. Yes, it is that easy.
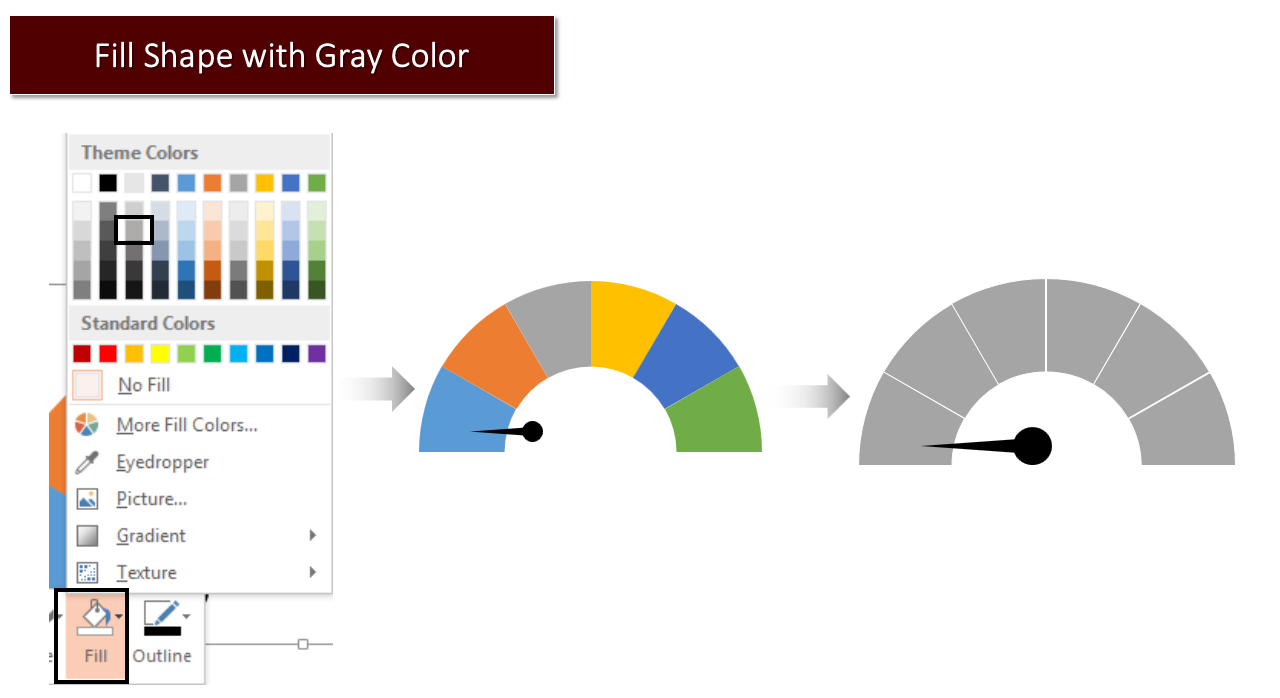
Right click the shape> Fill> Gray Color.
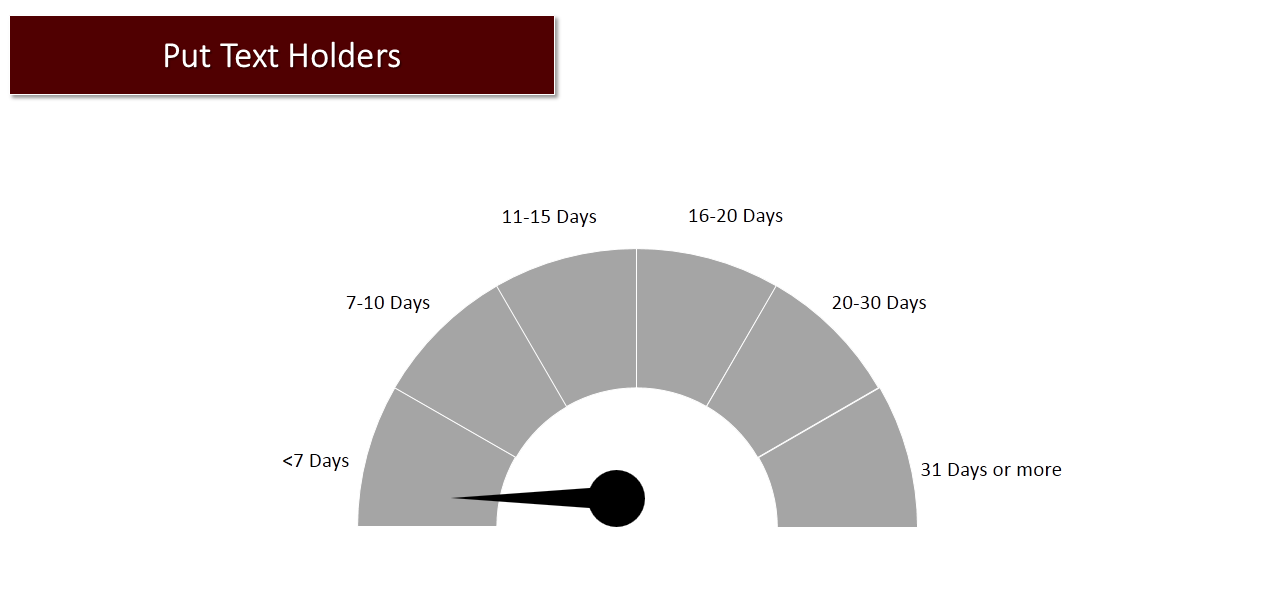
Put text holders around it.
Steps to apply animation to the animated speedometer:
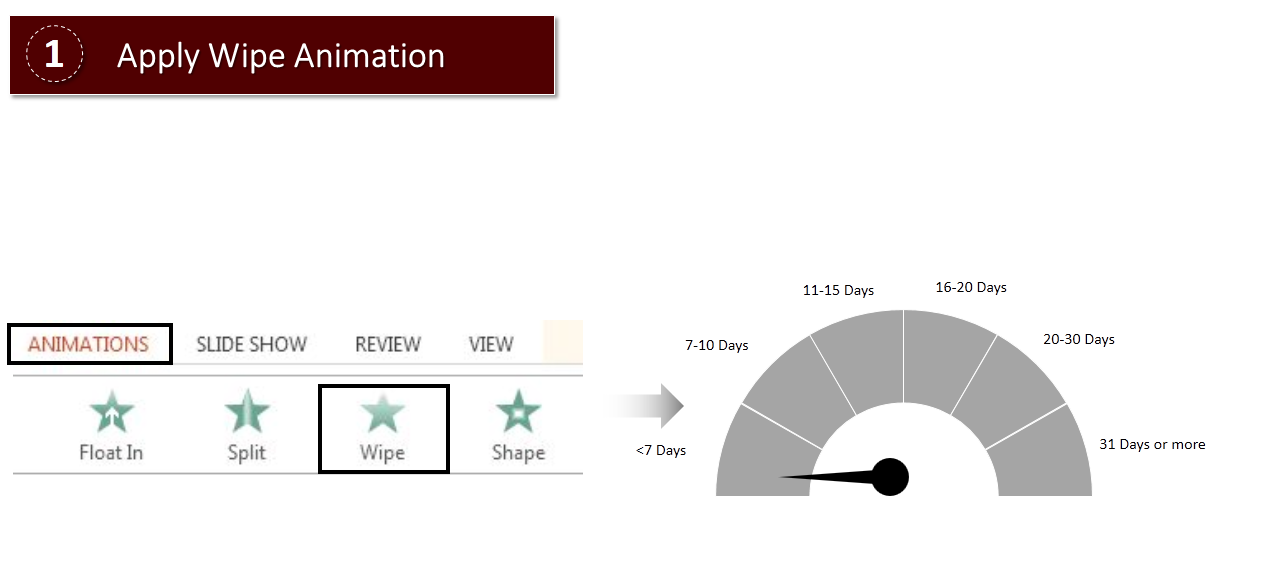
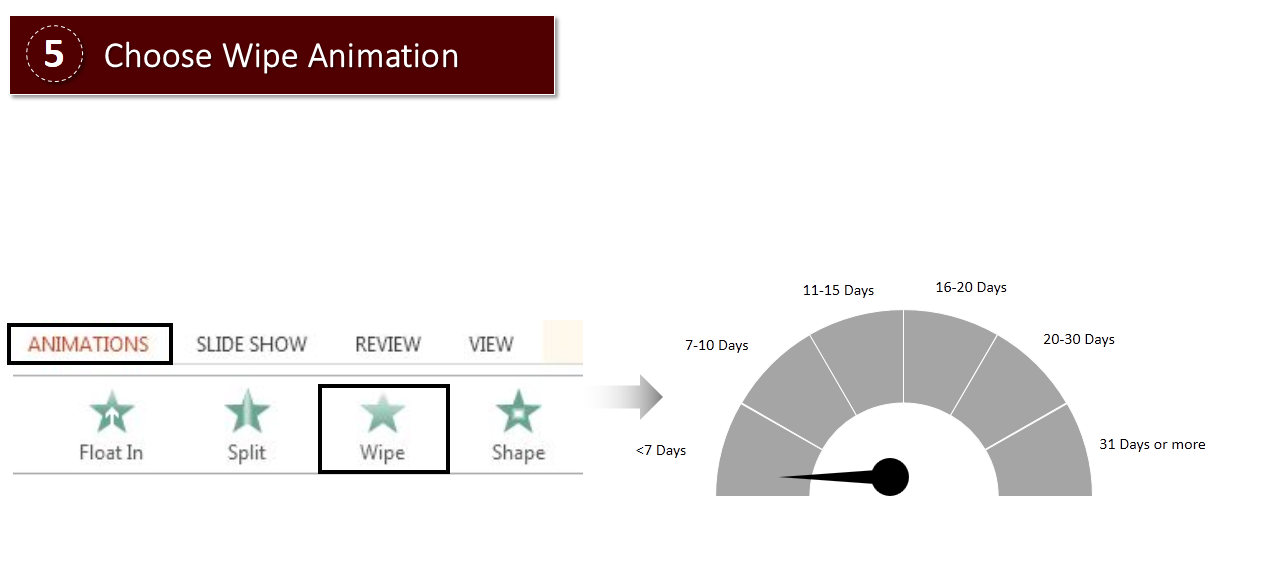
- Apply Wipe animation to the shapes of the speedometer (except needle and text holders). Select each shape and give wipe animation to it.
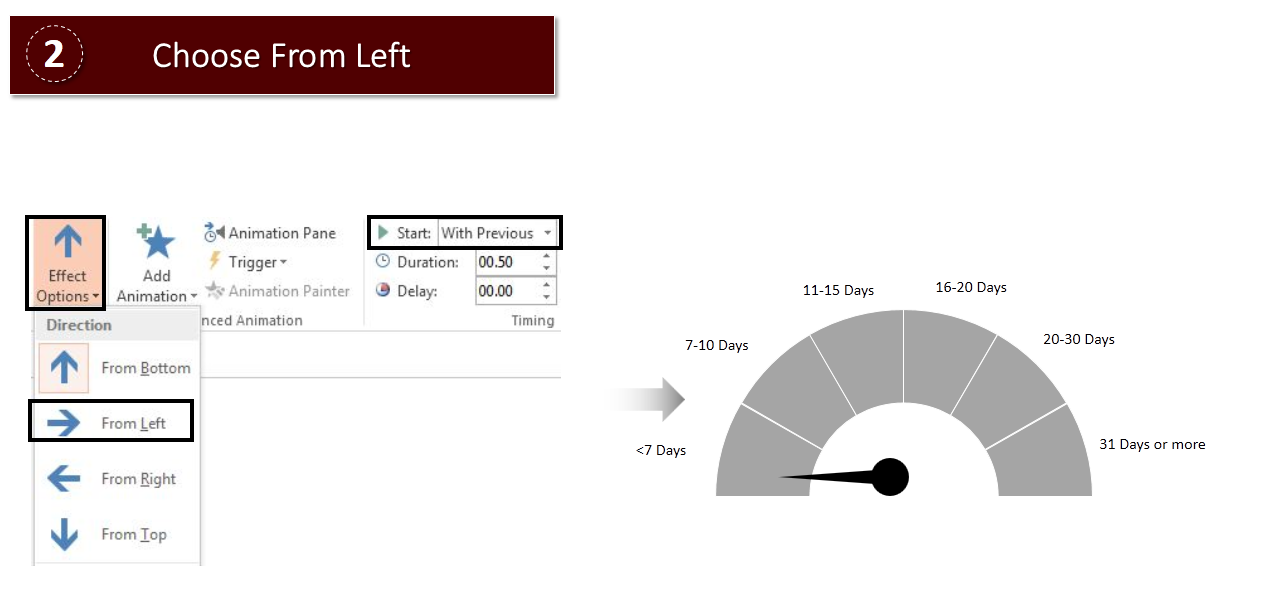
- Select From Left> With Previous. Set Duration for 0.5 seconds.
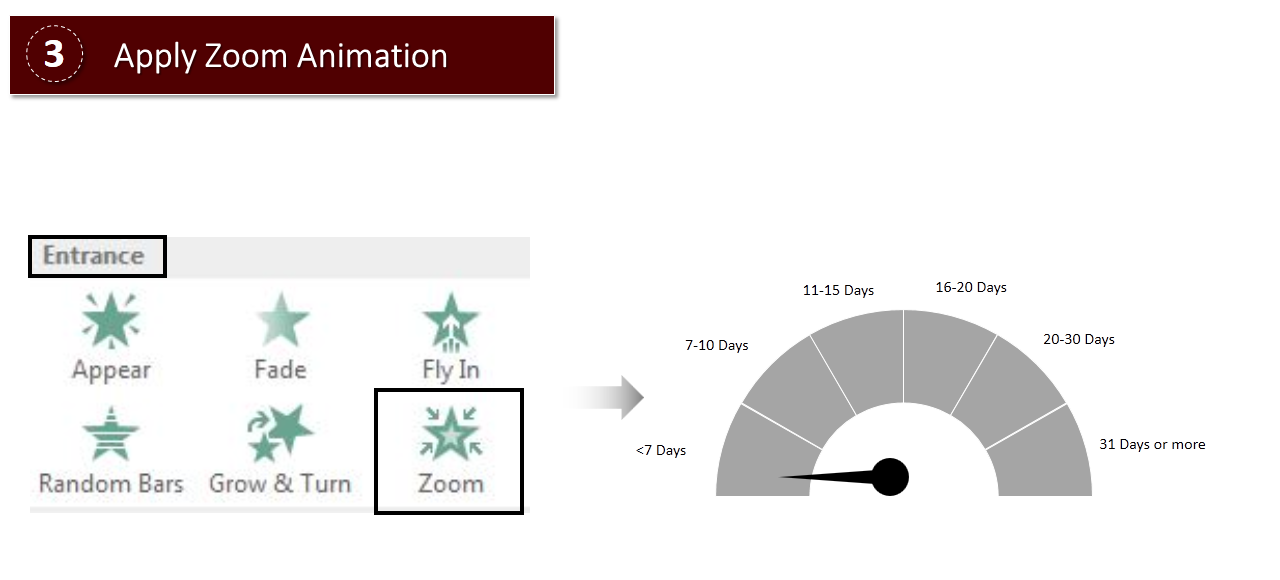
- Select Text> Choose Zoom.
- Select Object Center> With Previous. Set Duration for 2 seconds and Delay for 1 second.
- Select Needle> Wipe animation.
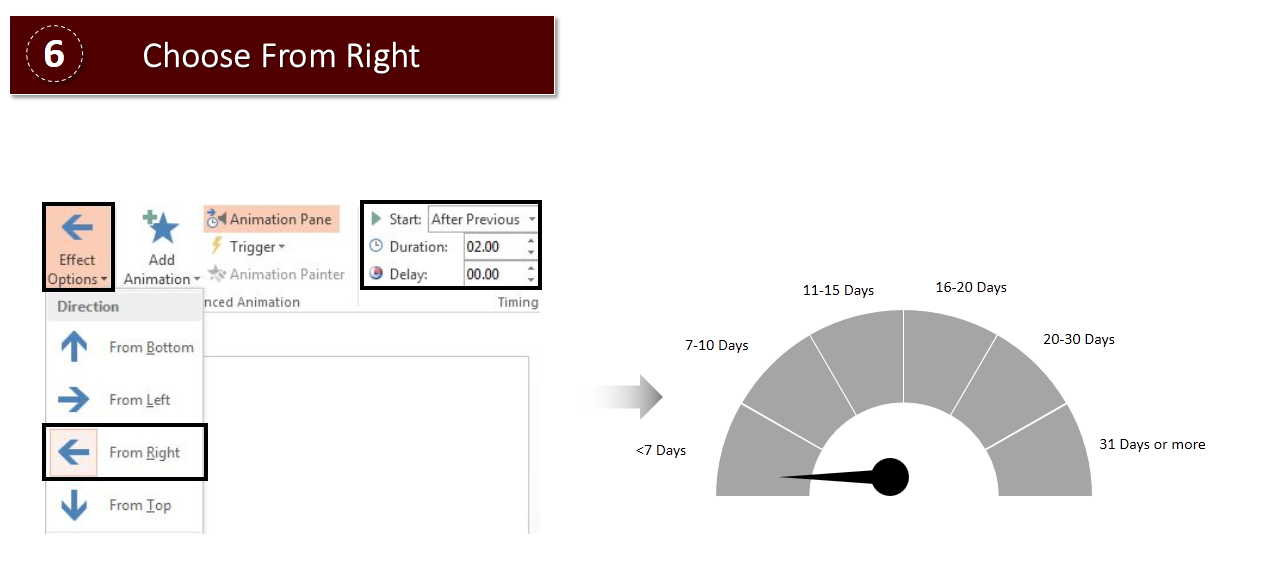
- Select From Right> After Previous. Set Duration for 2 seconds.
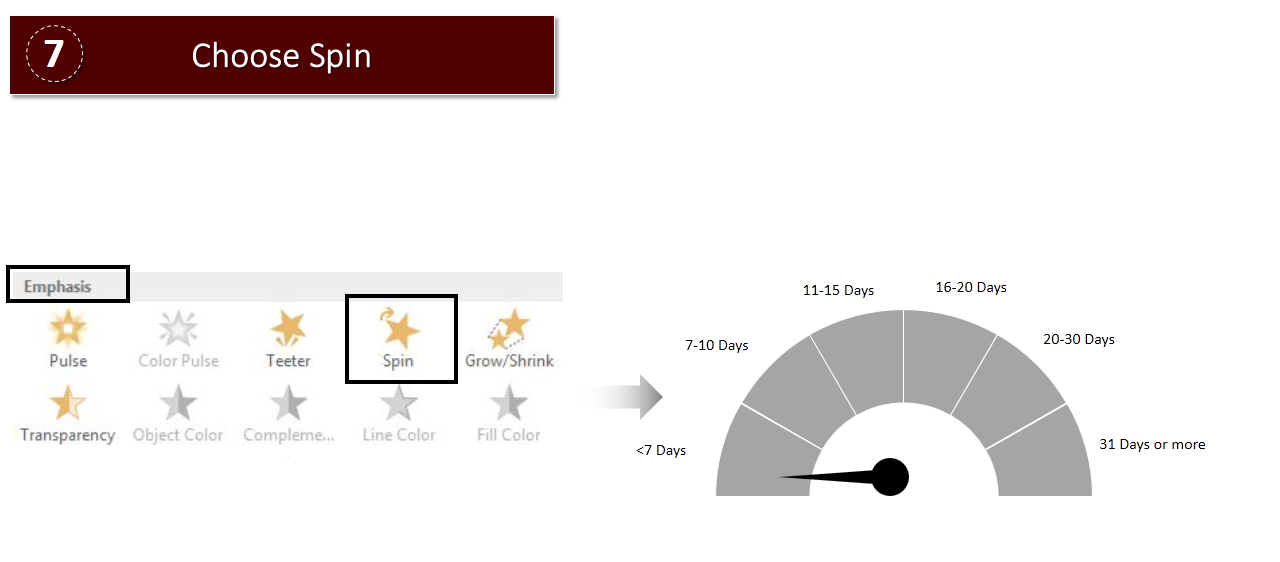
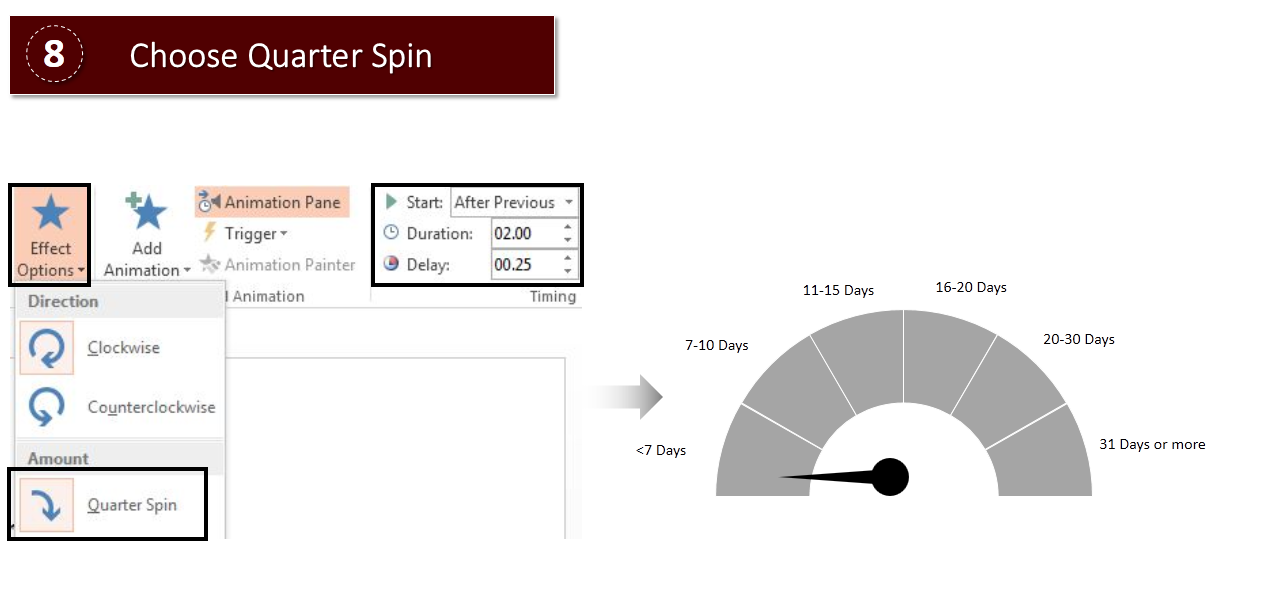
- Choose Needle> Add Animation >Spin animation.
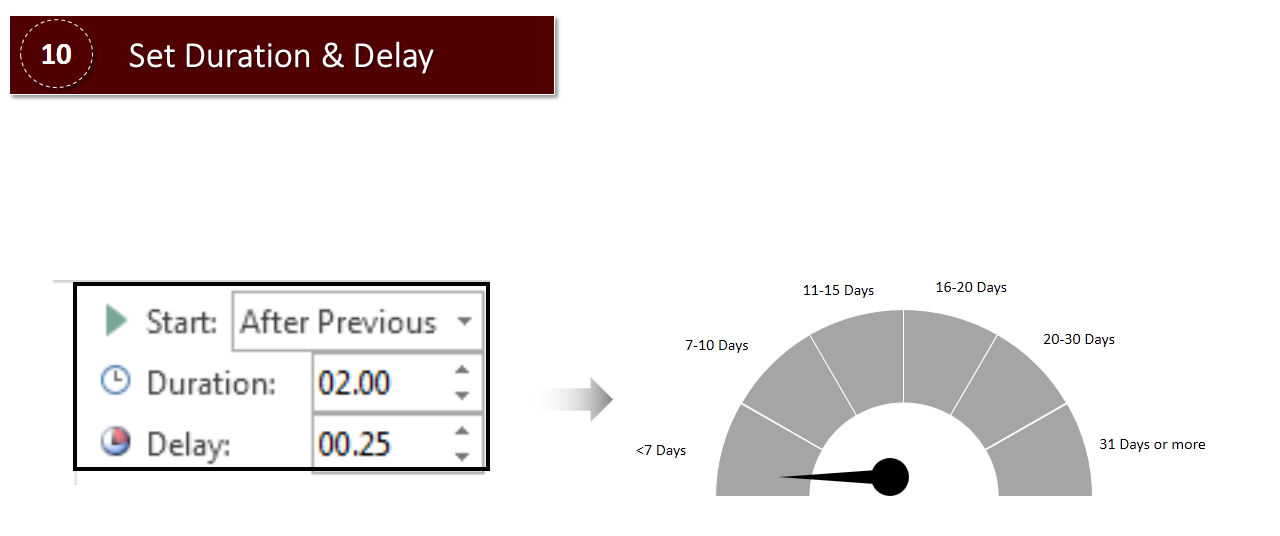
- Choose Quarter spin> After Previous. Set Duration for 2 seconds and Delay for .25 seconds.
- Choose Needle> Add Animation> Teeter.
- Start> After Previous> Duration> 2 seconds> Delay> .25 seconds.
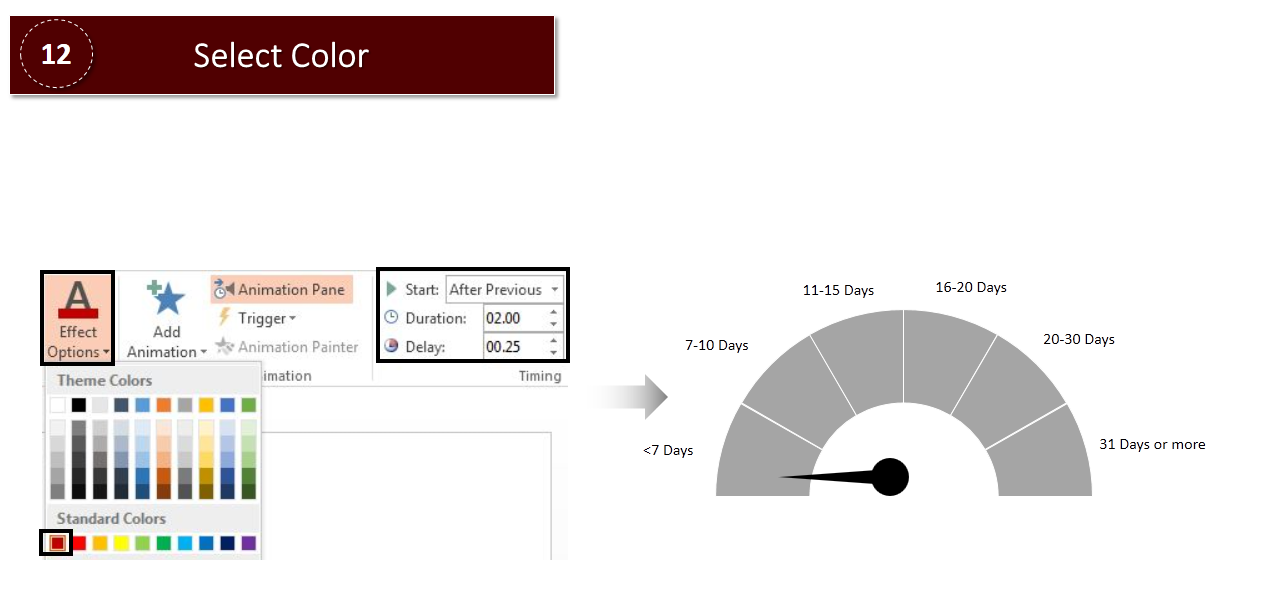
- Select the shape on which you have placed your needle> Add Animation> Emphasis> Fill Color.
That’s all.
We are sharing a video on this tutorial also so that you don’t have go back and forth to see the steps and juggle with them.
Try following the steps one by one. We are sure you will be able to nail it.
Good luck.


![Learn To Create Animated Speedometer in PowerPoint [Animation Tutorial #4]](https://www.slideteam.net/wp/wp-content/uploads/2018/04/Learn-To-Create-Animated-Speedometer-in-PowerPoint-1001x436.png)

 Customer Reviews

